
Modify Document is only available for document residing in an Archive. Documents in Inboxes first must be Indexed.
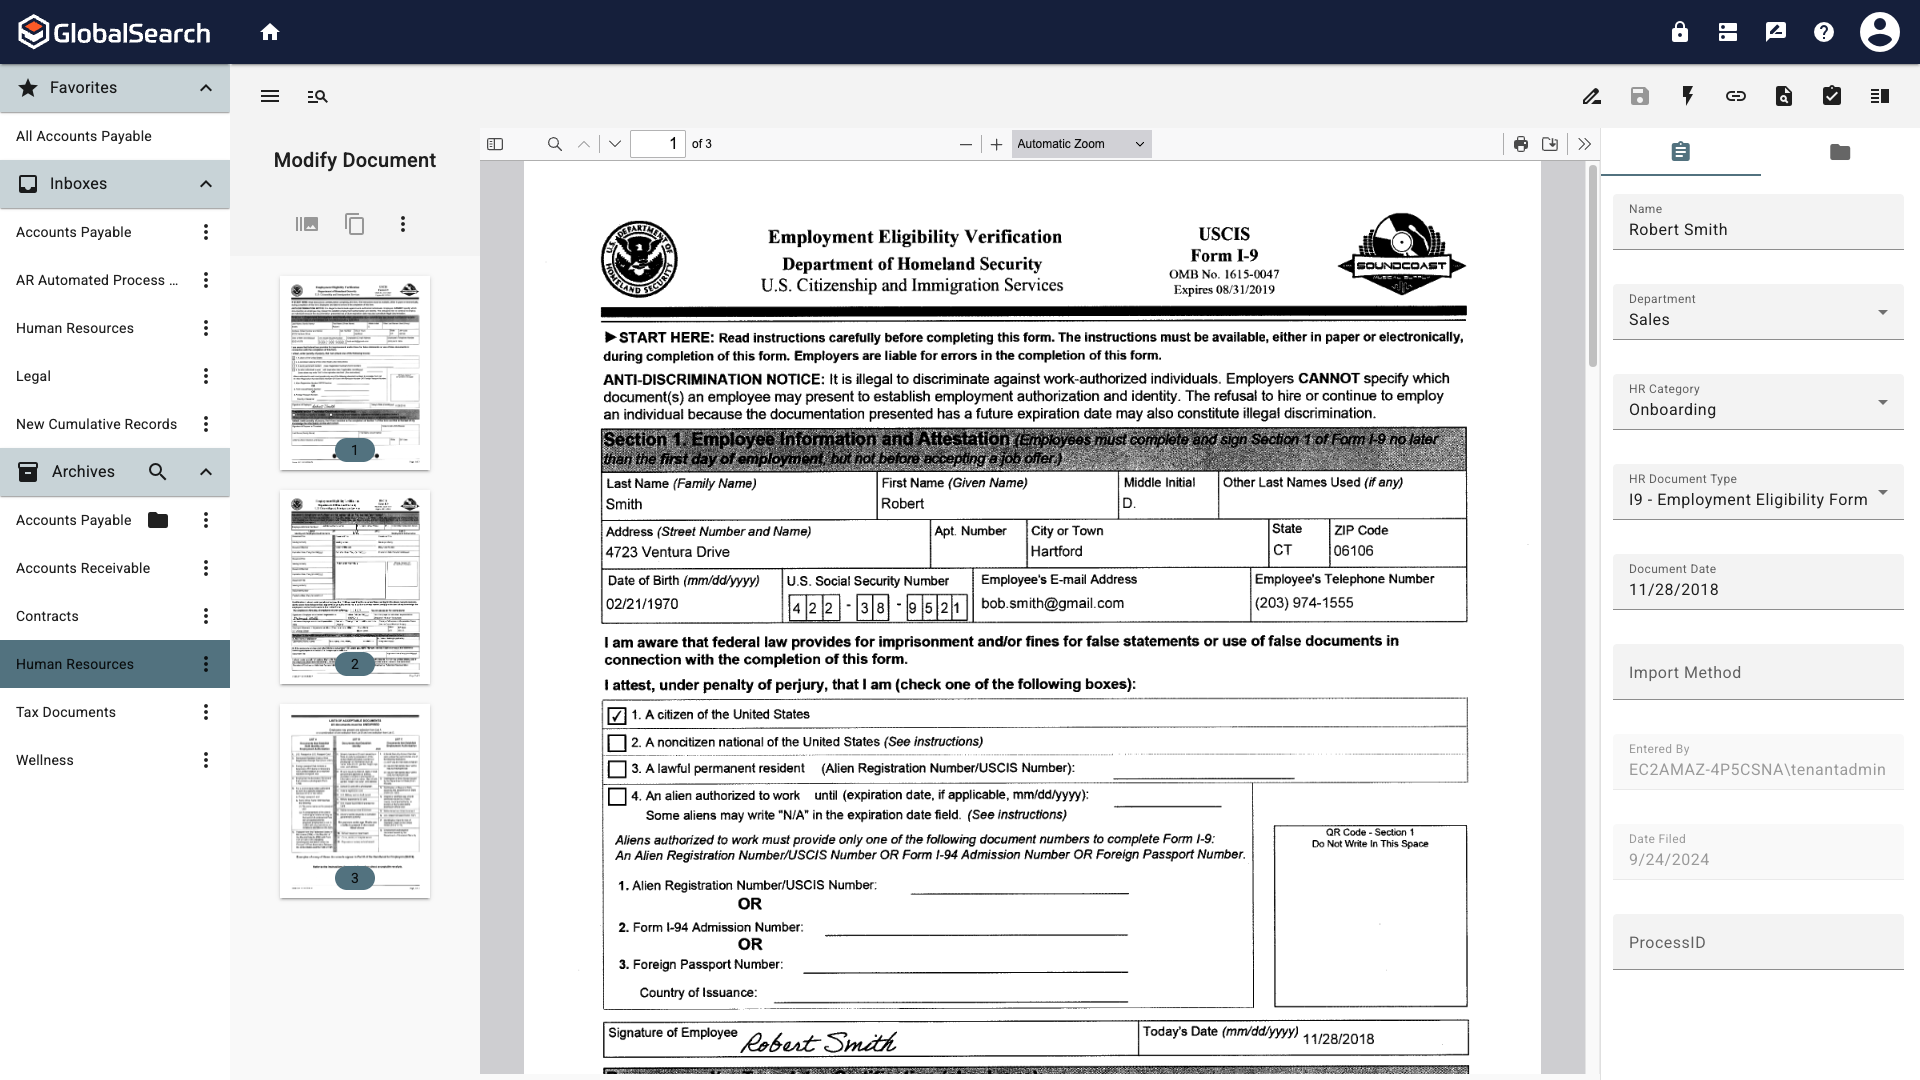
When Modify Document is selected from the Actions menu, images of document pages are displayed in the Modify Document panel, located to the left-hand side of the Document Viewer. This is particularly useful for navigation, if there are multiple pages to a document or when editing the pages of a document.
Document Actions
Please note that Document Actions create a permanent change to the record however you must click Save to retain them. If an error is made while using document actions, simply do not save the changes to retain the original document. When navigating away from the document, you will be prompted to Discard Changes.
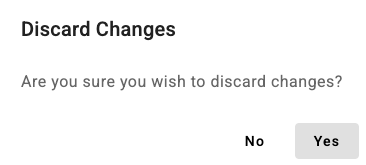
Select Yes to navigate away without saving changes or No to return to the current page with actions in place.
When using document versioning, changes are made to the current version. Changes can be undone by reverting to previous versions as needed, given appropriate permissions. Versioning is an Administrative setup decision and can only be enabled when creating Archives.
Modify Document Actions
Accessing the Modify Documents Pane
To access the Modify Documents pane:
-
Open a document into the Document Viewer.
-
From the Document Viewer Toolbar, select the Actions (

-
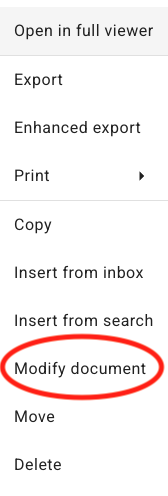
From the Action Menu, select Modify Documents.
Burst and Clone
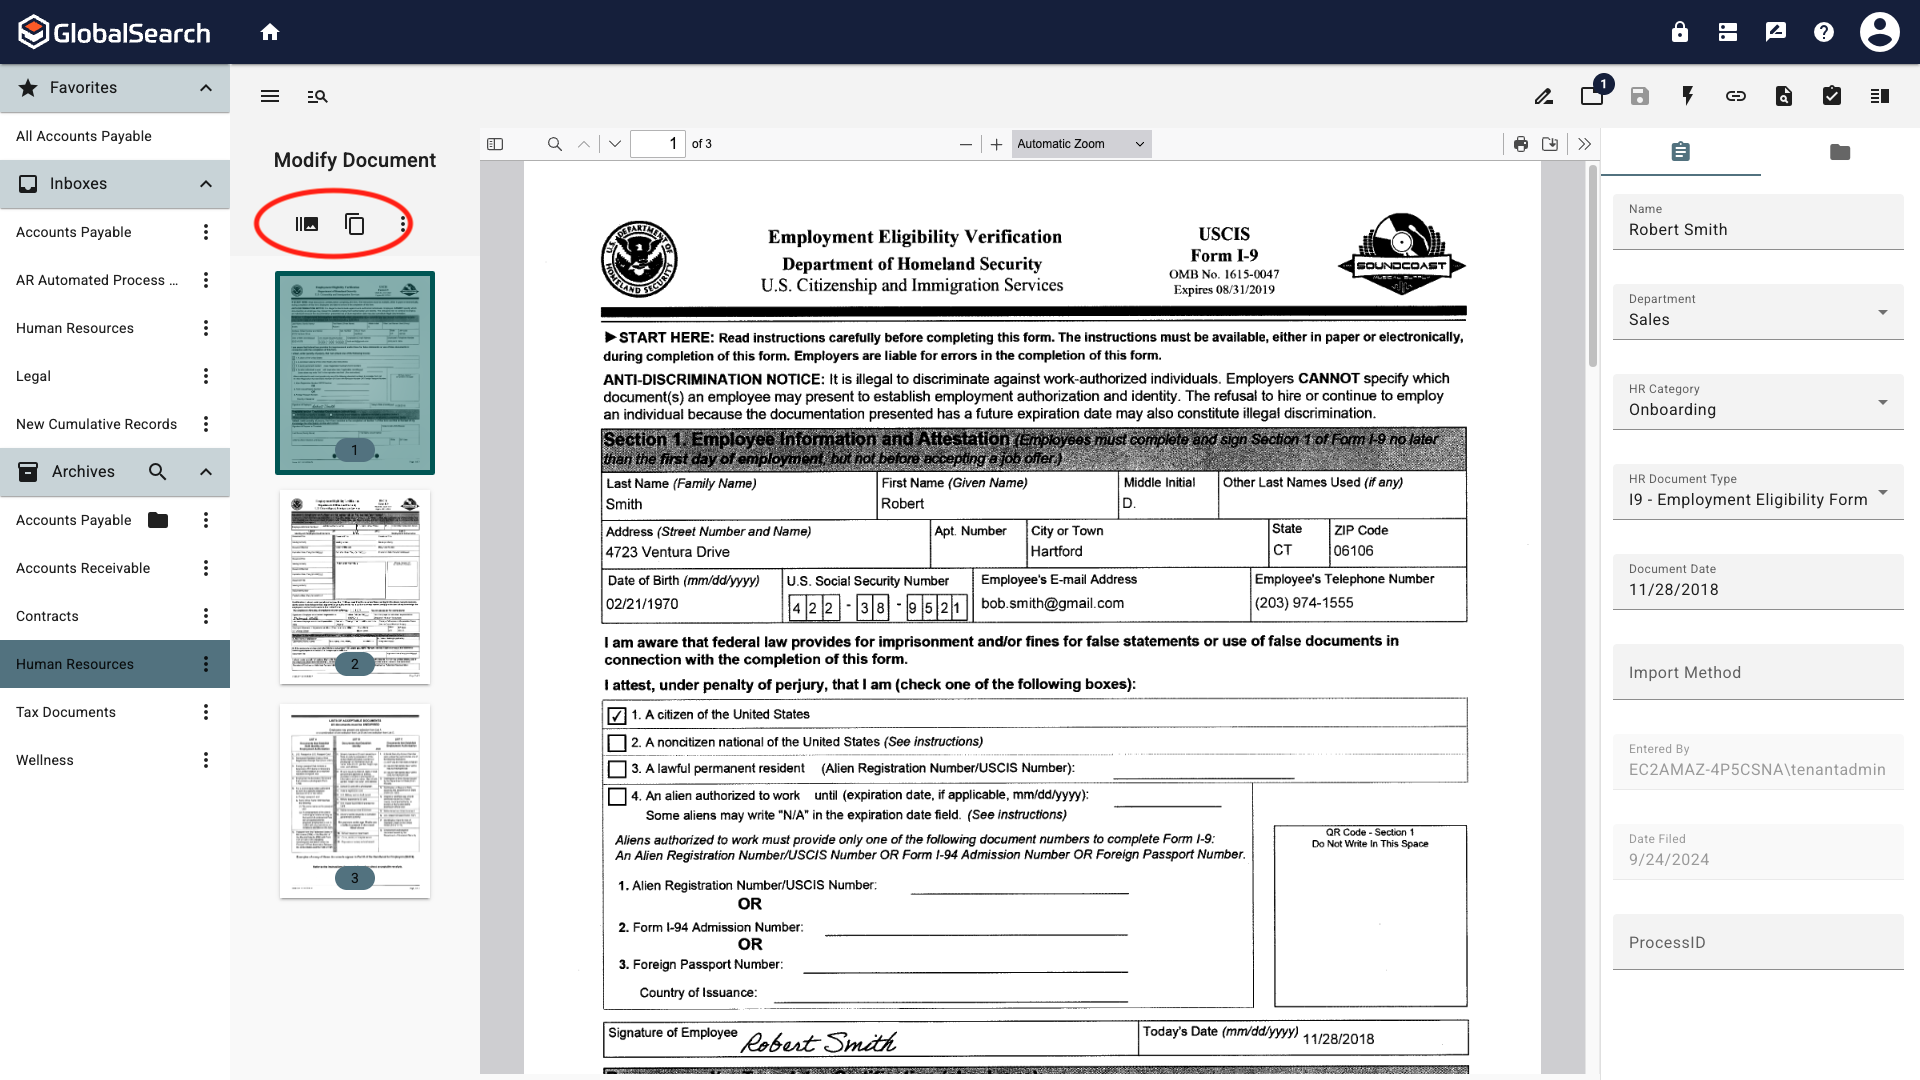
You can quickly and easily create copies of a page or pages of your document using Burst ( 

-
Burst (
-
Clone (
Possible Document Loss
When Bursting documents, the burst page(s) will be removed from the original document.
-
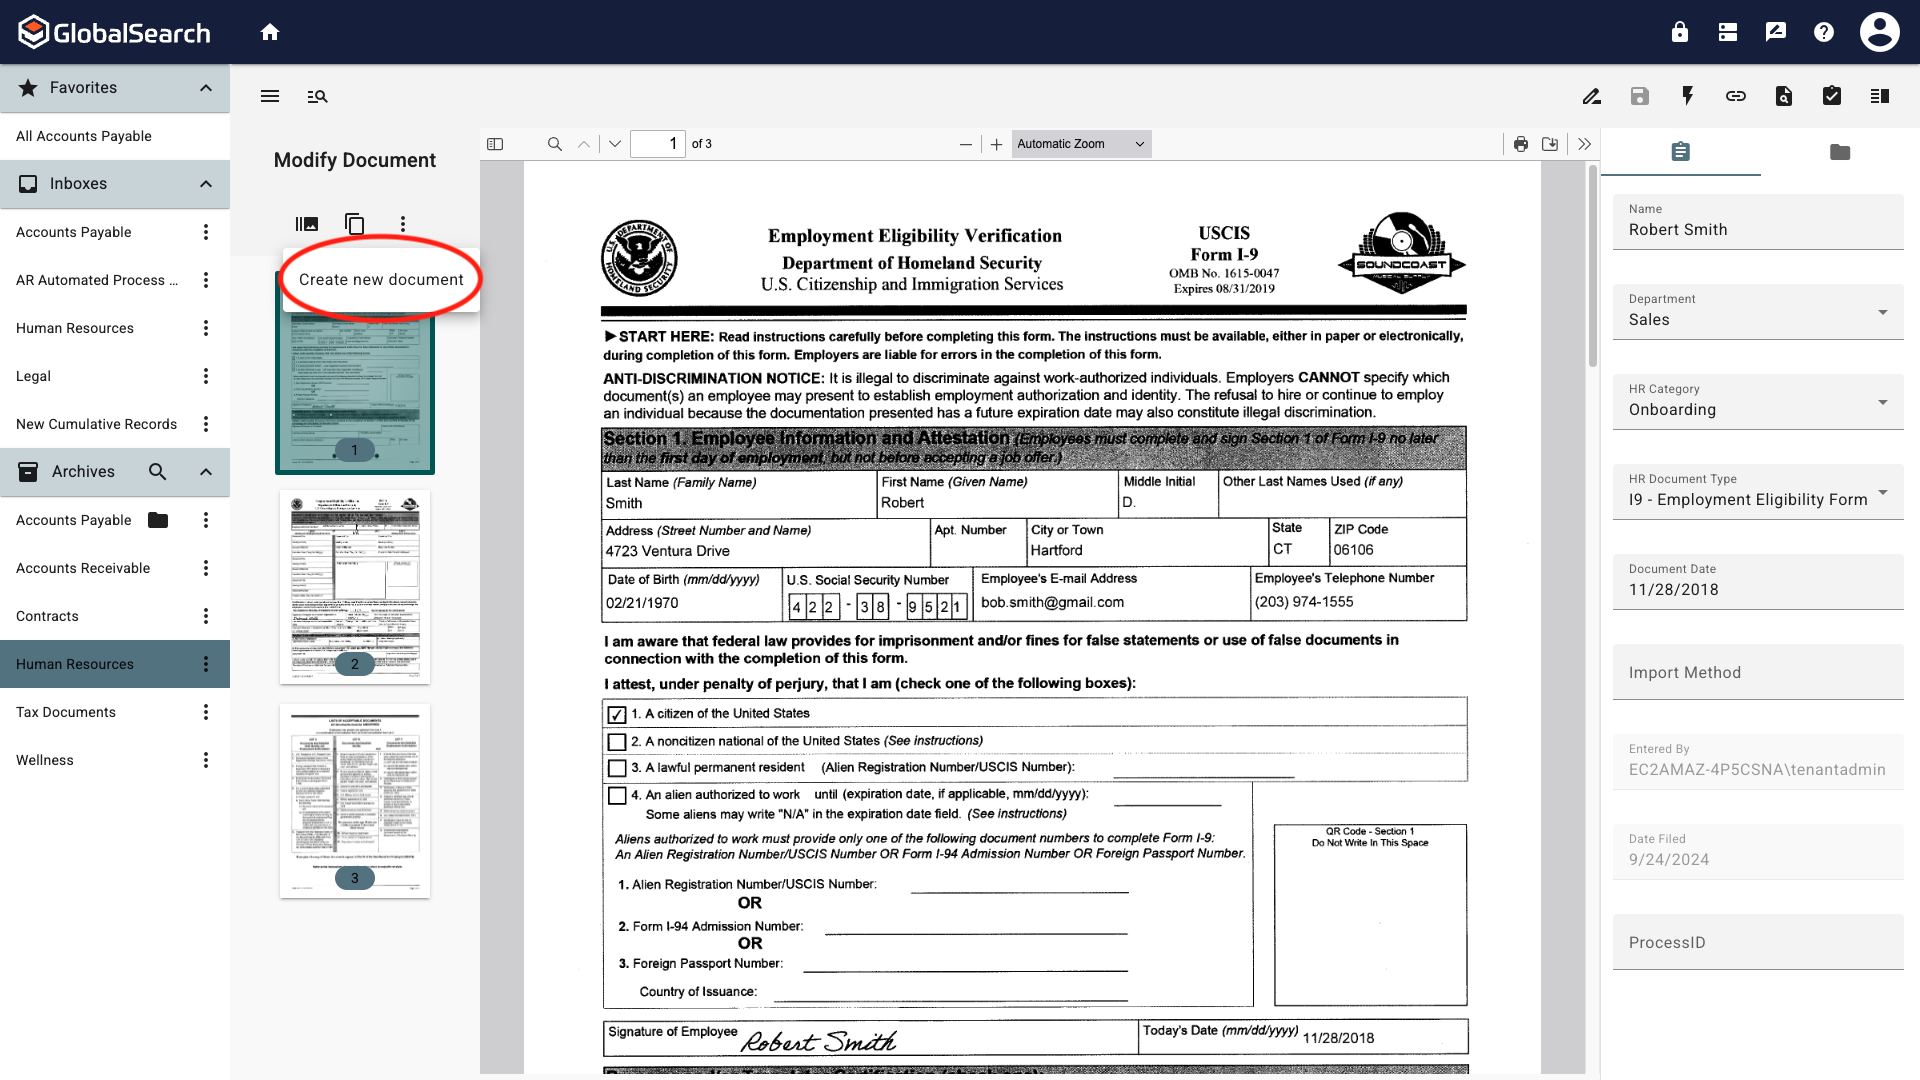
Select the page or pages to Burst or Clone into a new document.
-
Select a single page by clicking on it.
-
Select consecutive pages by clicking the first page to Burst, holding the Shift key, and then clicking the last page to Burst. All pages in between will be selected.
-
Click the Ellipsis (

-
You can only select consecutive pages or all pages. If you want non-consecutive pages, reorder the pages using the Cut Pages and Paste Pages commands.
-
Select the Burst (

-
Select Create New Document.
-
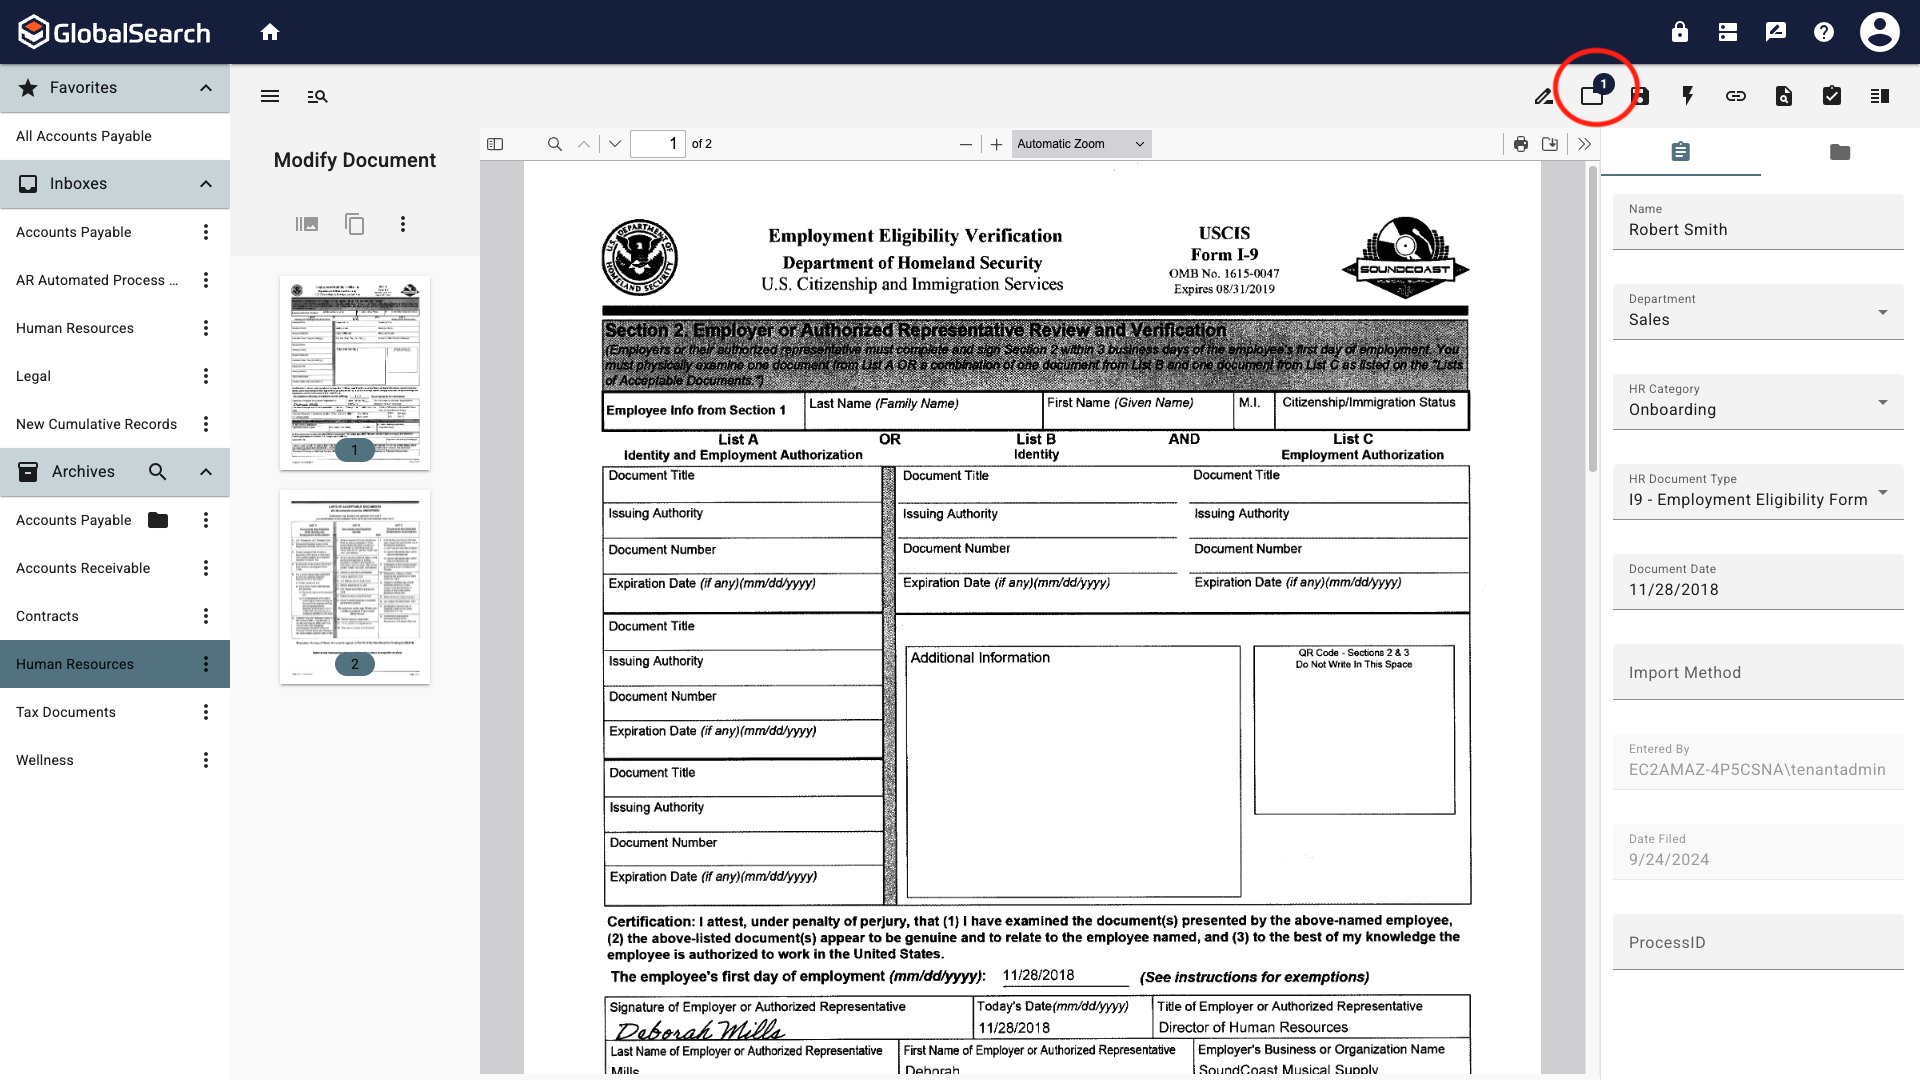
The pages are added to the New Document dialog list and the Open New Document dialog will appear in the Toolbar.
-
Click Save (

If the page has been Cloned, the Page Cloned ( 
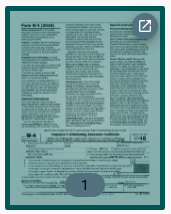
Remember, Burst will remove the page(s) from the original document. If you would like to keep the burst page in the original, use Clone.
Burst and Cloned documents will default to being stored in the source documents archive. Once the document has been opened for indexing, the document can be moved to a new destination archive by clicking the Change Archive ( 
New Document Dialog
Any pages that are Burst or Cloned generate new documents that need to be properly stored. These documents appear in the New Document dialog. Anytime such documents are created, the Open New Dialog ( 
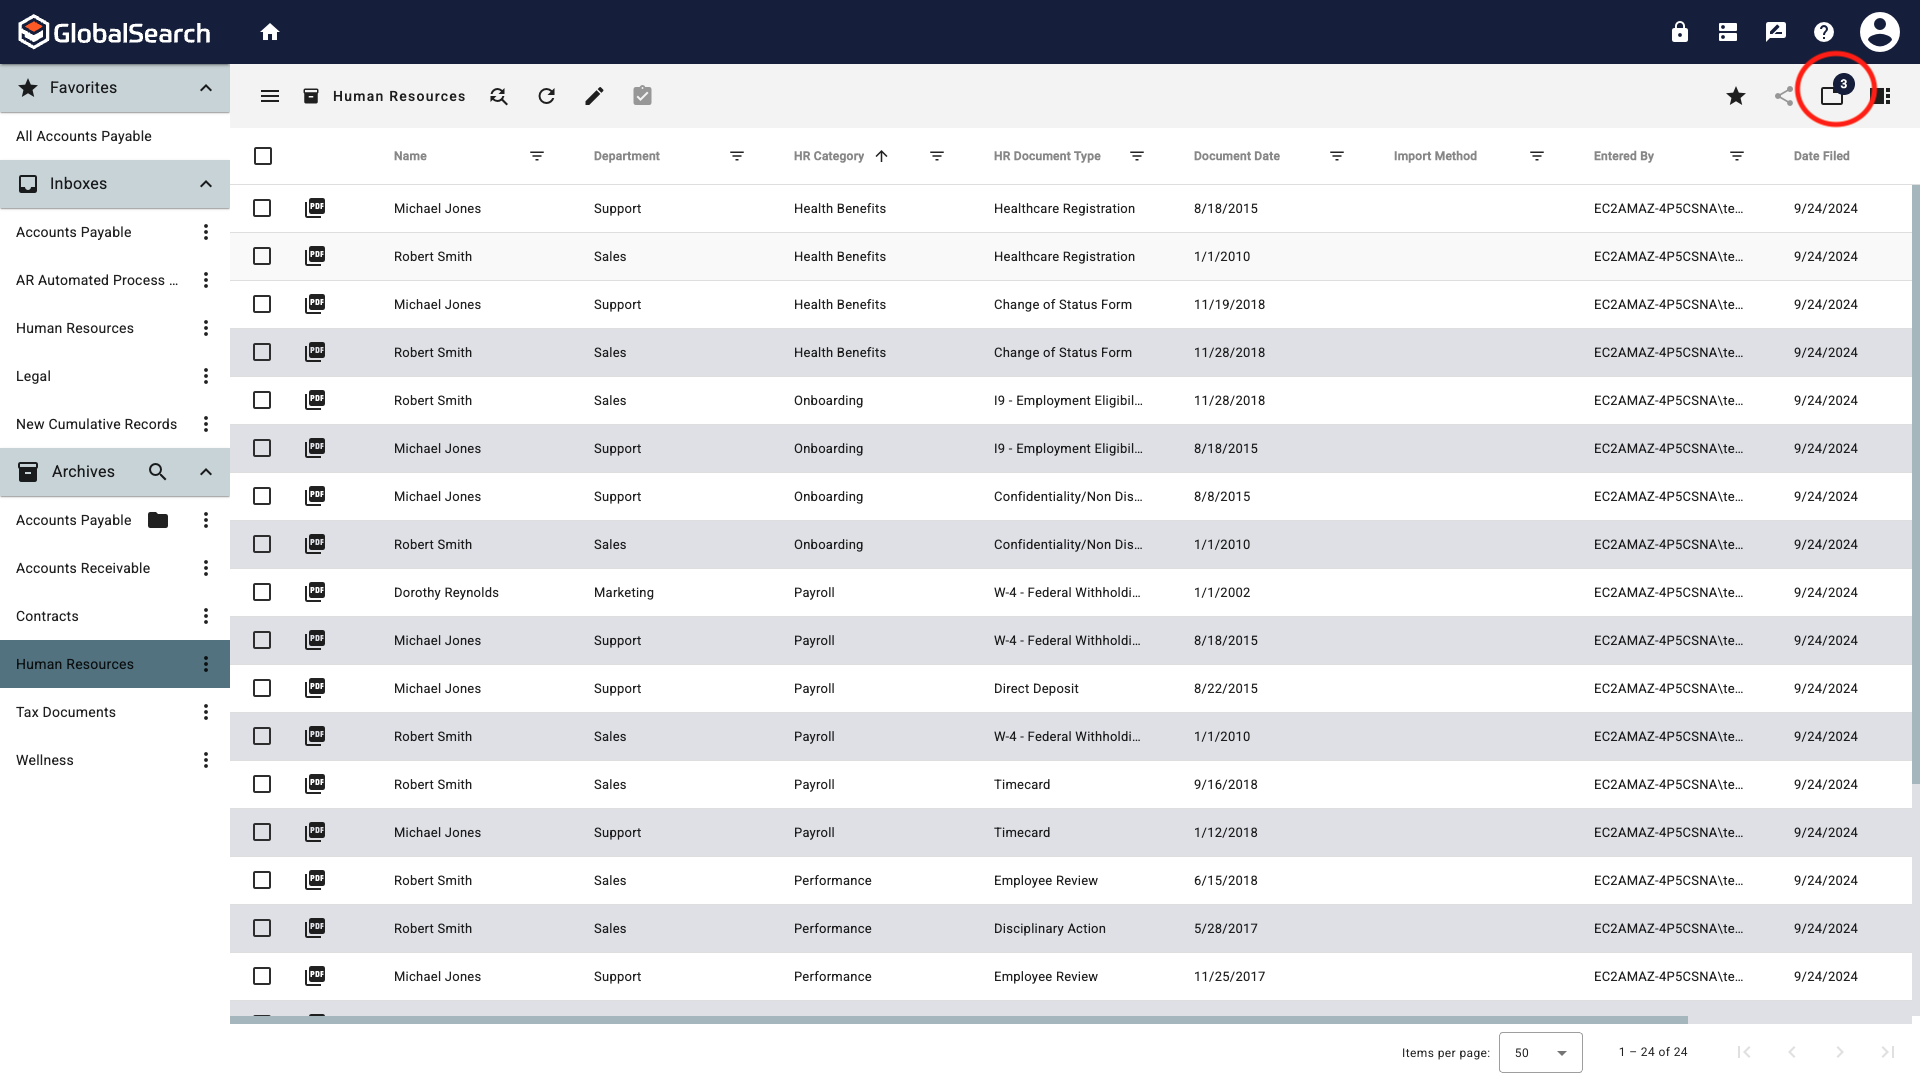
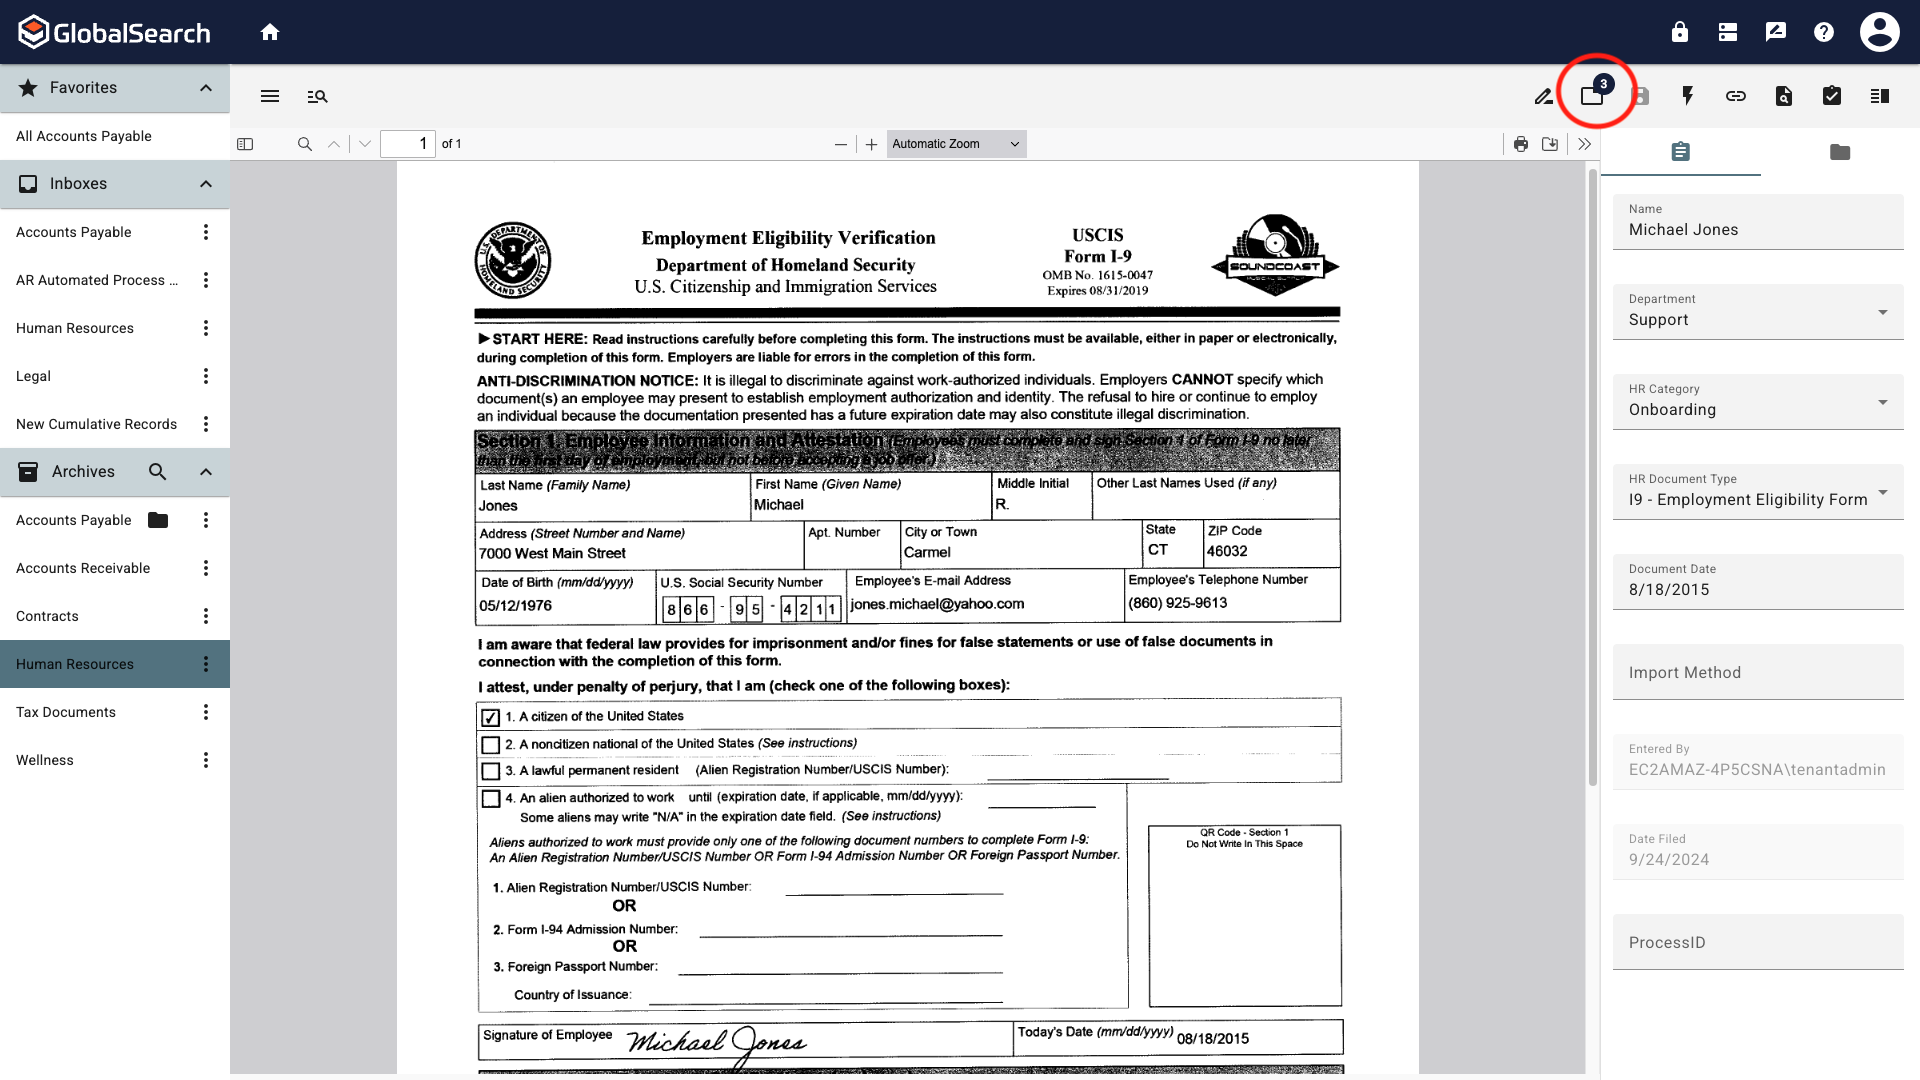
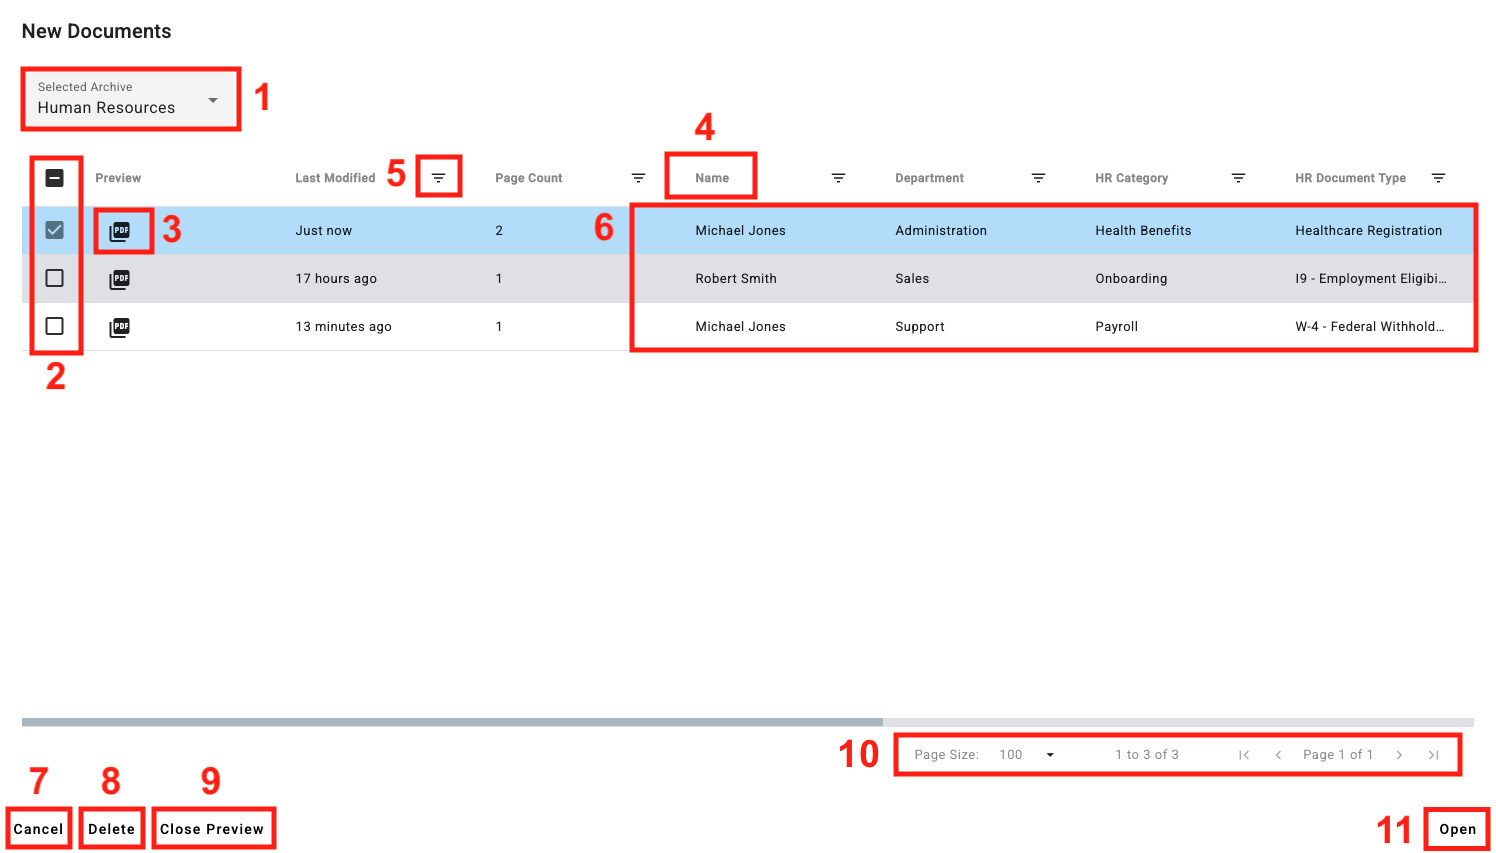
To access the New Documents dialog, click the Open New Documents (
-
Selected Archive - Displays the list Archives that have Burst or Cloned documents waiting to be indexed and stored.
-
Document Selector - Click to select one or more documents. This is only applicable for deleting documents.
-
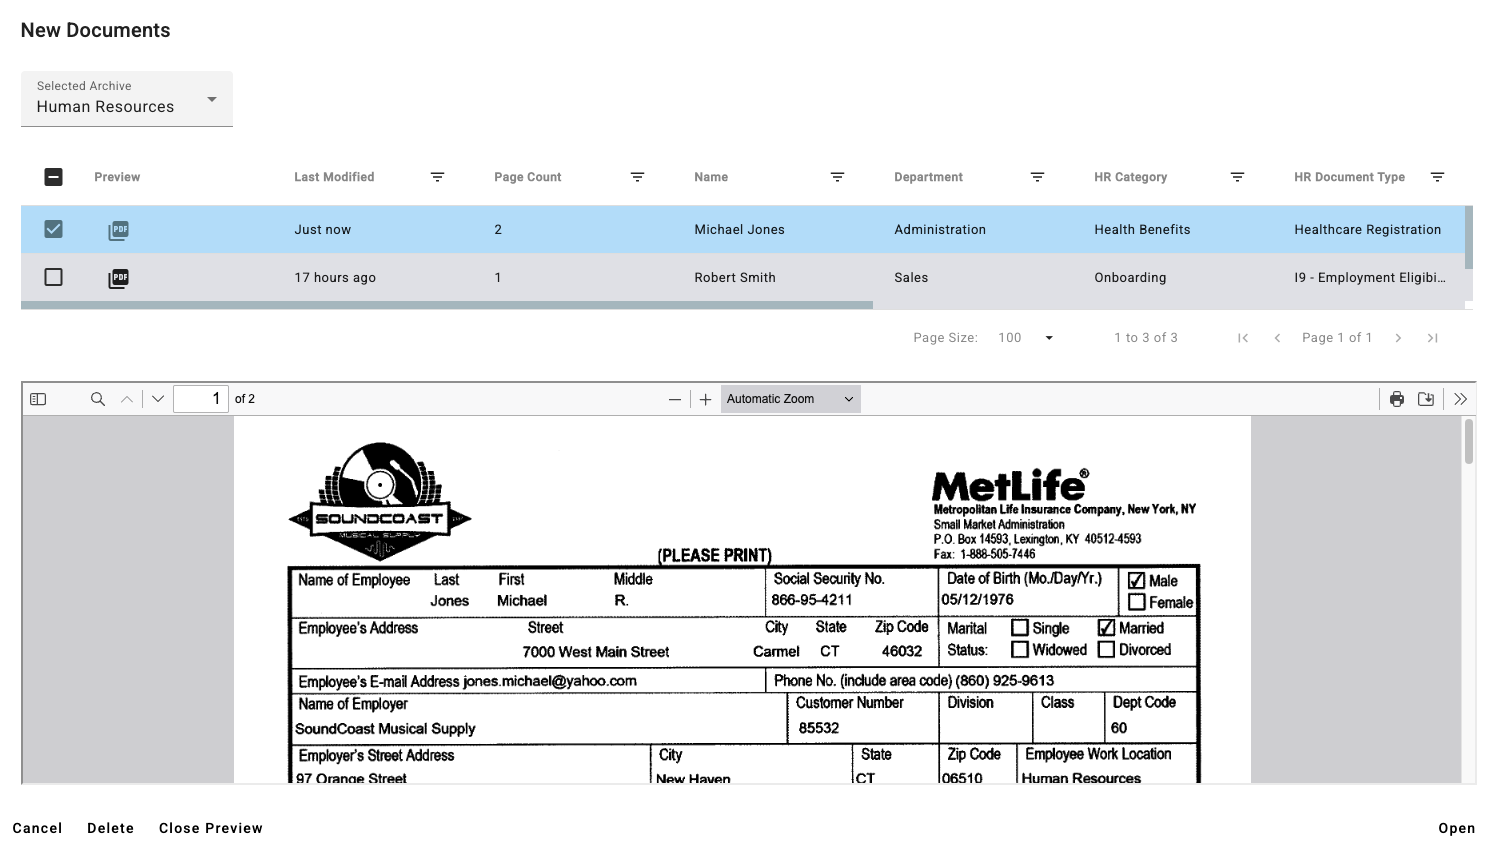
Document Type/Preview - Displays the file format of the document. Clicking the icon displays the document in the preview window at the bottom of the New Document Dialog.
-
Index Field Name/Sort - Index fields and data currently associated with the document. This data is inherited from the source document. Changing the data here does not impact the source document. Clicking the index field name toggles the sort between Ascending, Descending, and Document Age.
-
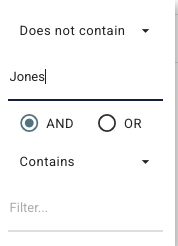
Filter - Use operators, index data, and conditions to narrow down results. Clear the filter to return to all results.
-
Index Data - Current index data associated with the document. Data can be edited by selecting a field.
-
Cancel - Closes the New Documents dialog. Any changes made to index data are automatically saved.
-
Delete - Deletes the selected documents from the New Document Dialog.
-
Close Preview - Closes the document preview at the bottom of the New Document dialog.
-
Results and Pages - Displays the number of results, the number of results per page and the number of pages of results. Change the number of results on a page or the page you are viewing.
-
Open - Available when one or more documents are selected. Opens all documents in the New Documents Dialog regardless of archive in a single viewer.
Double clicking on any document will also open all documents in a single document viewer.
Ellipsis Menu
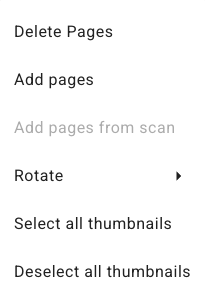
Under the Ellipsis (
Delete Pages
Select a thumbnail or multiple thumbnails of a document and click Delete Page to remove them from the document.
Add Pages
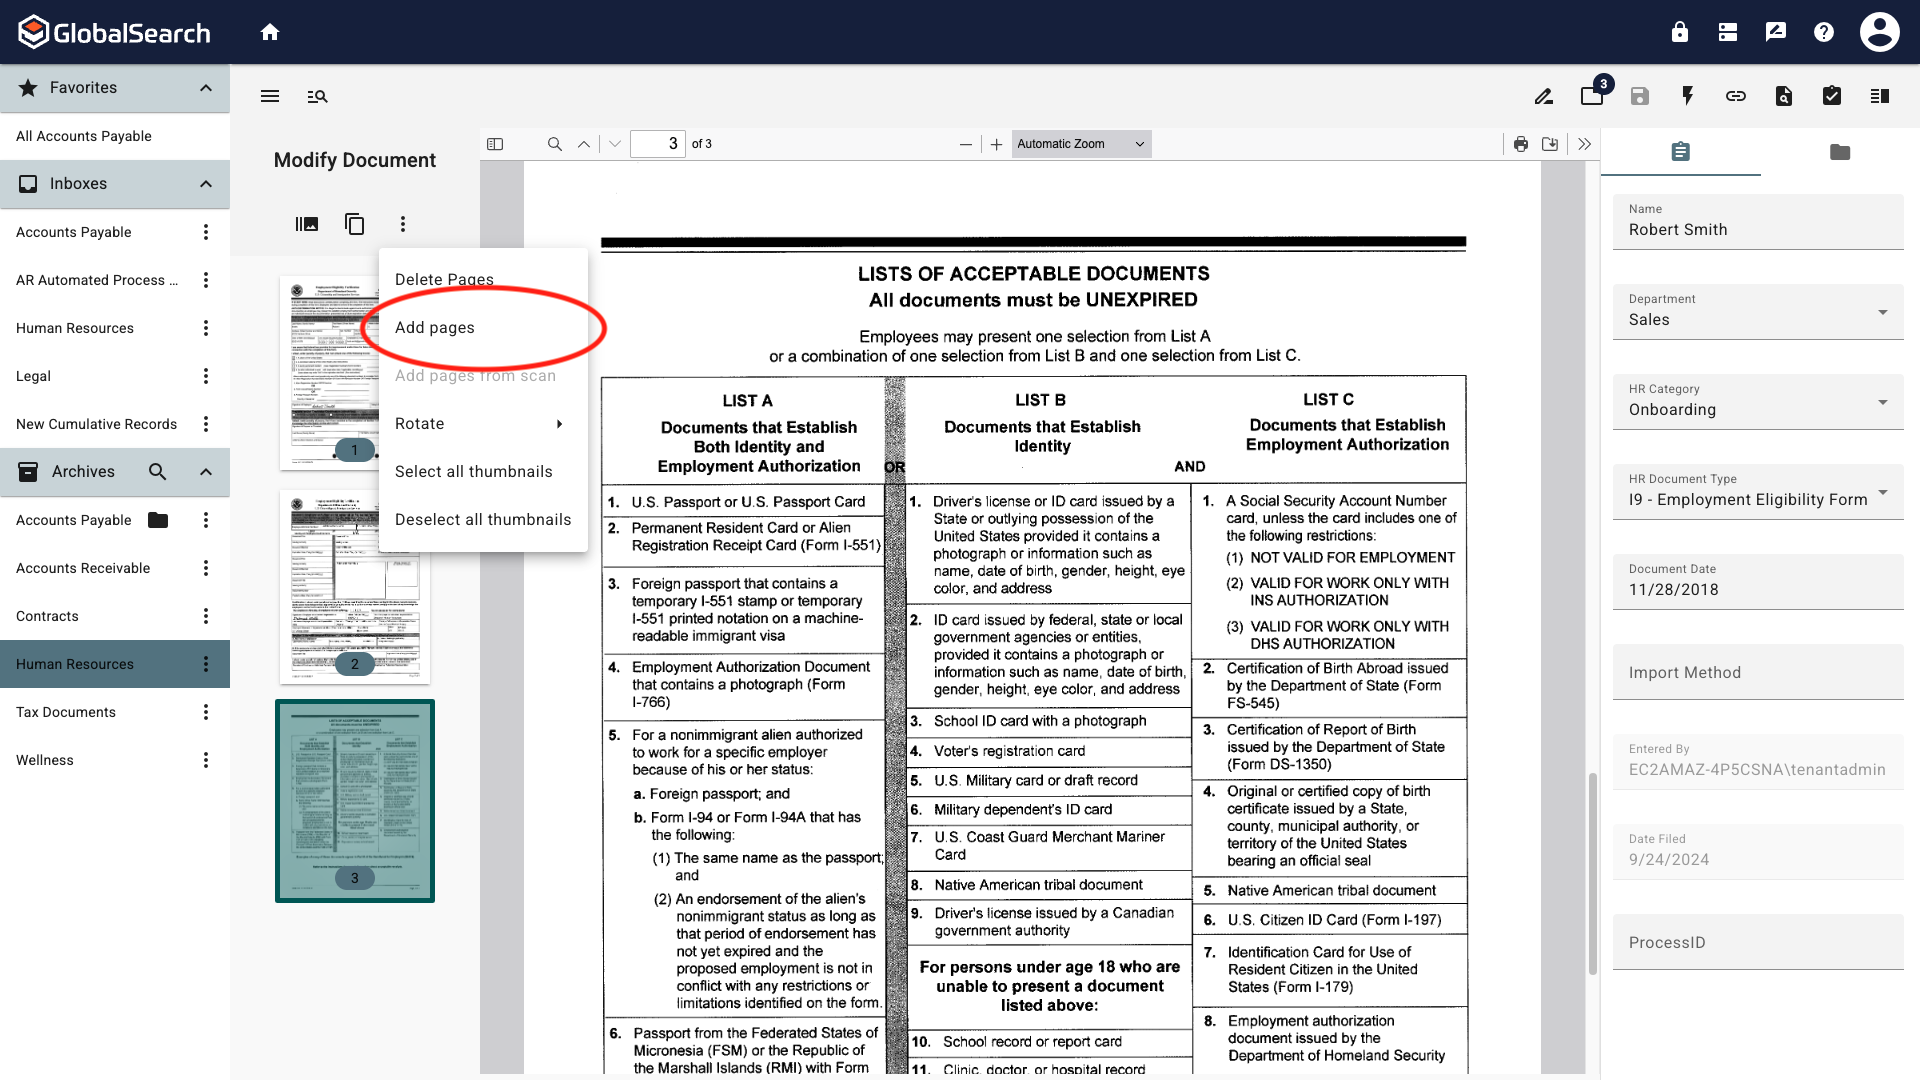
Add the pages of an existing file to the document currently open in the Document Viewer. Pages will be inserted AFTER the selected page.
Only PDF’s can be added to existing documents. All pages of the PDF file will be added.
To insert a page or pages into the current document:
-
Select the page in which you would like the inserted pages to follow and click Add Pages.
-
Navigate to and select the document that contains the page to add from the File Explorer Window. Click Open.
.png?cb=4b241f0ffc543f662ebc481e41ccdeb4)
-
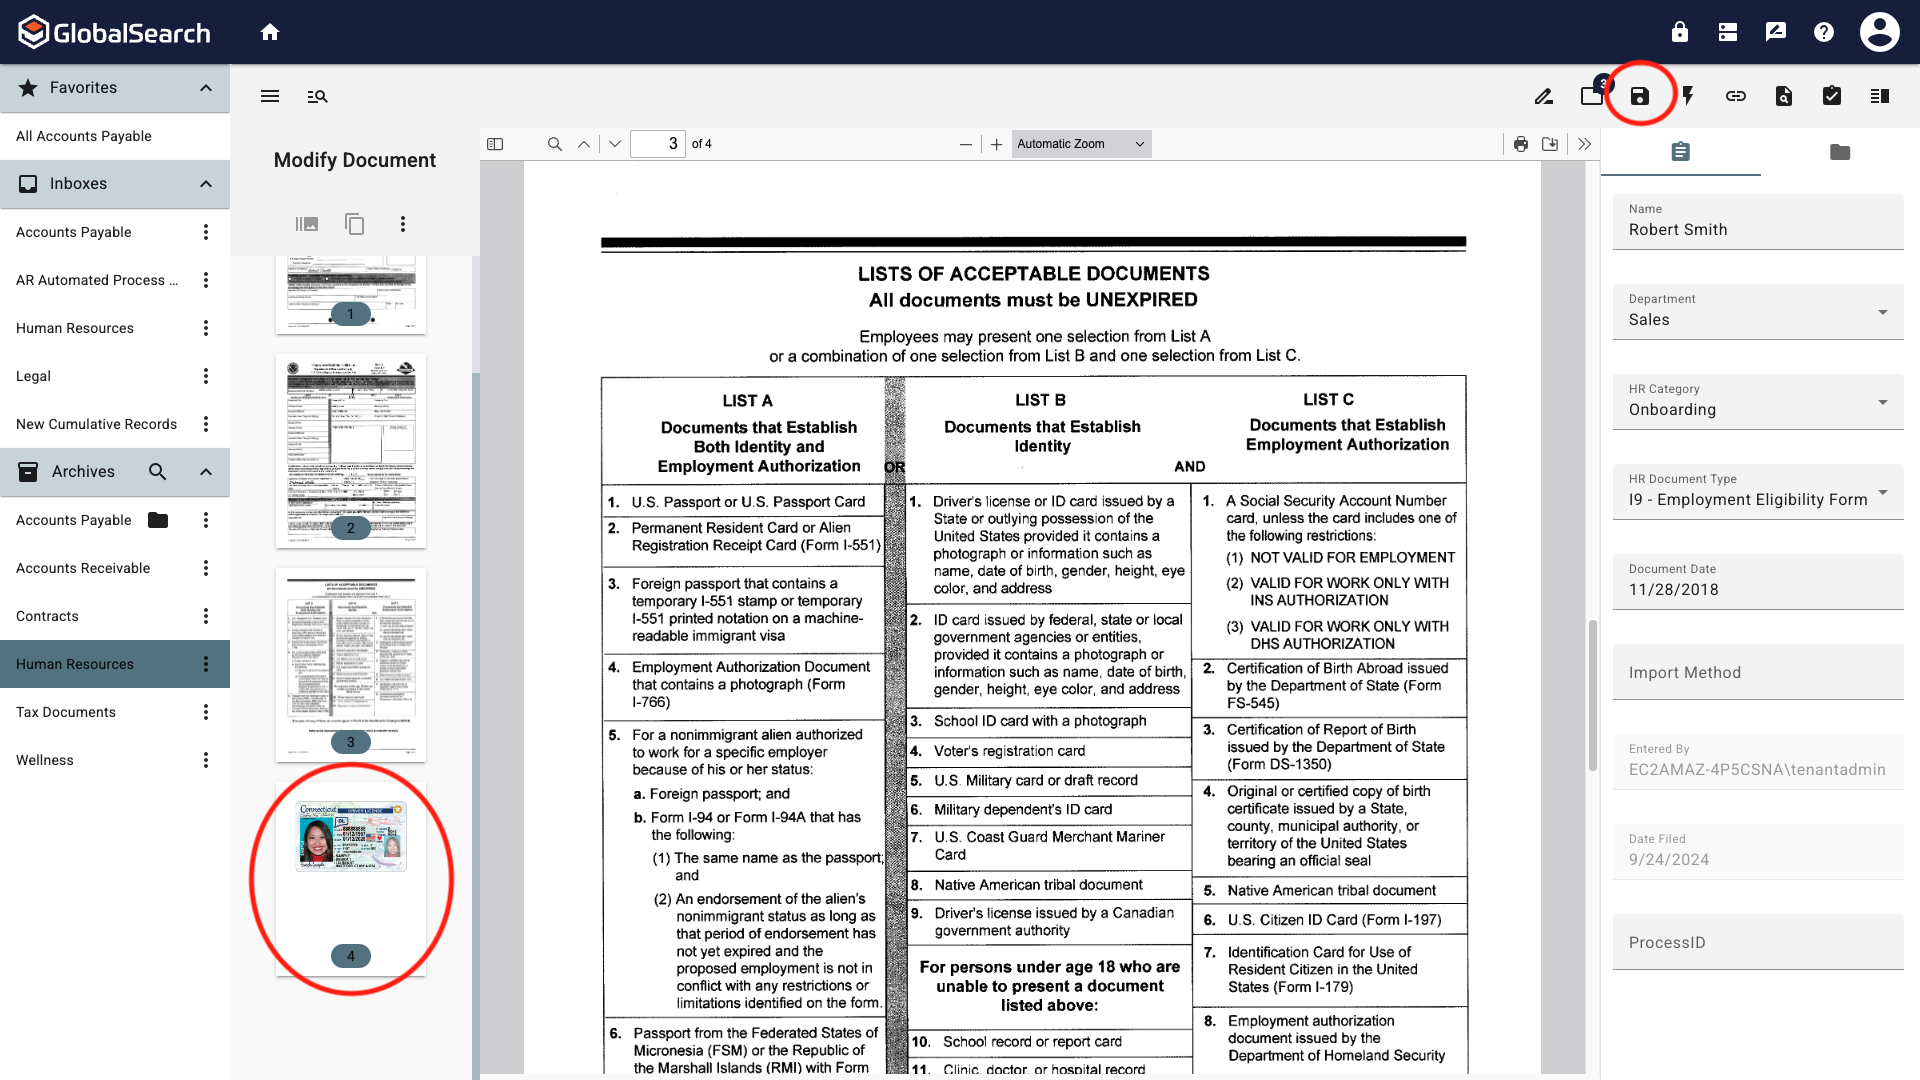
The page(s) have been added. Continue to make any needed changes to the document and pages, then click Save.
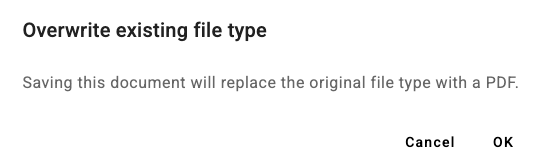
Adding a PDF to non PDF documents will force a conversion of those document types to PDF on Save.
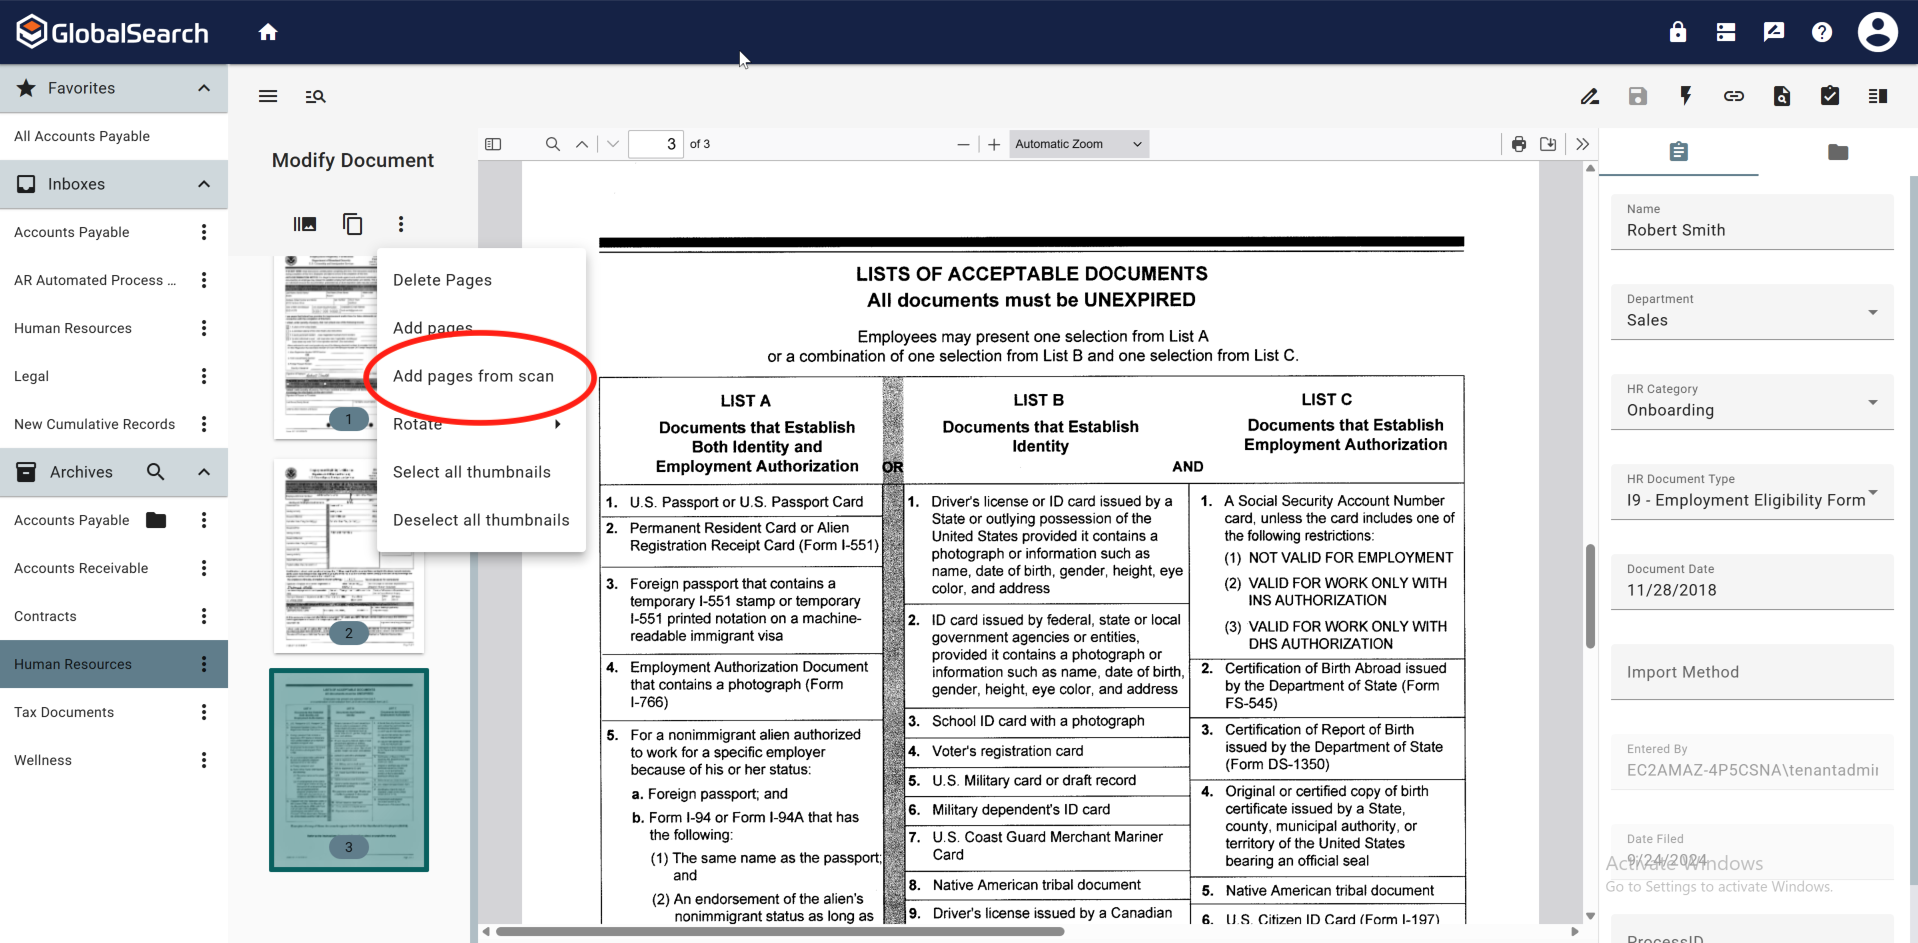
Add Pages from Scan
To Add Pages from Scan you must have a desktop scanner connected and GlobalSearch Extensions installed.
Add pages to an existing document using your desktop scanner. Pages will be inserted AFTER the selected page.
-
Select the page in which you would like the inserted pages to follow and click Add Pages from Scan.
-
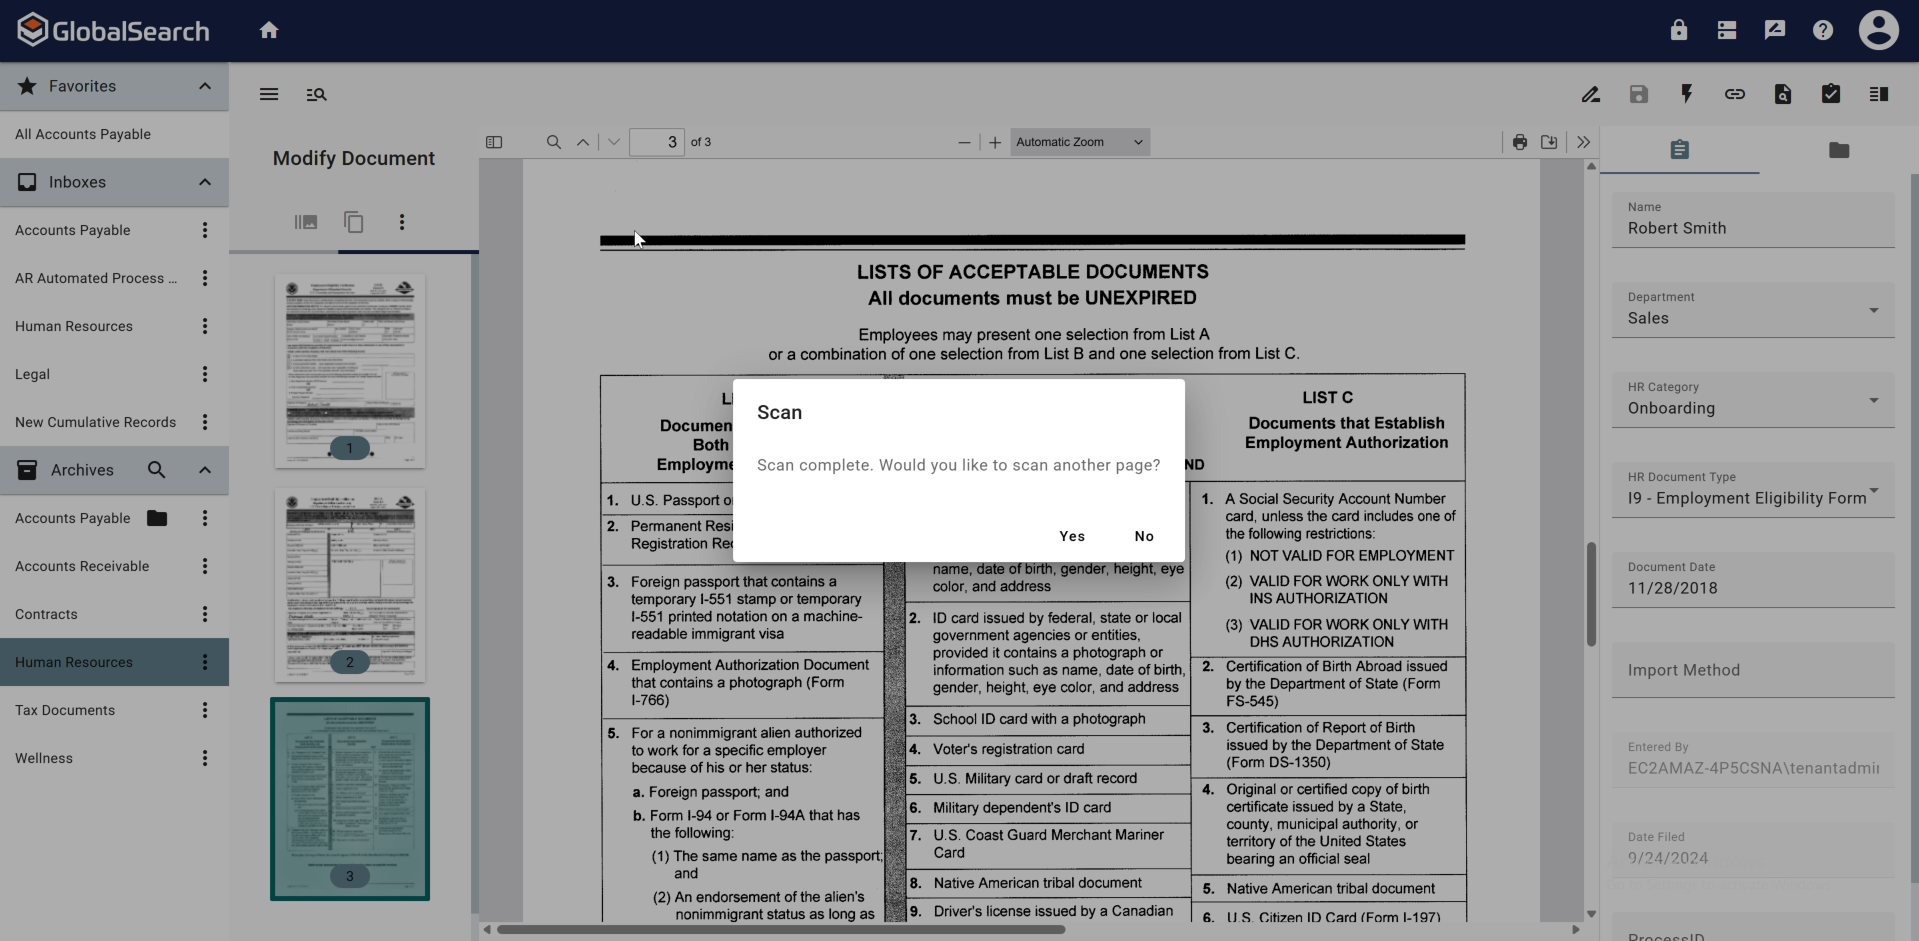
This will trigger the scanner to begin scanning pages. Once finished, tt will ask if you would like to scan additional pages.
-
Yes - Continue scanning additional pages to add to the document.
-
No - Scanning is completed and the scanned pages(s) are added to the document.
-
-
The page(s) have been added. Continue to make any needed changes to the document and pages, then click Save.
Rotate
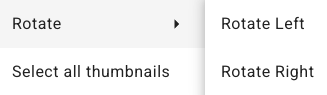
Rotate the selected pages in 90 degree increments. Rotate Left rotate the page counterclockwise. Rotate Right rotates the page clockwise.
Select All Thumbnails
Highlights all the pages of the document. Actions taken will be performed on all pages and added pages will be added to the BEGINNING of the document.
Deselect All Thumbnails
Cancels the selection of any thumbnails currently selected. This will NOT undo any actions previously taken.
Modify Page Actions - Reordering Pages
The following page actions do NOT carry over from one document to the next and therefore cannot be used to copy and paste pages between documents.
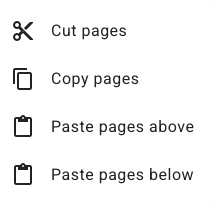
Modify Page Actions are used to reorder the pages of a document. The Modify Page Actions can be accessed by selecting one or more pages and
-
right clicking
-
CTRL Left Clicking
anywhere in the Modify Documents pane.
The action will be taken on the selected page(s) regardless of where you click in the Modify Documents pane.
Cut Pages
Use Cut Pages ( 
-
Move to the new location when Paste Pages Above or Paste Pages Below is selected.
-
Return to its original position and state if another page is Cut or Copied.
Copy Pages
Use Copy Pages (
-
Duplicate in the new location when Paste Pages Above or Paste Pages Below is selected. The original pages will remain in their original location.
-
Return to their original state if another page is Cut or Copied.
Paste Pages Above
Use Paste Pages Above ( 
Paste Pages Below
Use Paste Pages Below (