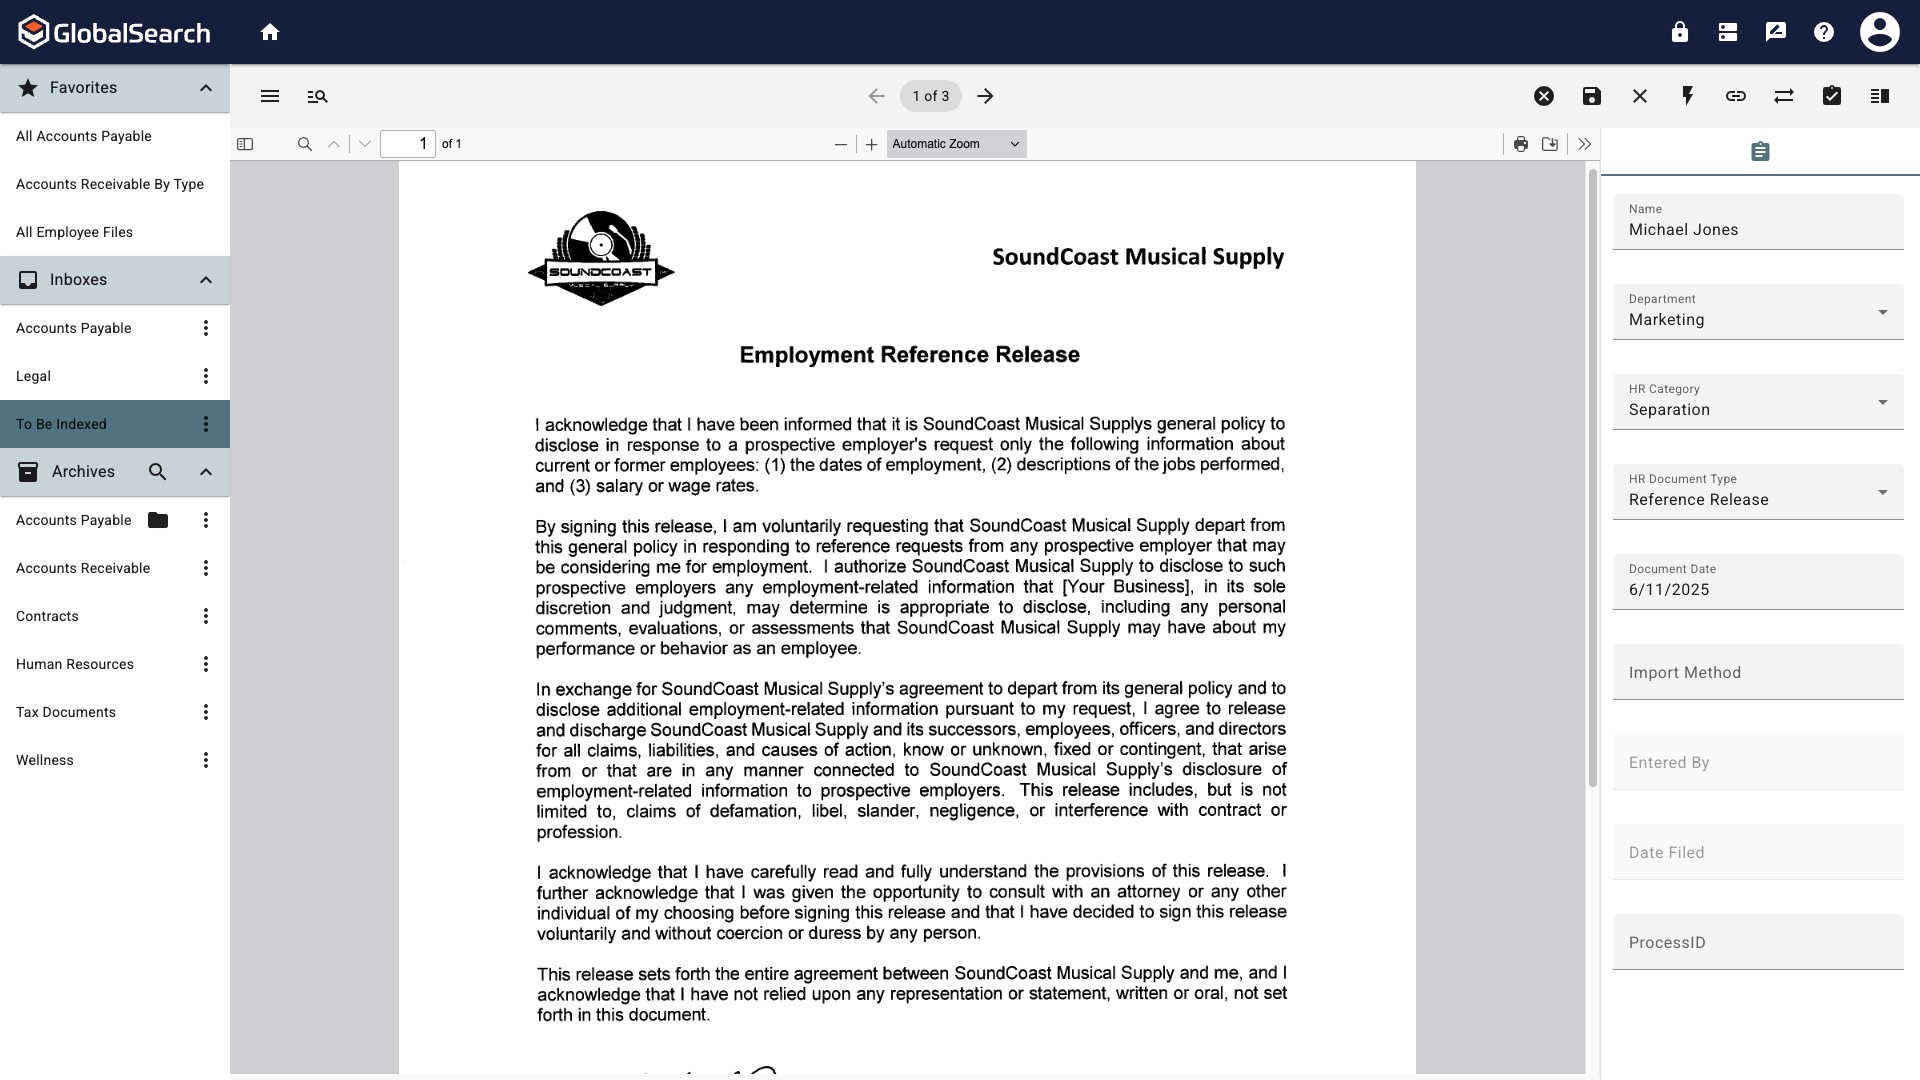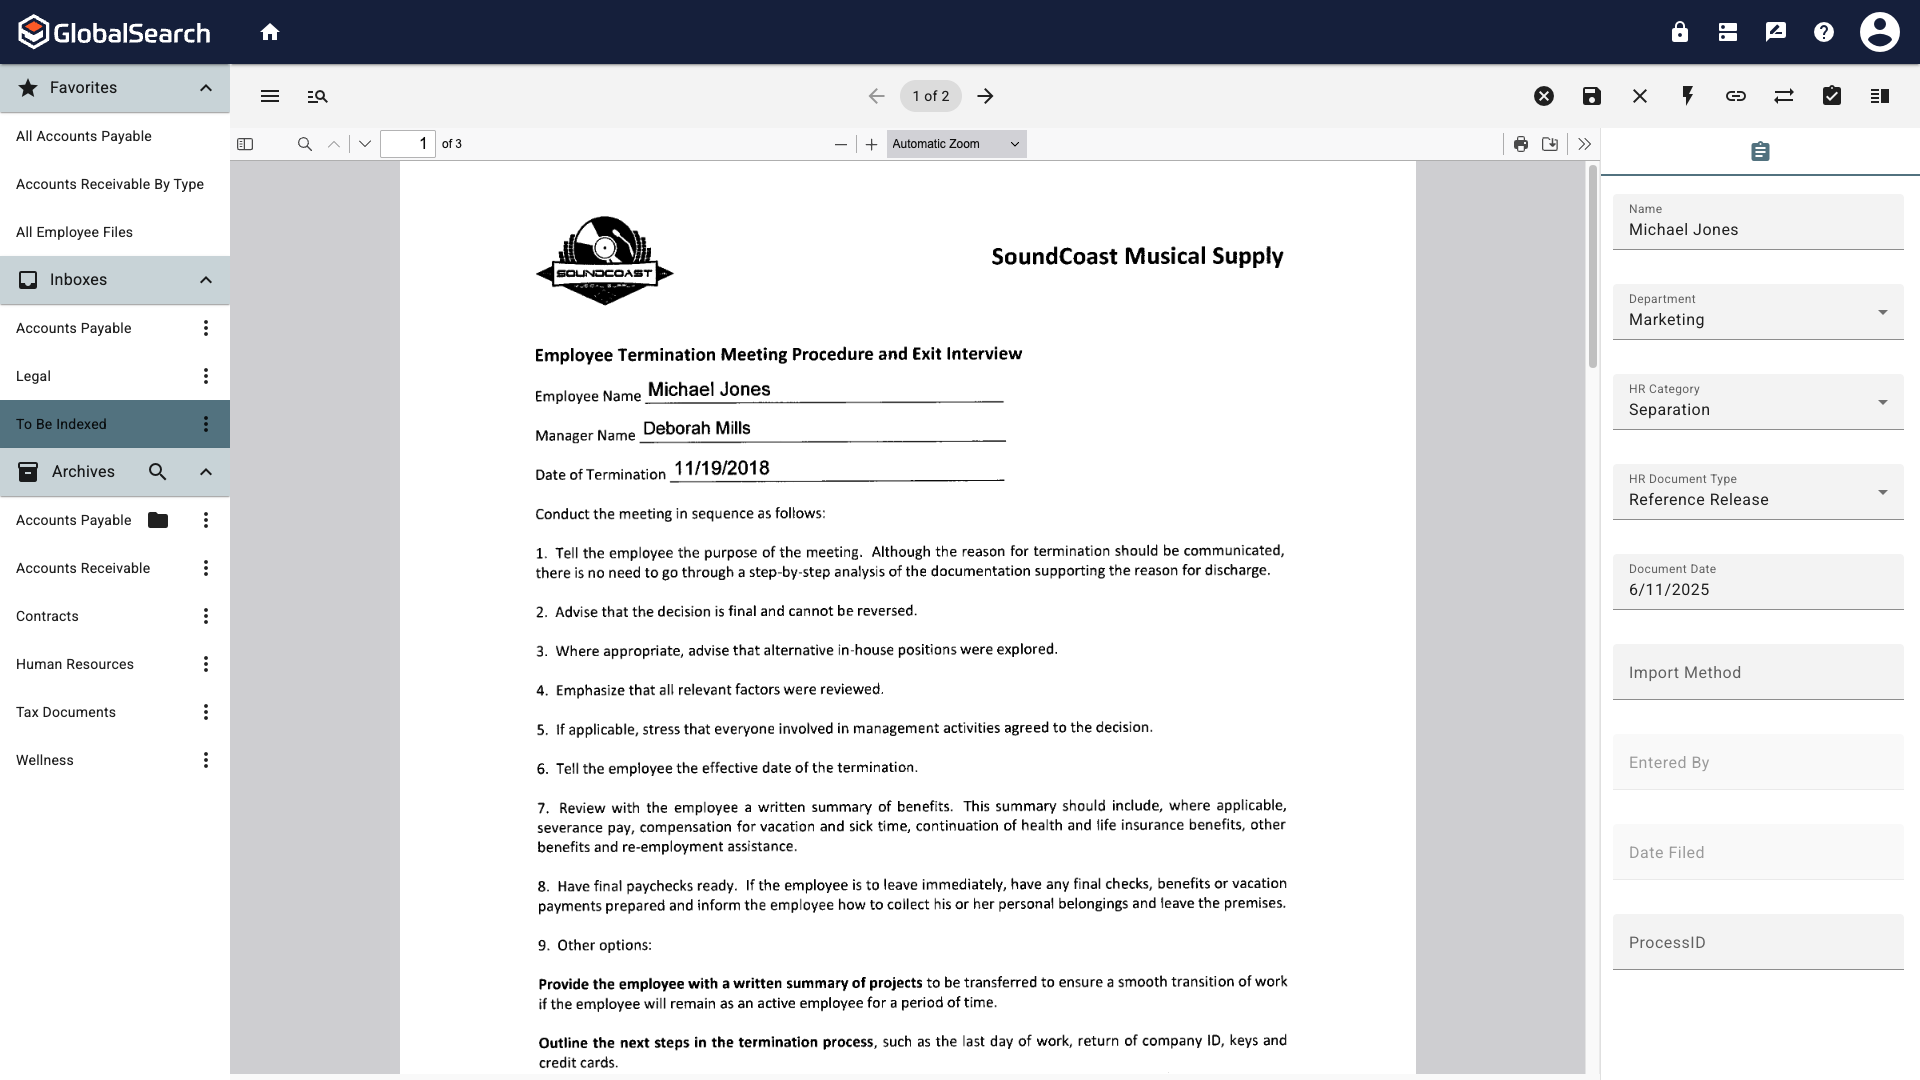
In most cases, documents from an Inbox will be indexed to an Archive at some point. Documents within a single Inbox can all be indexed to the same archive or can be sent to different archives.
From the Grid View
This method is useful when all the selected documents are being indexed to the same Archive.
-
Click on the Inbox that contains the document(s) to be indexed.
-
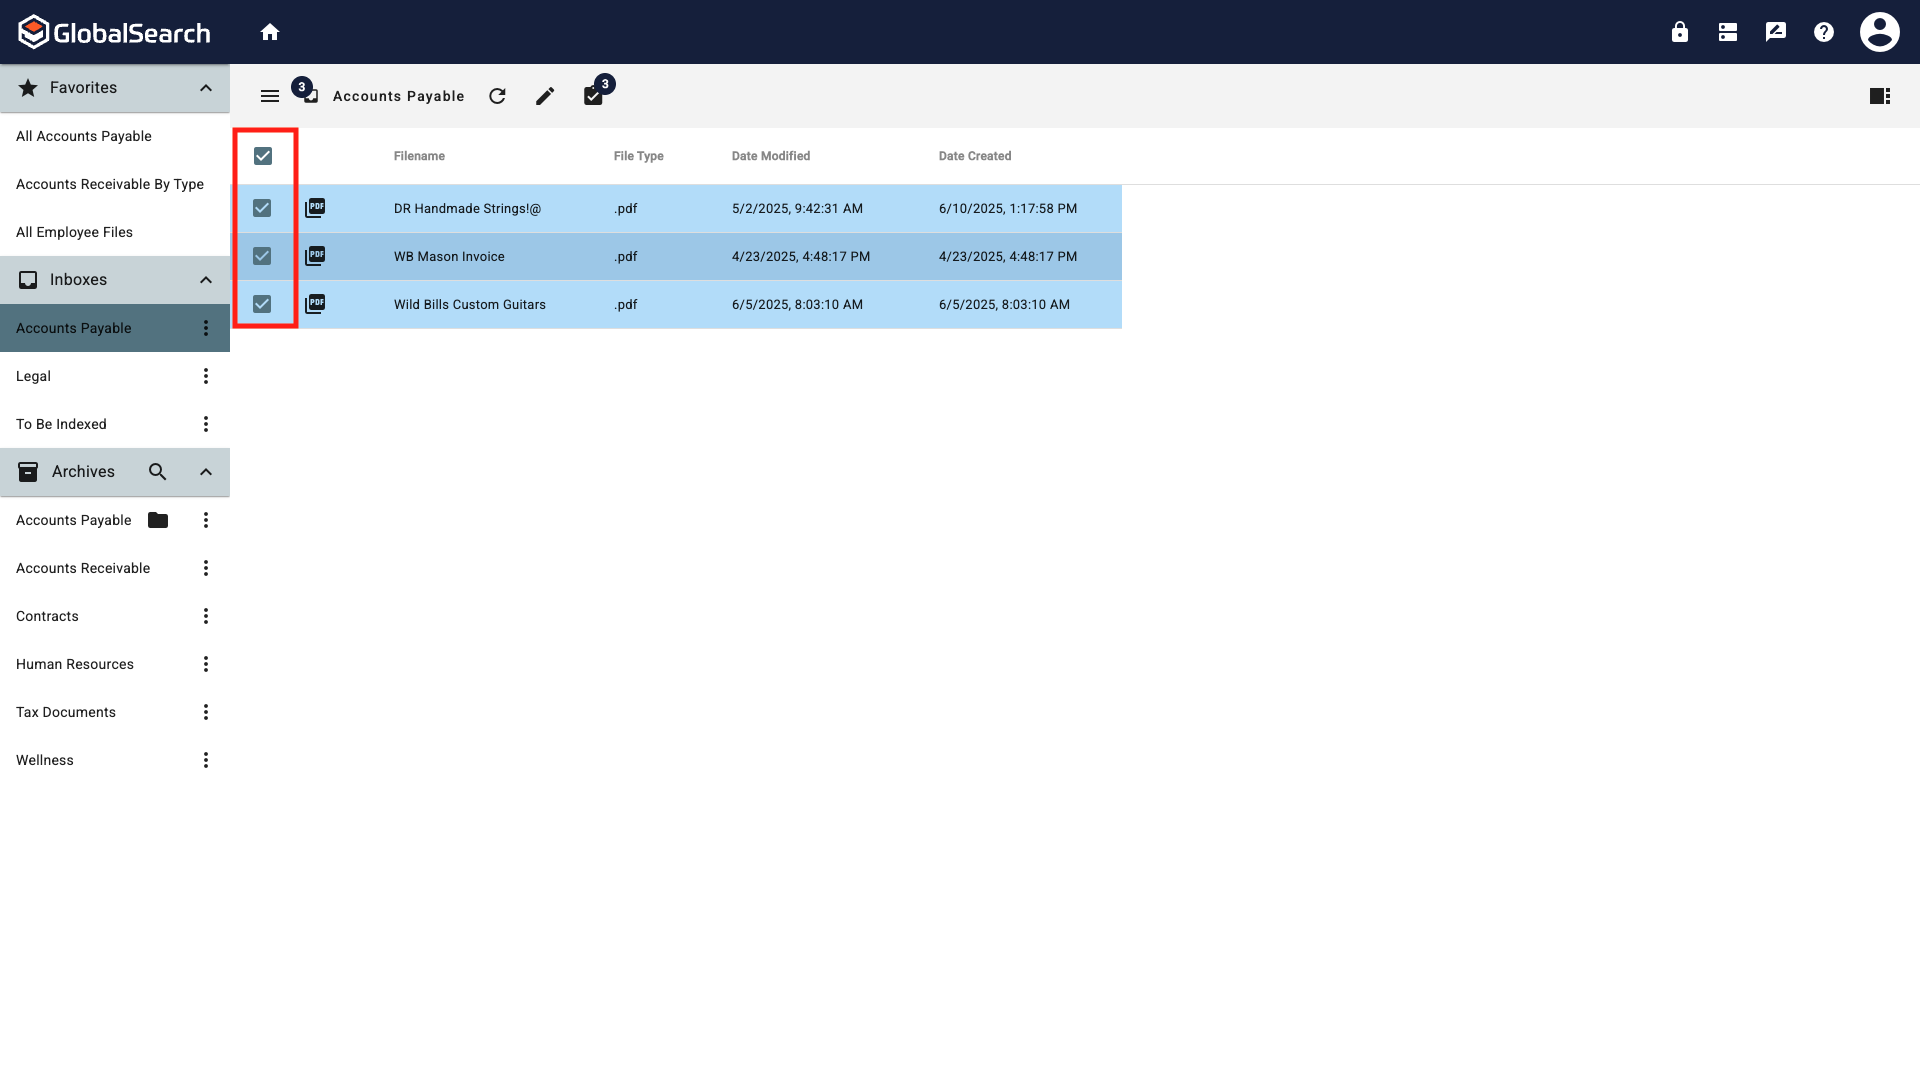
Select one or more documents to be indexed by clicking the checkbox next to the desired document(s) or click the check all box at the top to select all documents.
-
When the Select All checkbox is selected, the document will open in alphabetical order, regardless of any sorts on the Inbox.
-
If individual checkboxes are used, the document will appear in the order in which they are selected.
-
From the Actions menu, select Index.
-
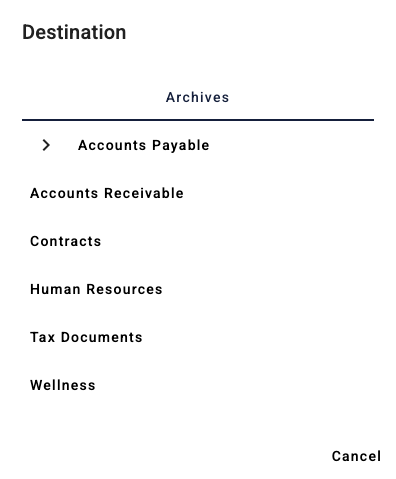
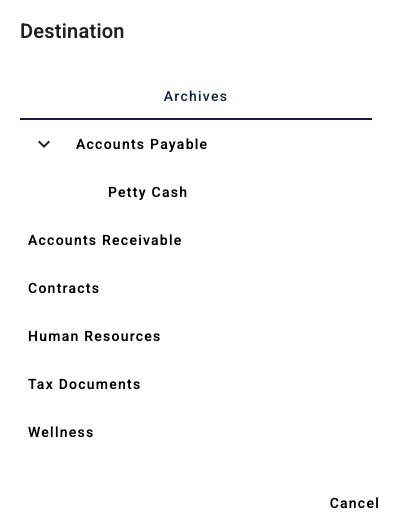
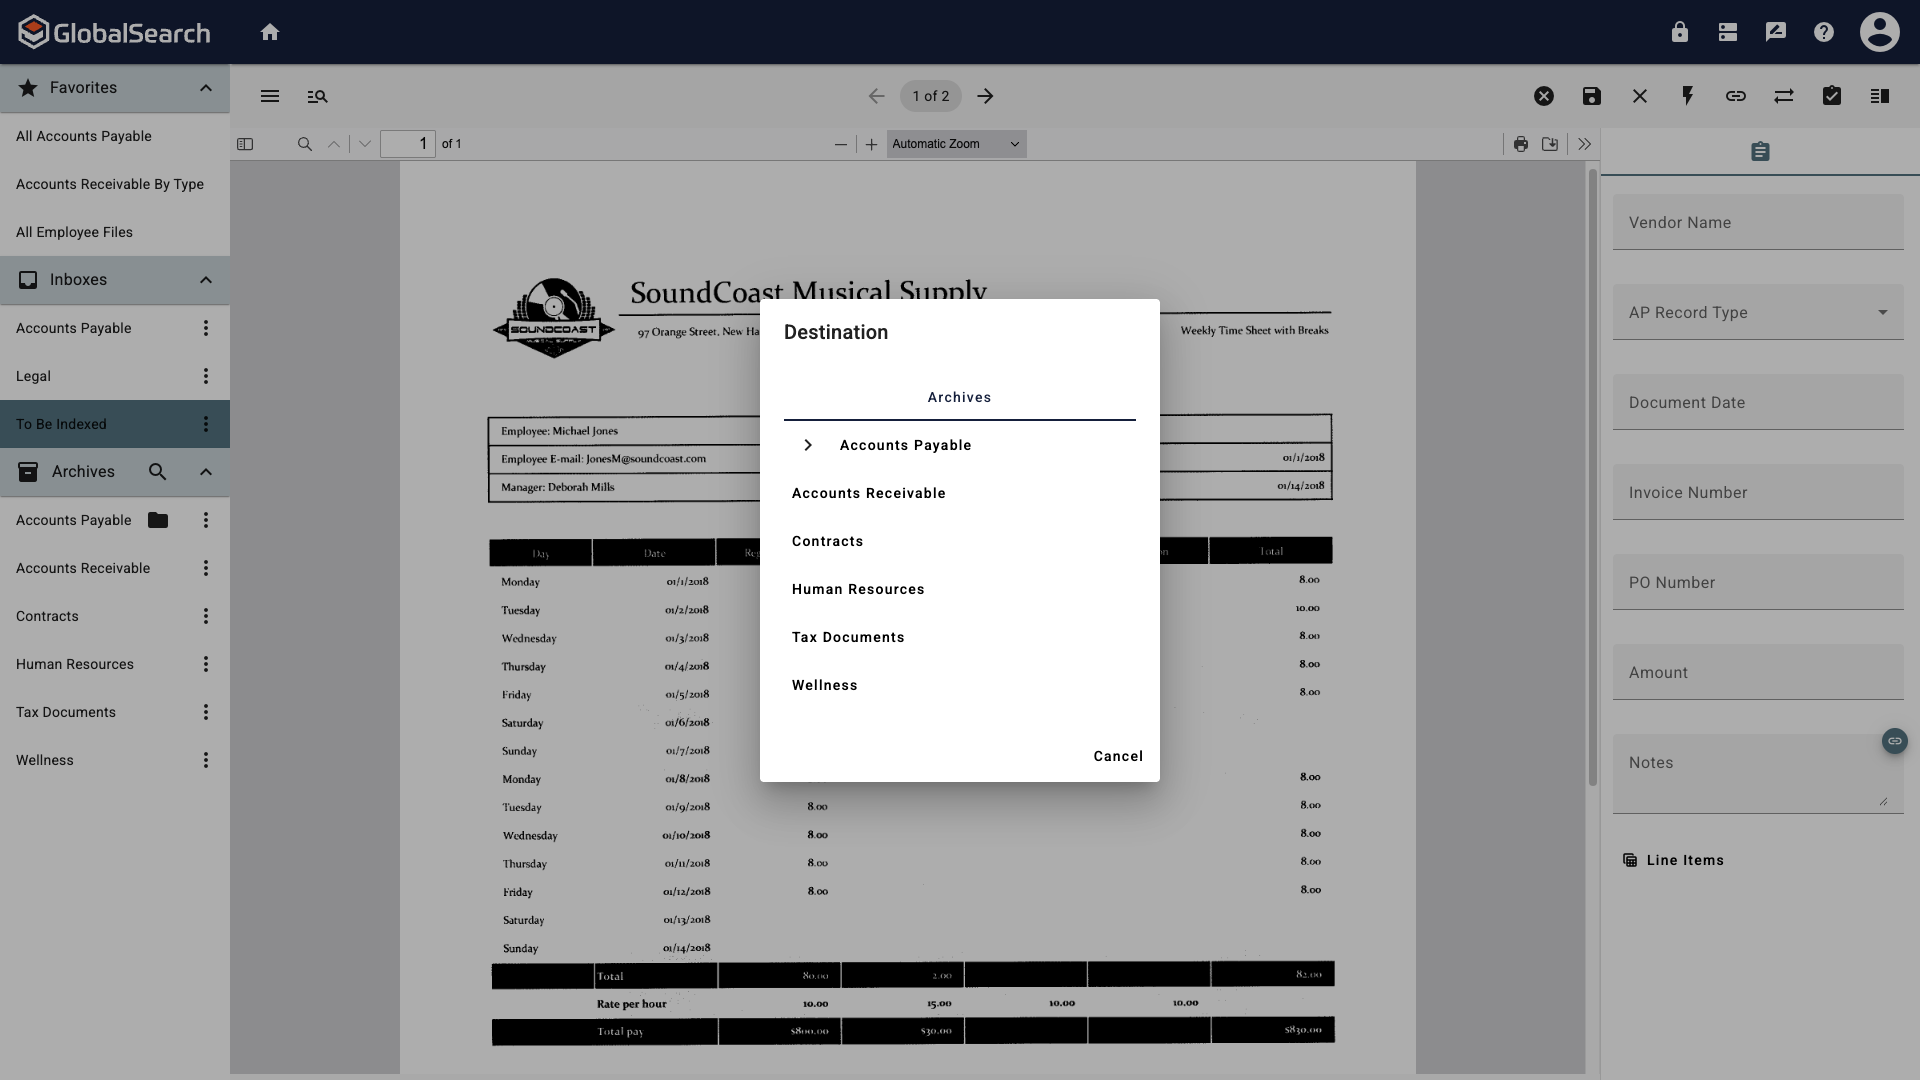
From the Destination popup, select the destination archive for the documents.
Archives with sub-archives will display with an arrow next to them. Click the arrow to display the list of sub-archives.
-
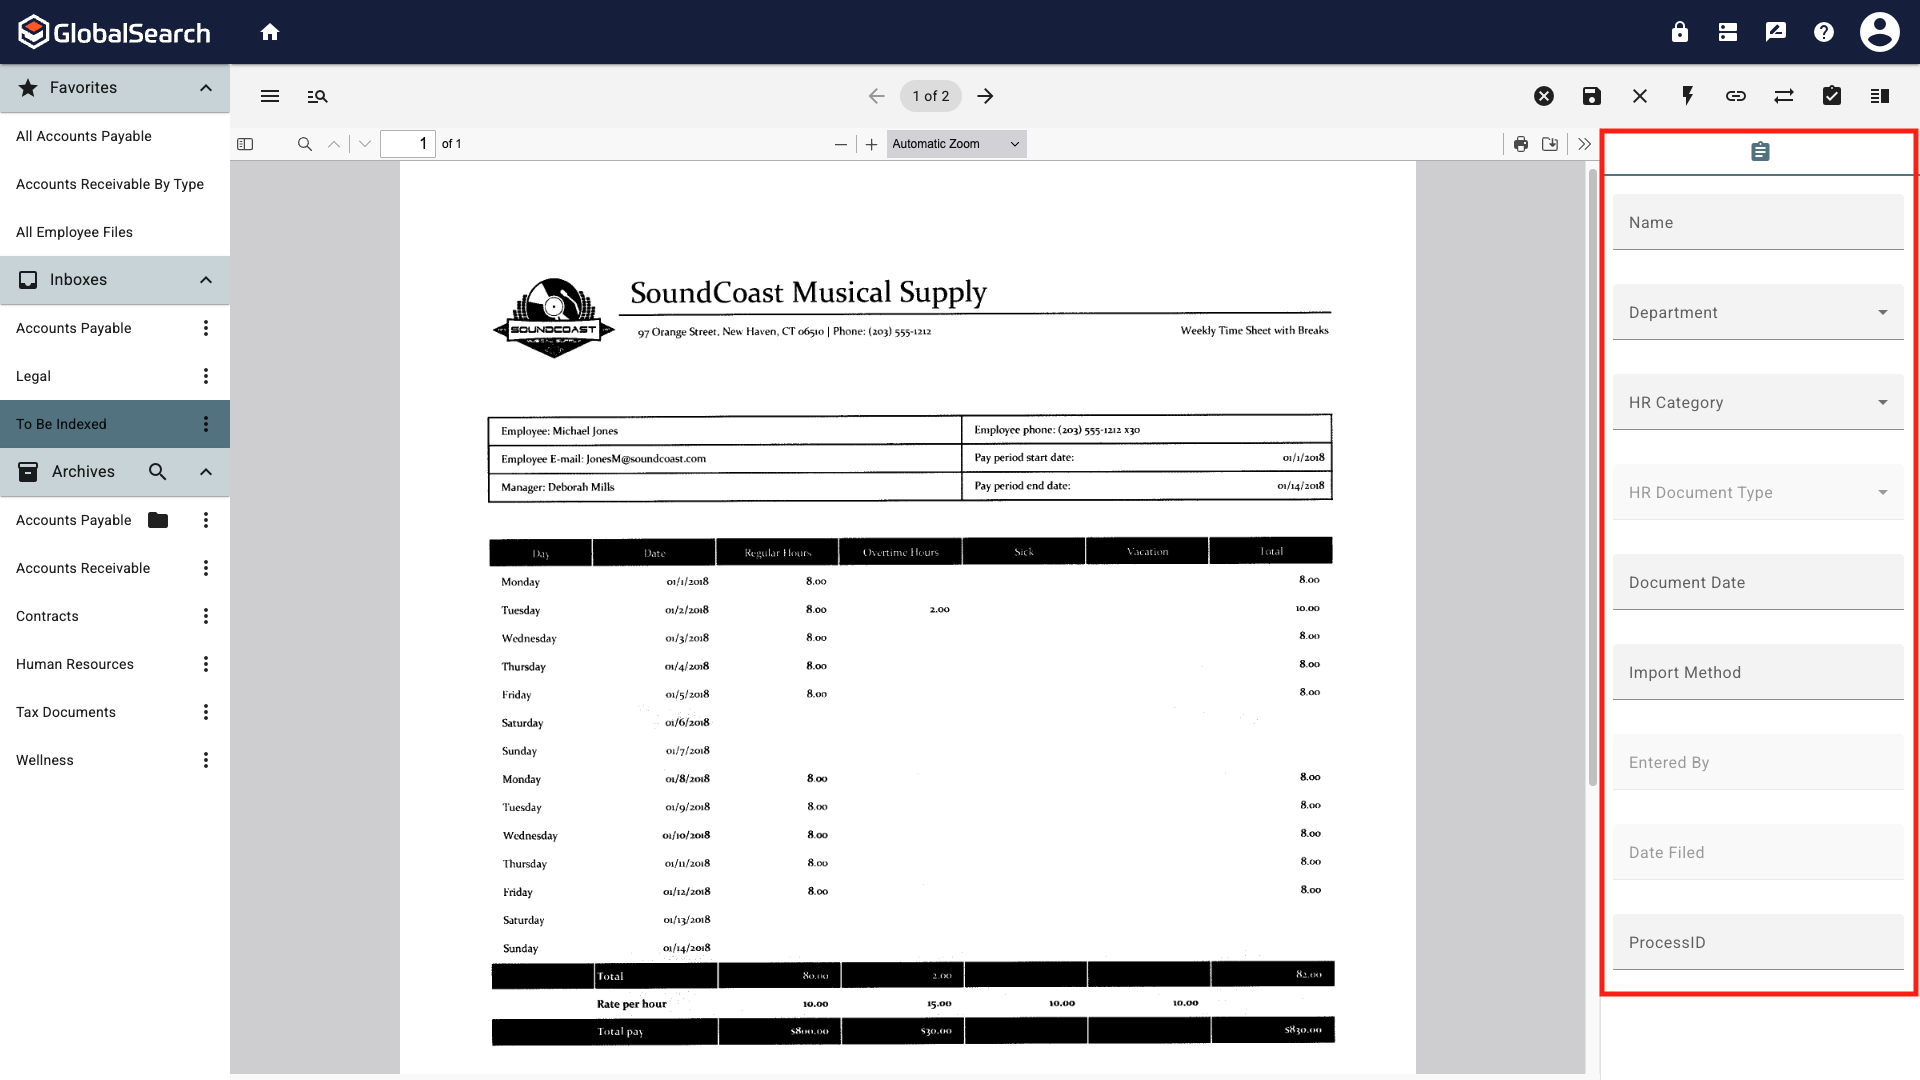
The documents will open in the Document Viewer with the index fields for the selected archive.
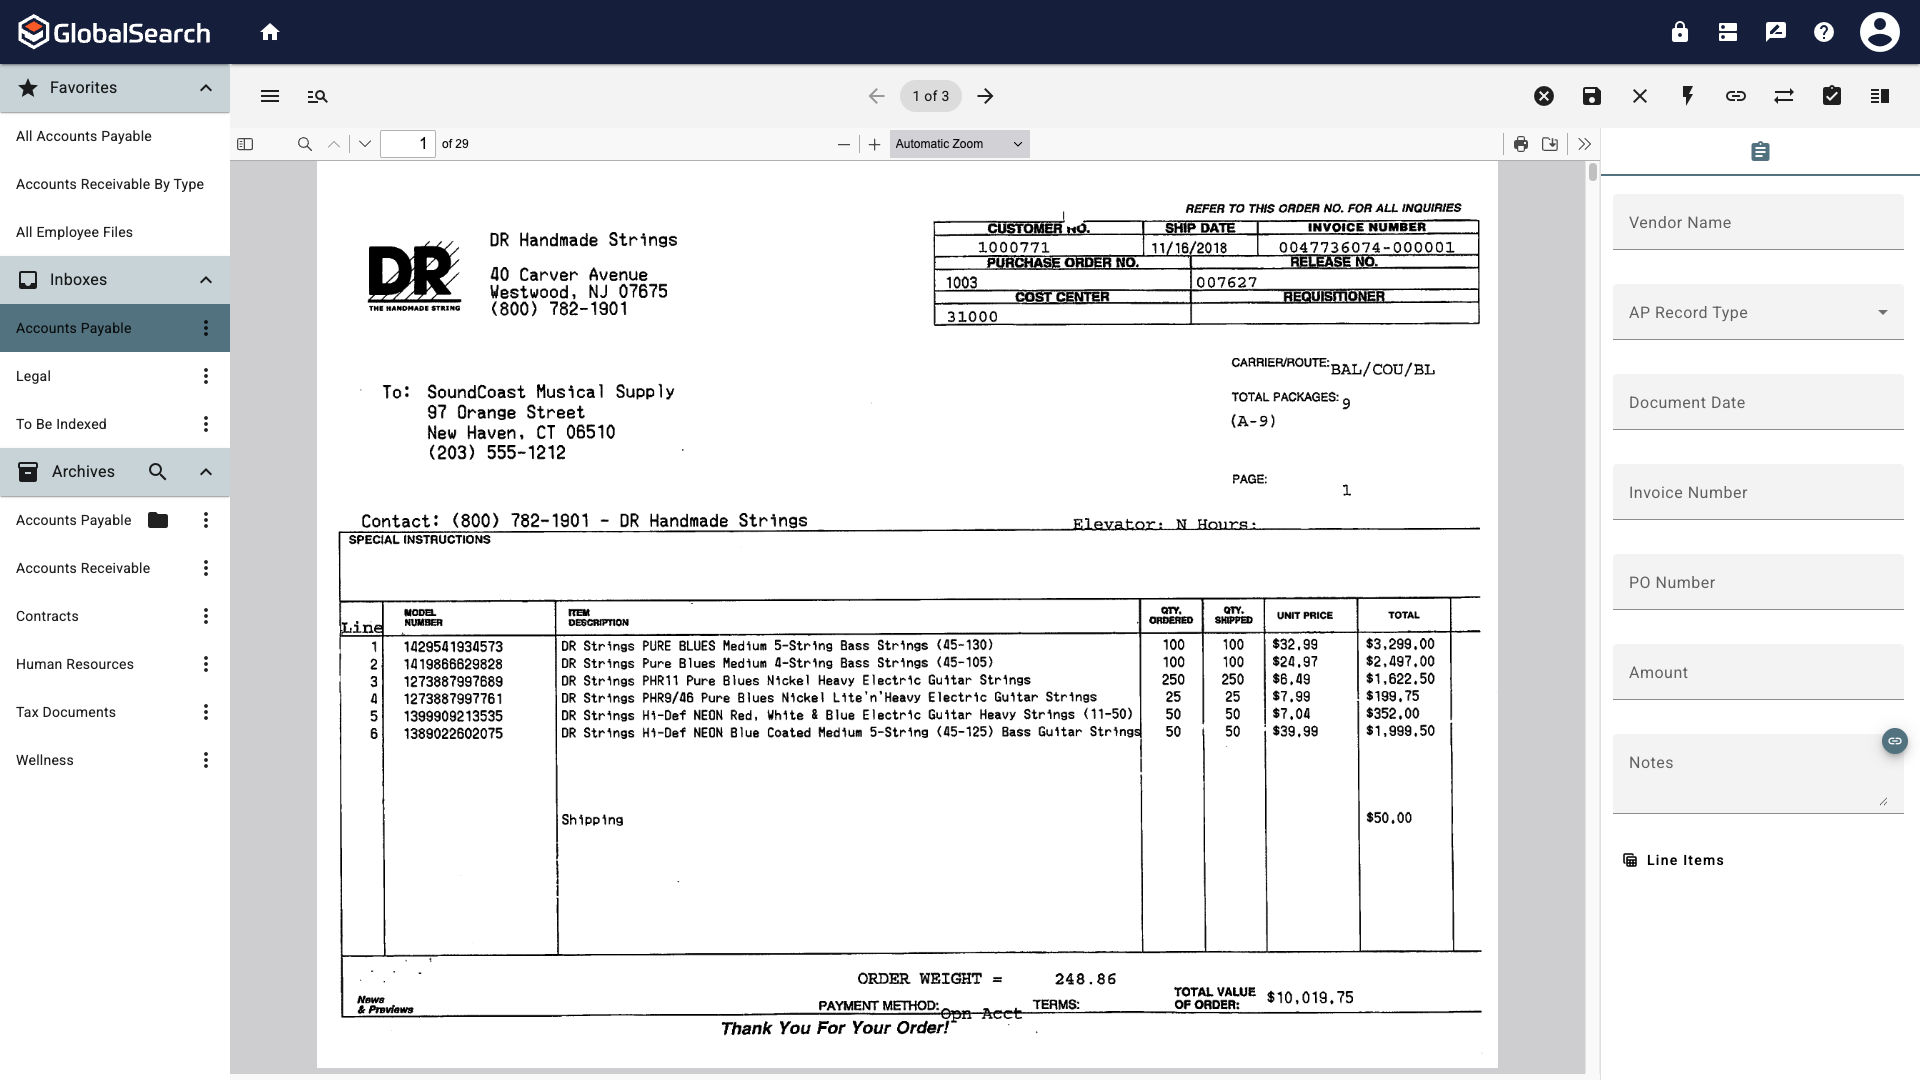
After indexing and saving the document, the next document to index will appear and default to the currently selected archive. To select a different archive see Changing the Destination Archive below.
From the Document Viewer
This method is useful when an inbox contains documents that may go to different archives and viewing the document before selecting an archive is desired.
-
Click on the Inbox that contains the document(s) to be indexed.
-
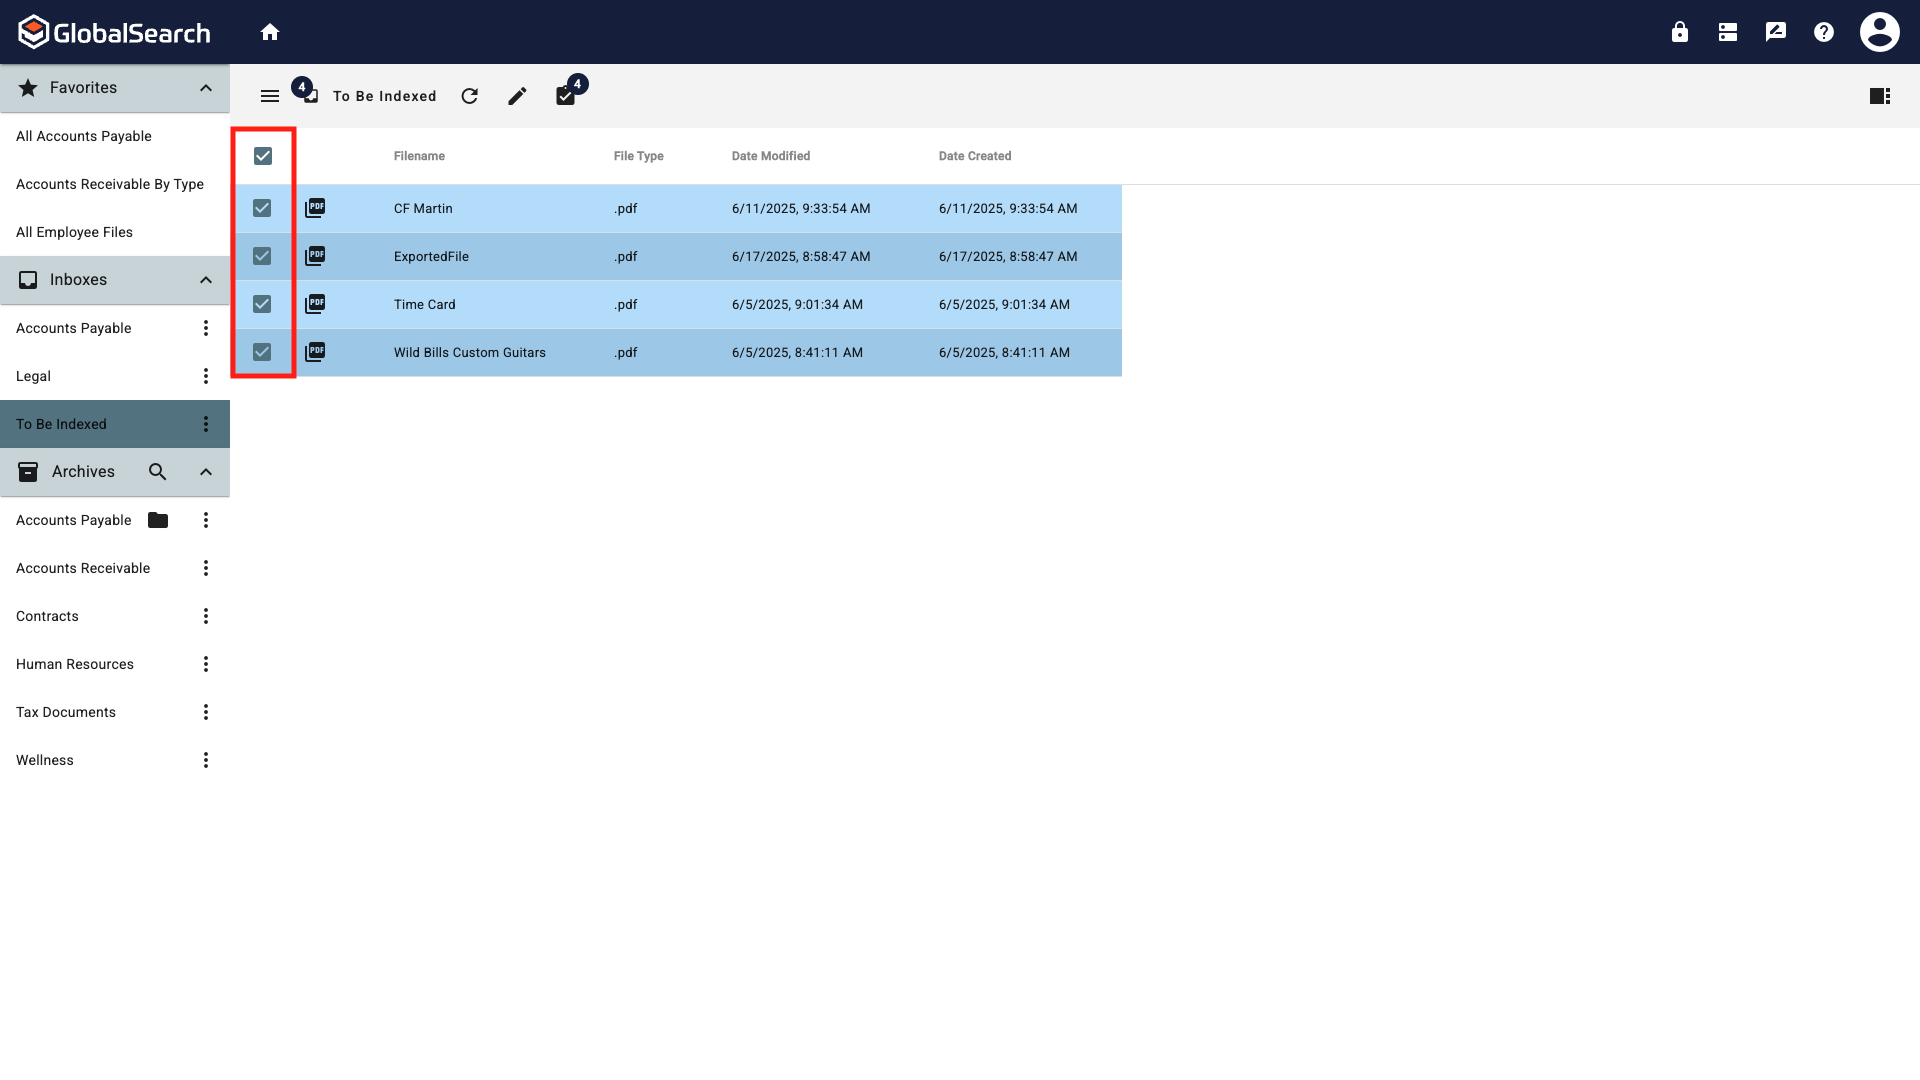
Select one or more documents to be indexed by clicking the checkbox next to the desired document(s) or click the check all box at the top to select all documents.
-
When the Select All checkbox is selected, the document will open in alphabetical order, regardless of any sorts on the Inbox.
-
If individual checkboxes are used, the document will appear in the order in which they are selected.
-
From the Actions menu, select Open Documents.
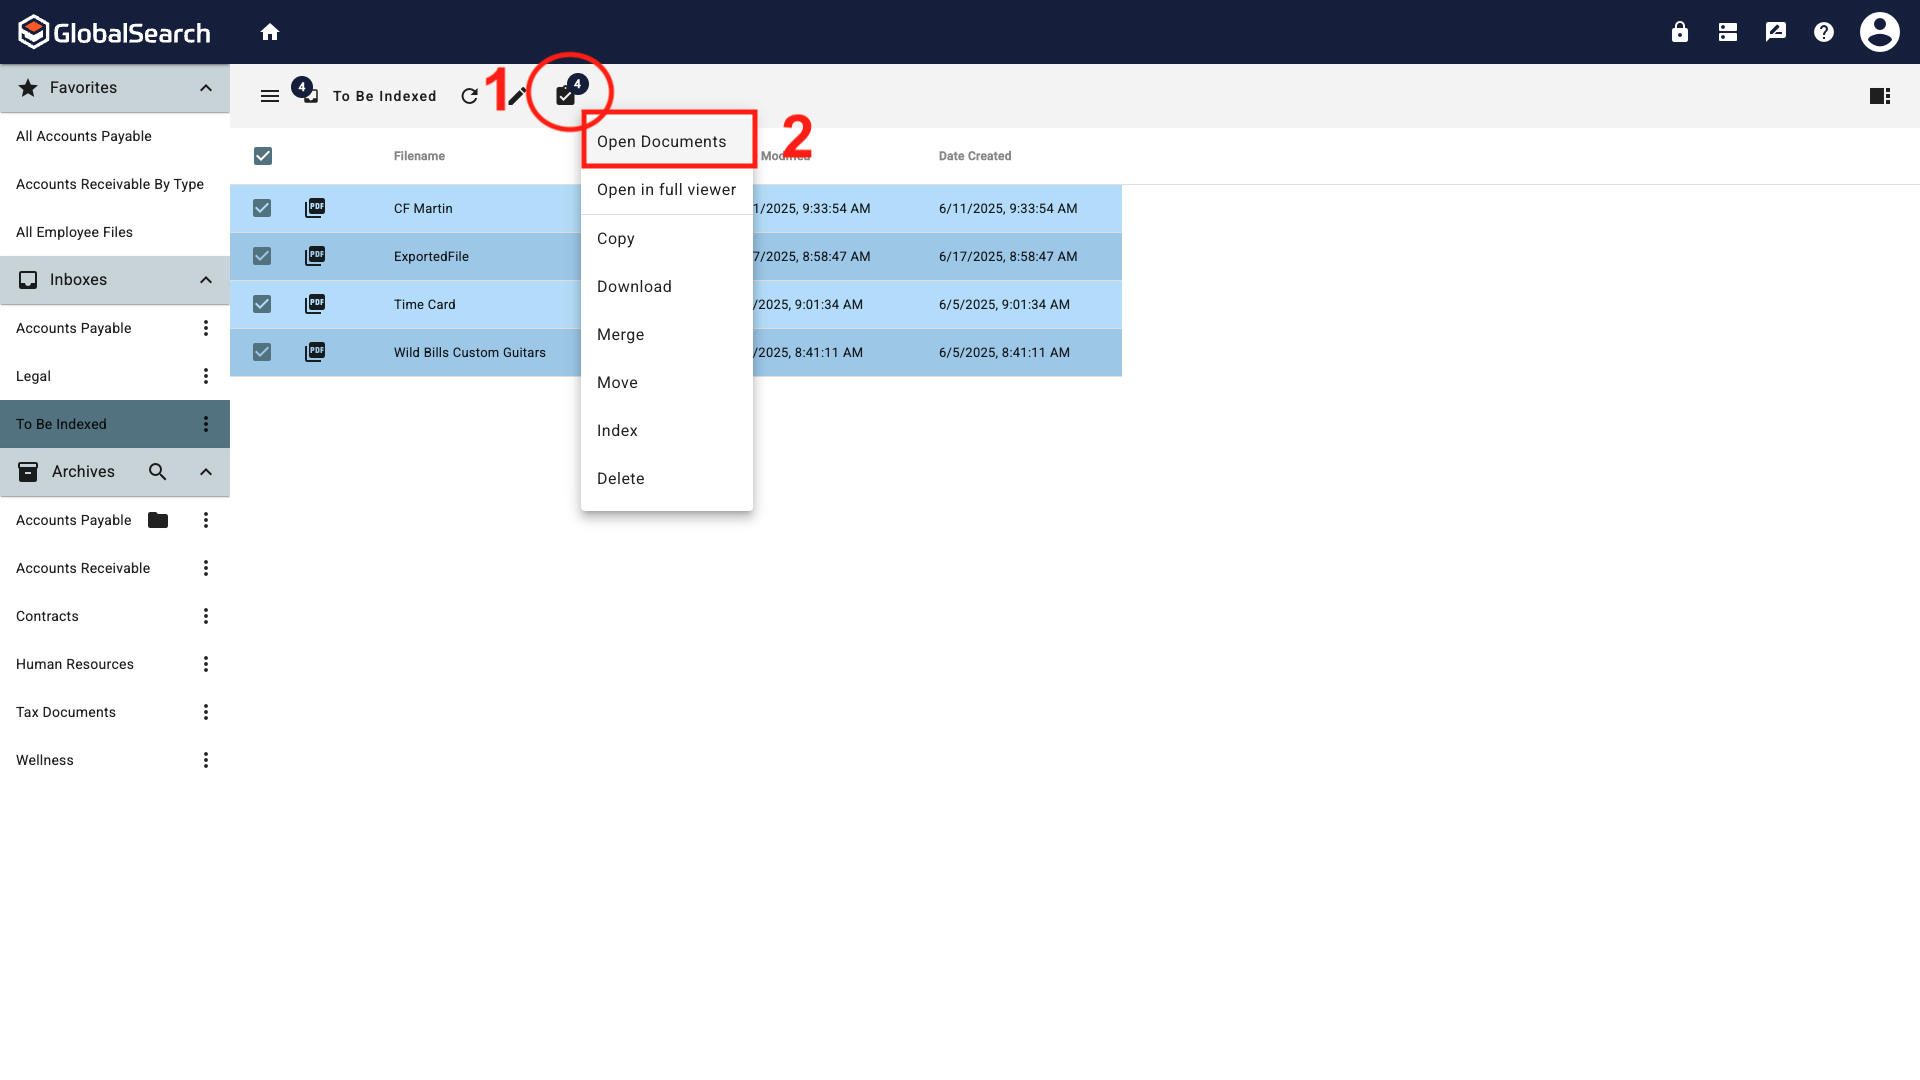
-
The documents will open in the Document Viewer with no Index Fields. From the Document Viewer Actions menu, select Index.
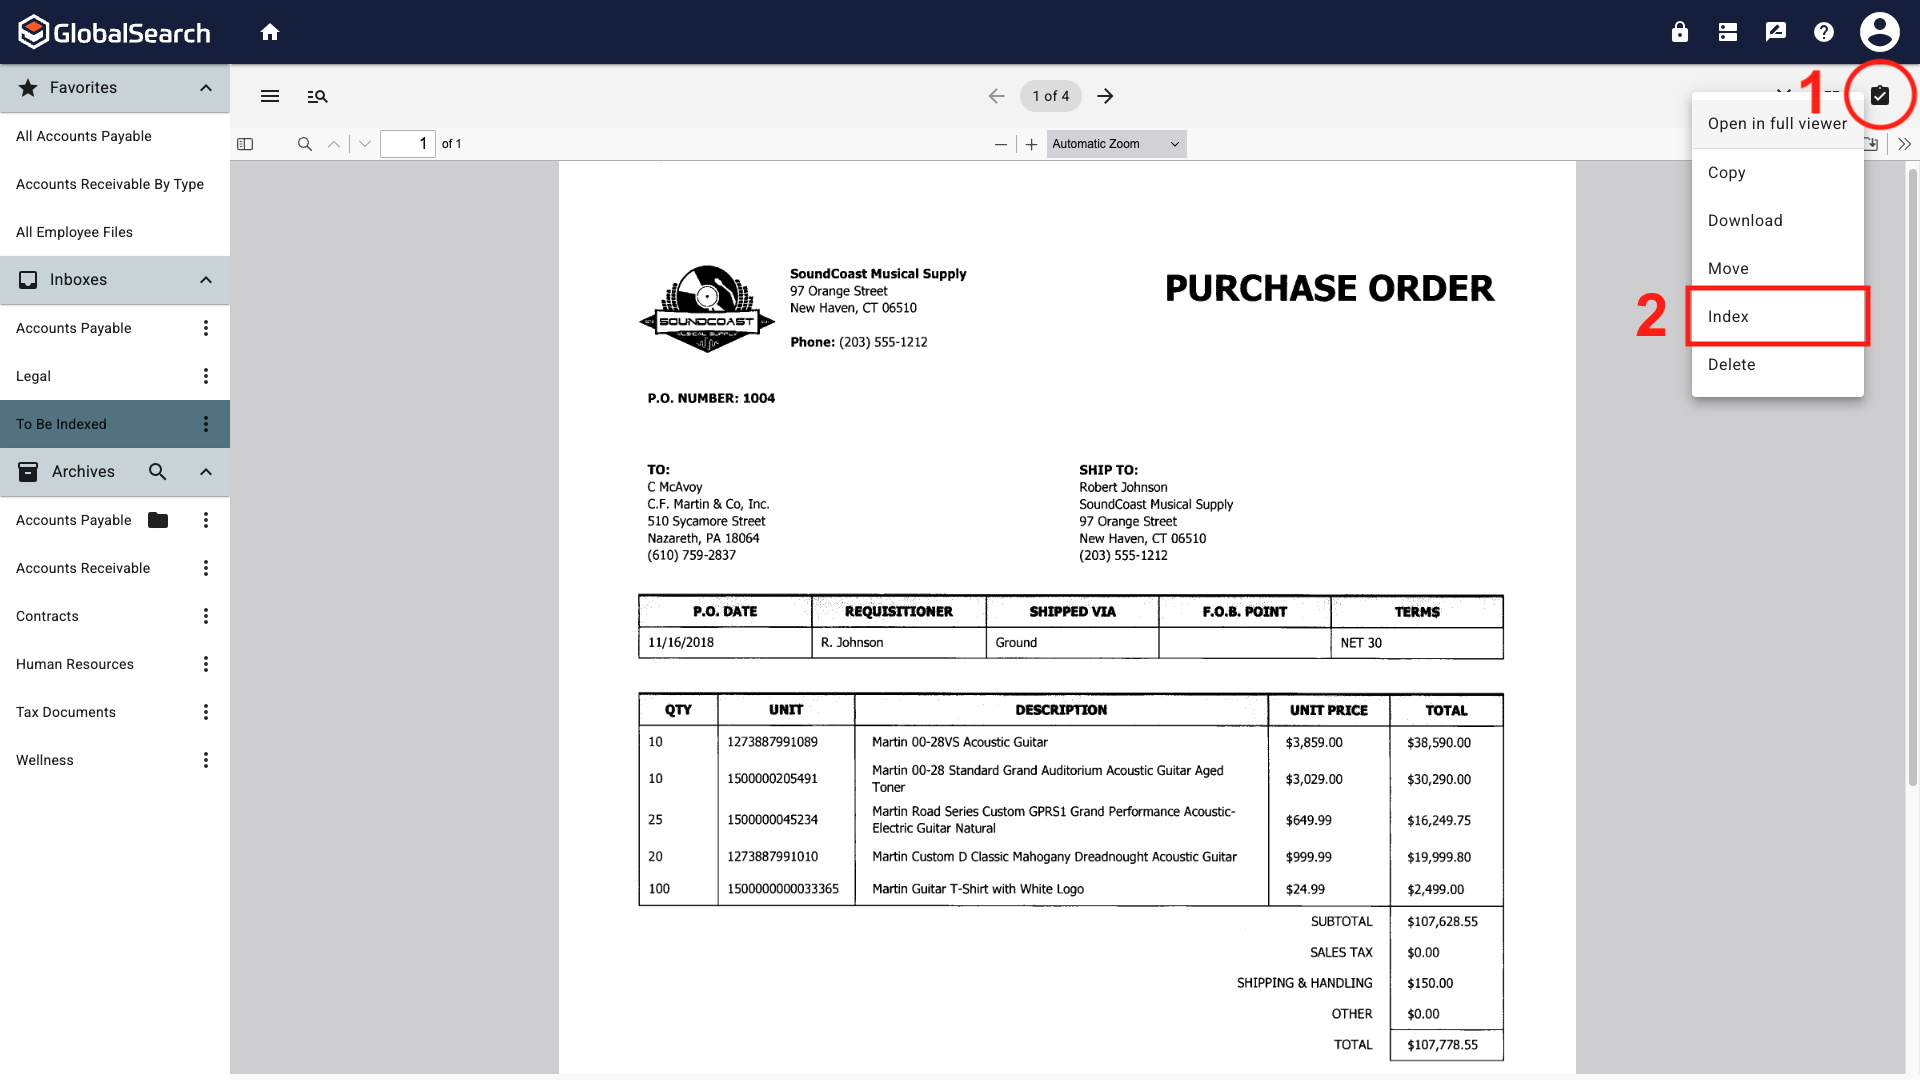
-
From the Destination popup, select the destination archive for the documents.
Archives with sub-archives will display with an arrow next to them. Click the arrow to display the list of sub-archives.
-
The Index Fields for the selected destination archive are now available. If Persist Archive Import Data is enabled, data from the previous indexing will populate the corresponding fields.
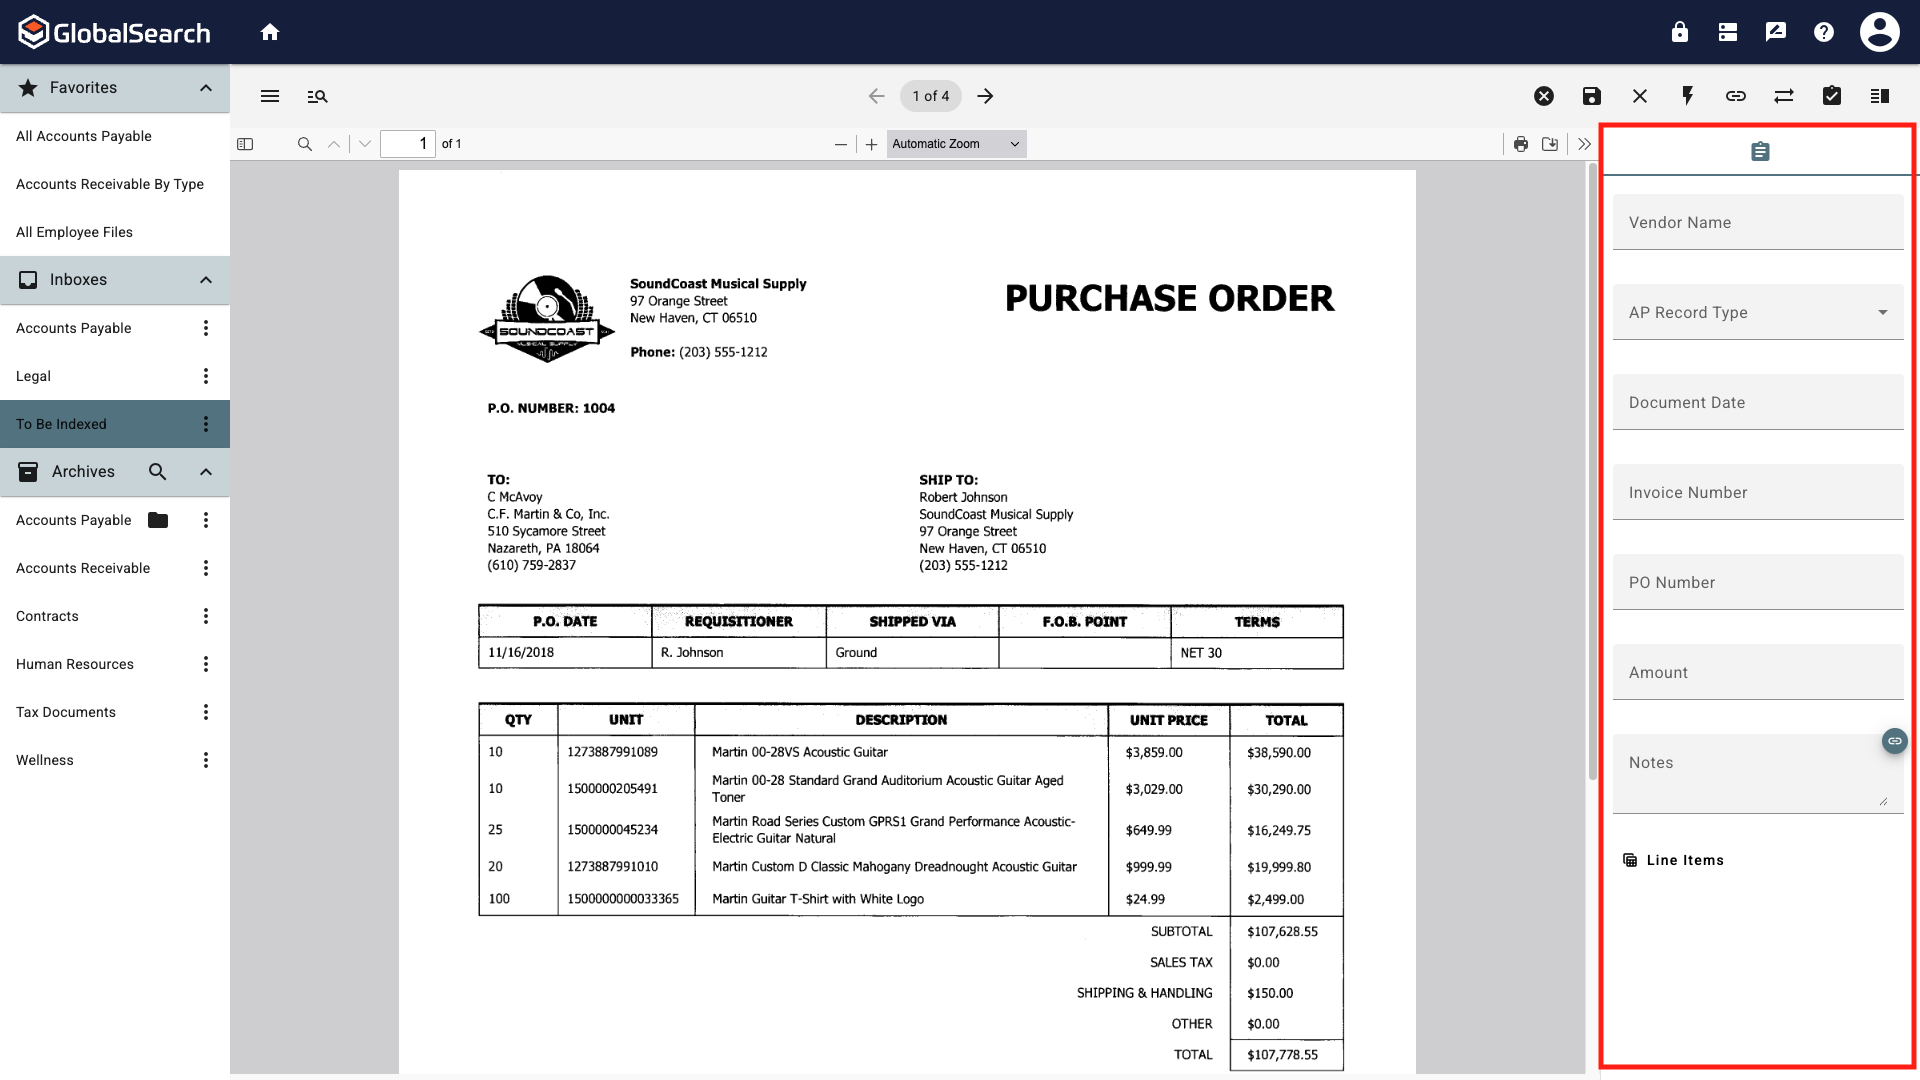
After indexing and saving the document, the next document to index will appear and default to the currently selected archive. To select a different archive see Changing the Destination Archive below.
Changing the Destination Archive
When indexing multiple documents, you may need to change the destination archive for a document.
-
From the Document Viewer Actions menu, select Index.
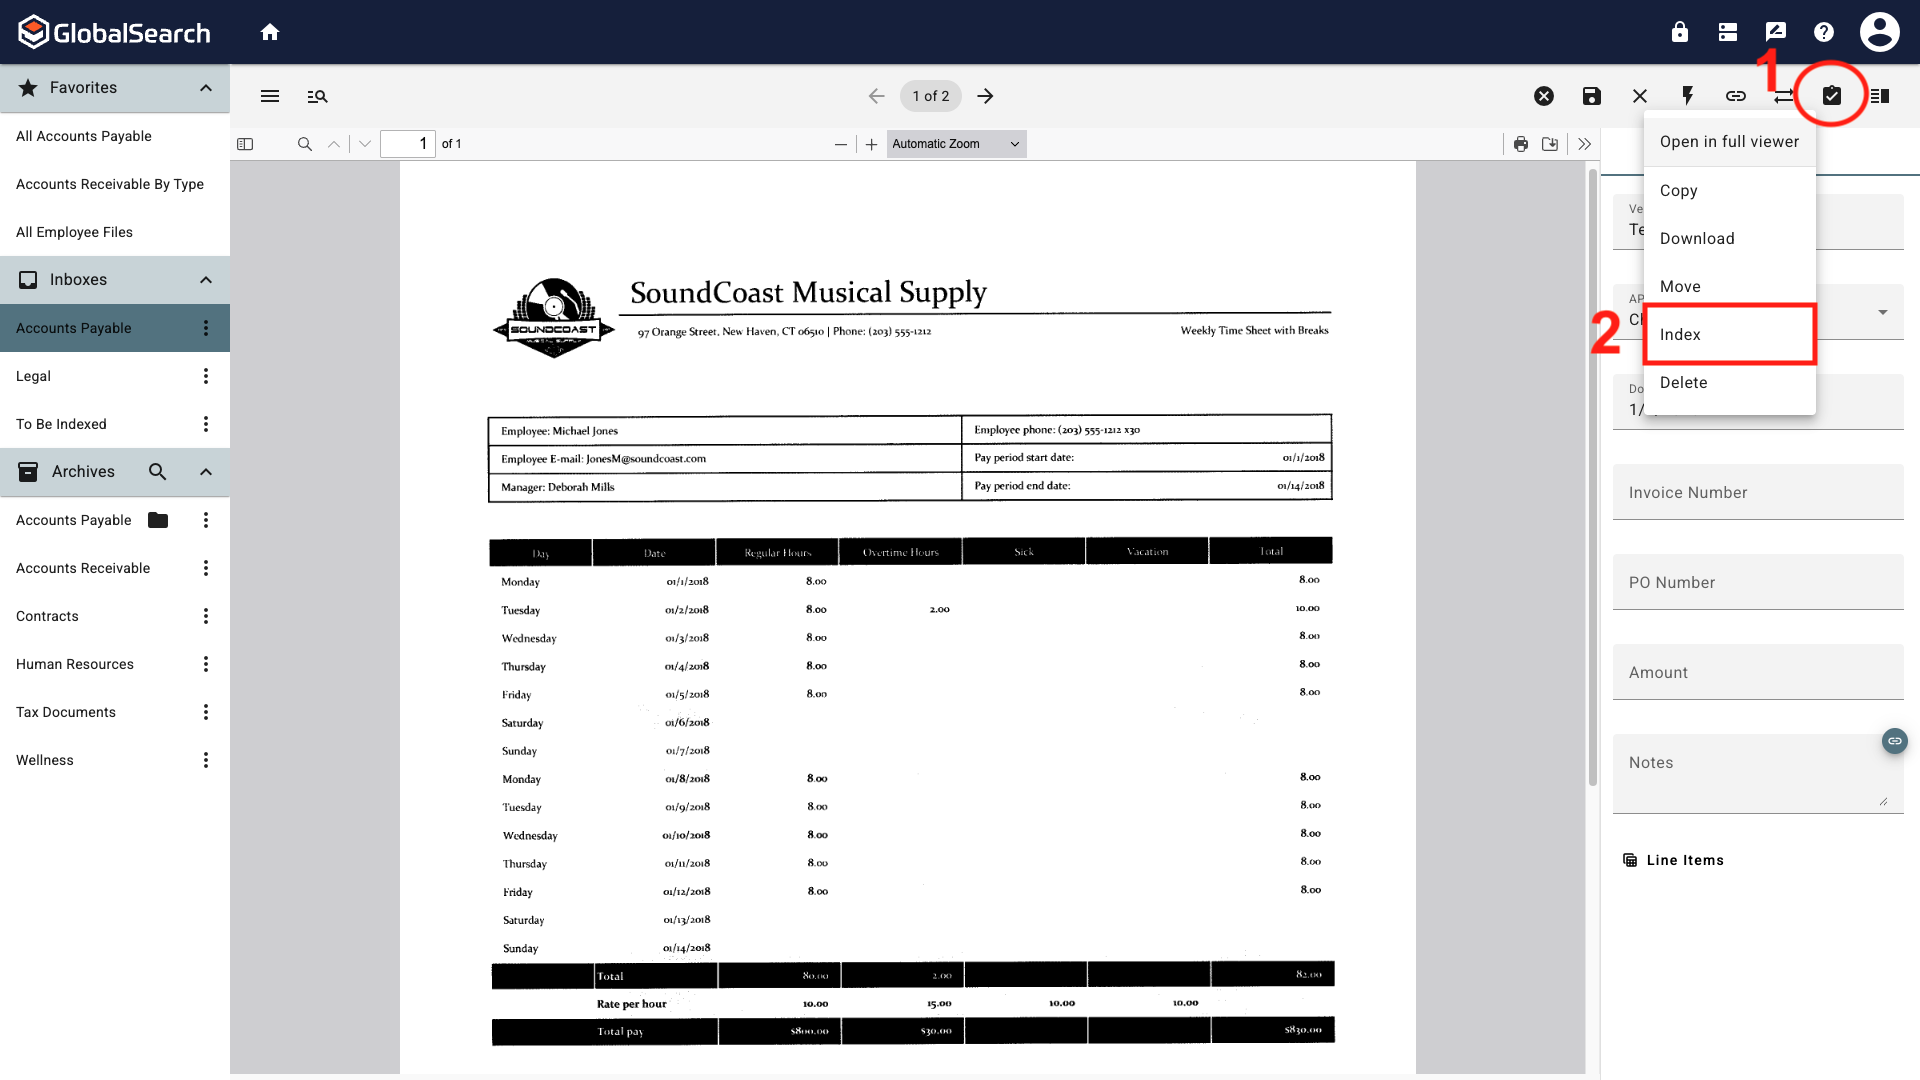
-
From the Destination popup, select the destination archive for the document.
-
The Index Fields now represent those of the new destination archive.
Persist Archive Import Data
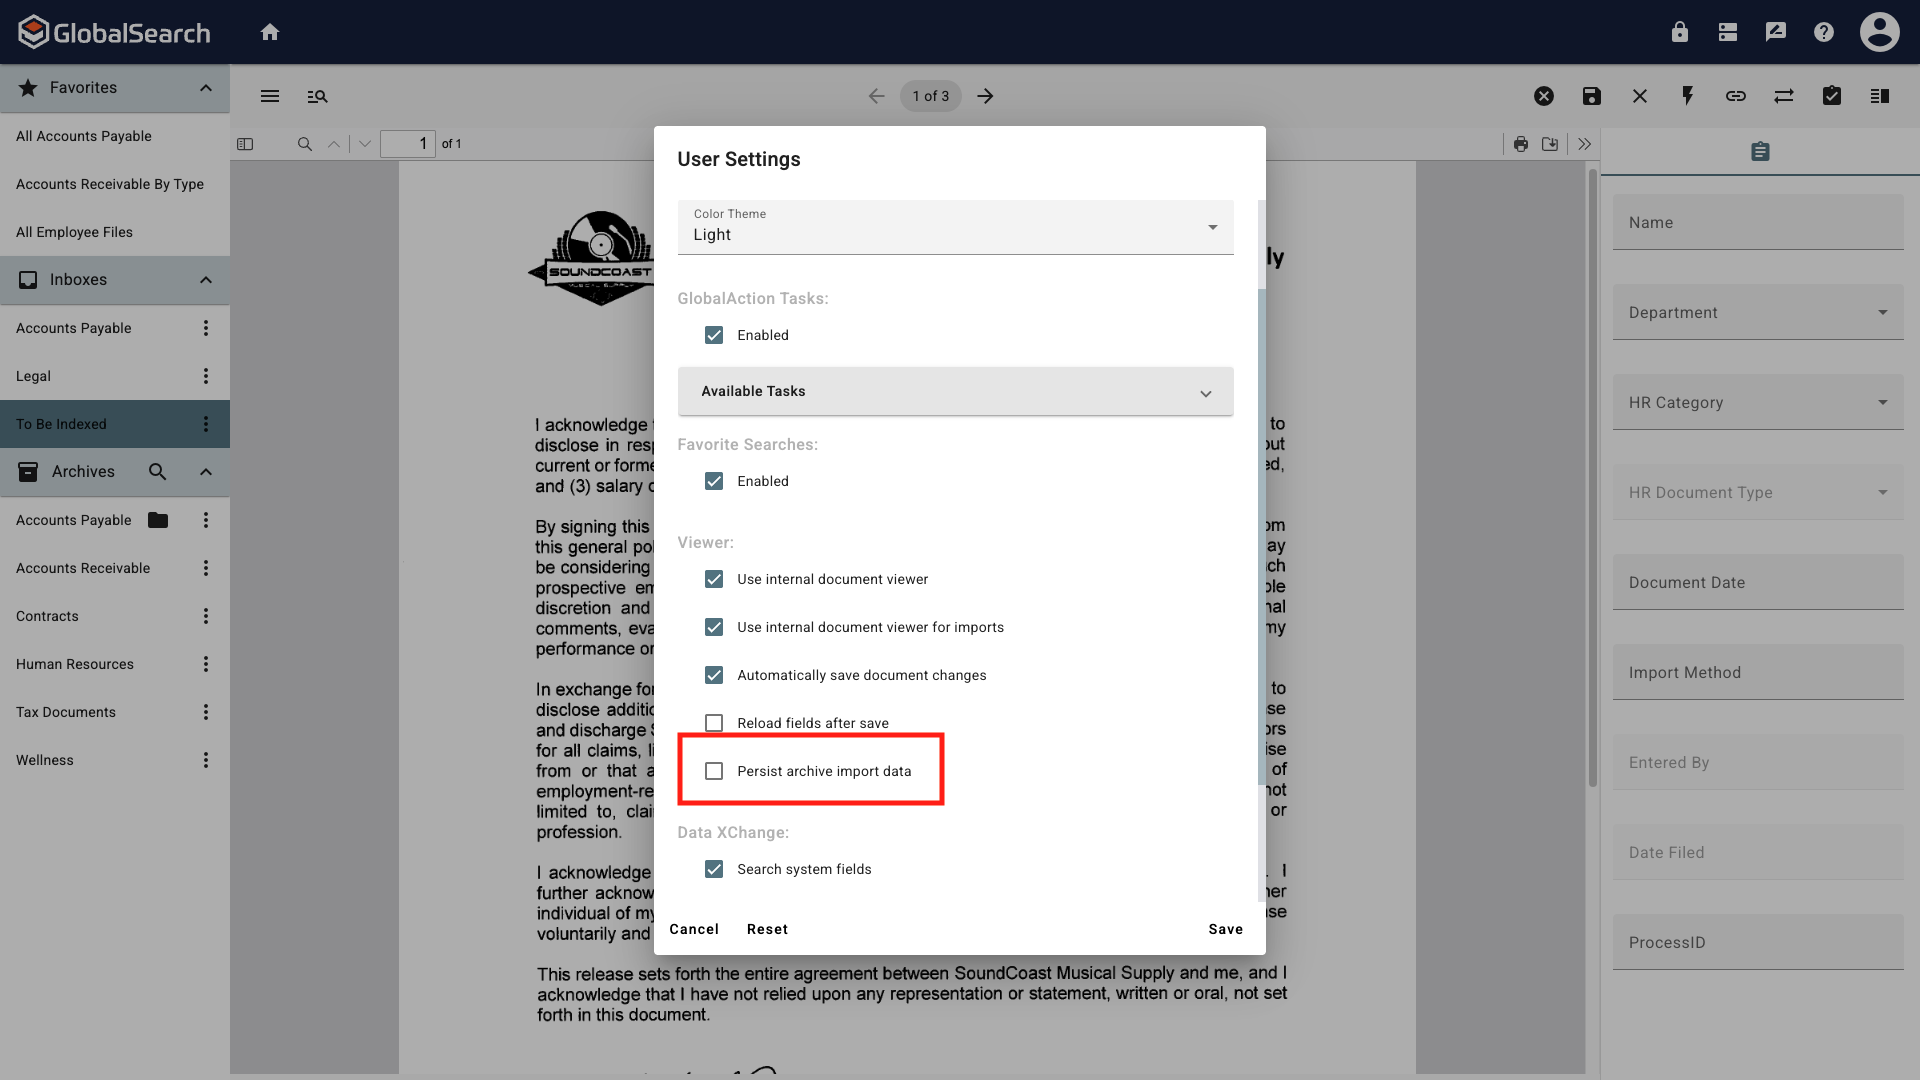
When indexing multiple documents, it may be beneficial to carry index data from one document to be indexed to the next to reduce repeated data entry. For example, when indexing Human Resources documents for a new hire, carrying the Employee Name, Employee Number, Department, etc. from one document to the next would be helpful. To enable this:
-
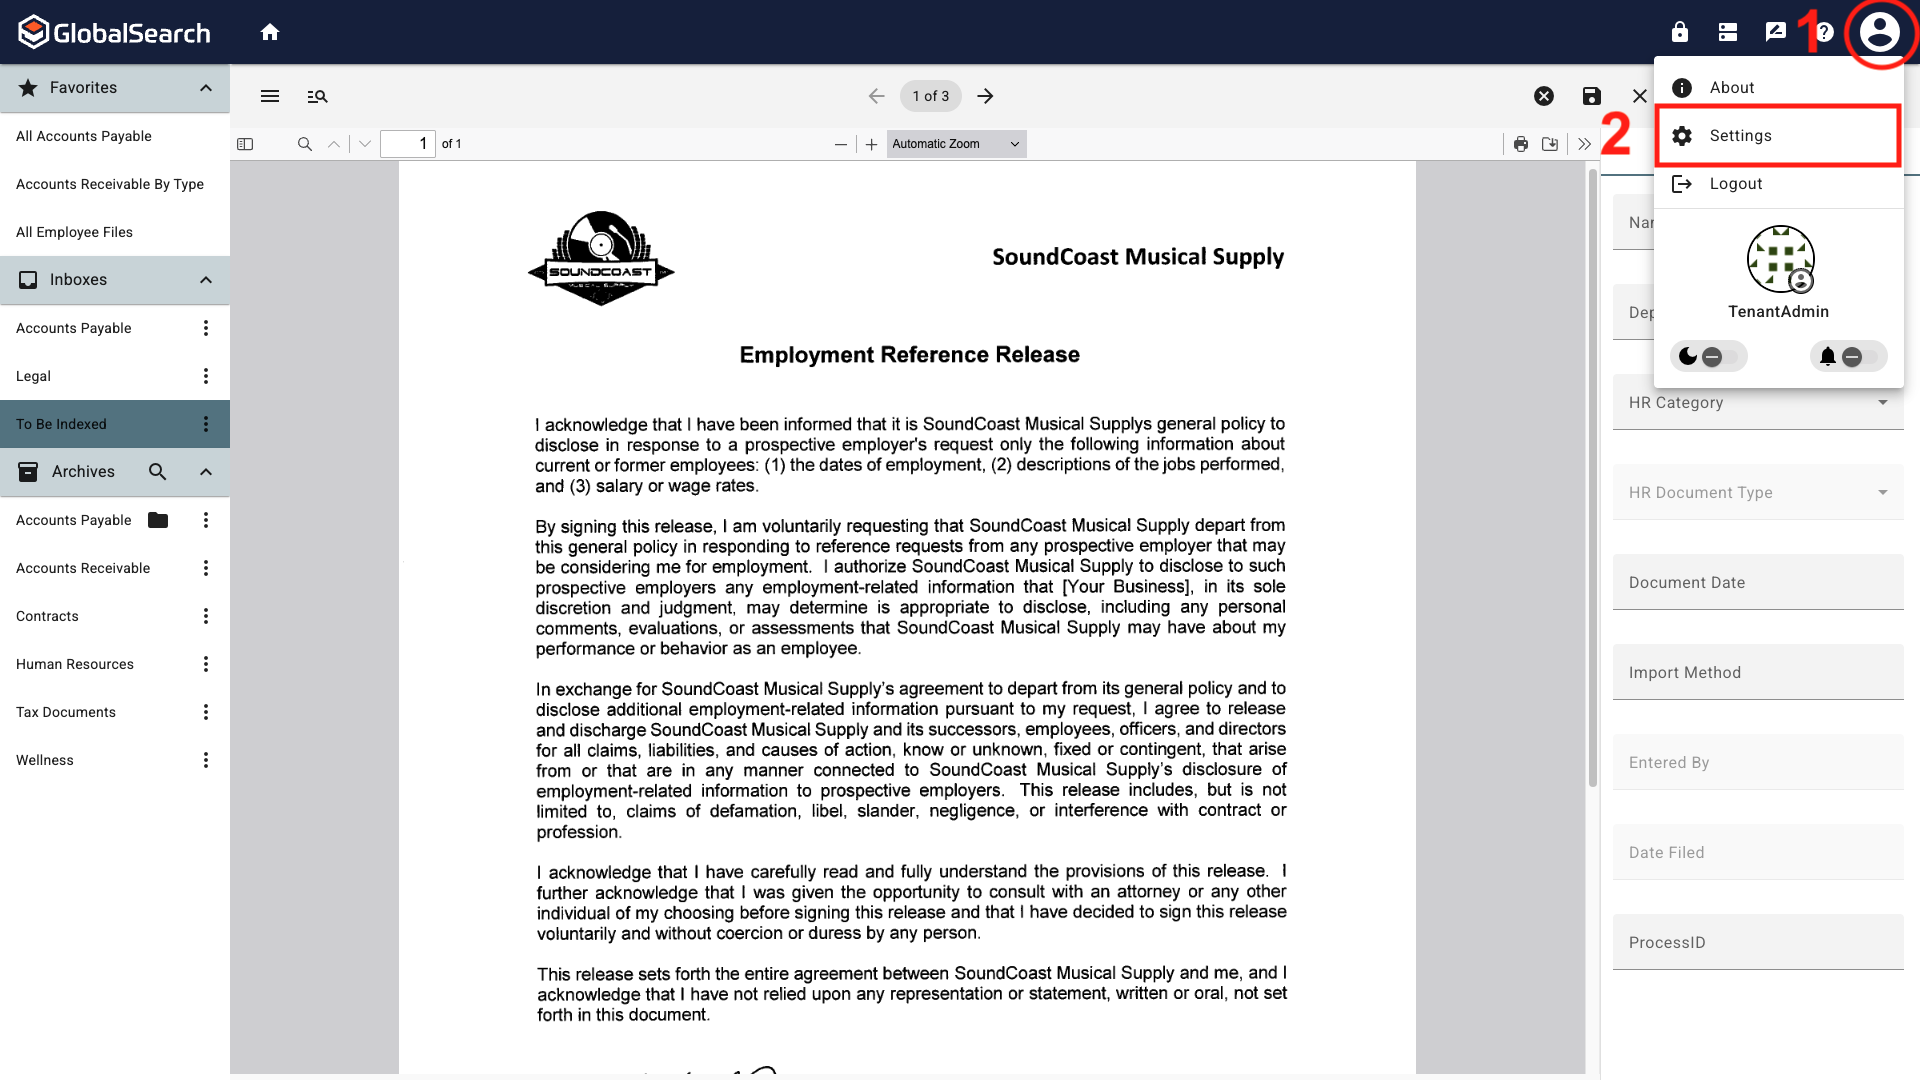
Access the User Settings by clicking your avatar in the top, right corner and selecting Settings.
-
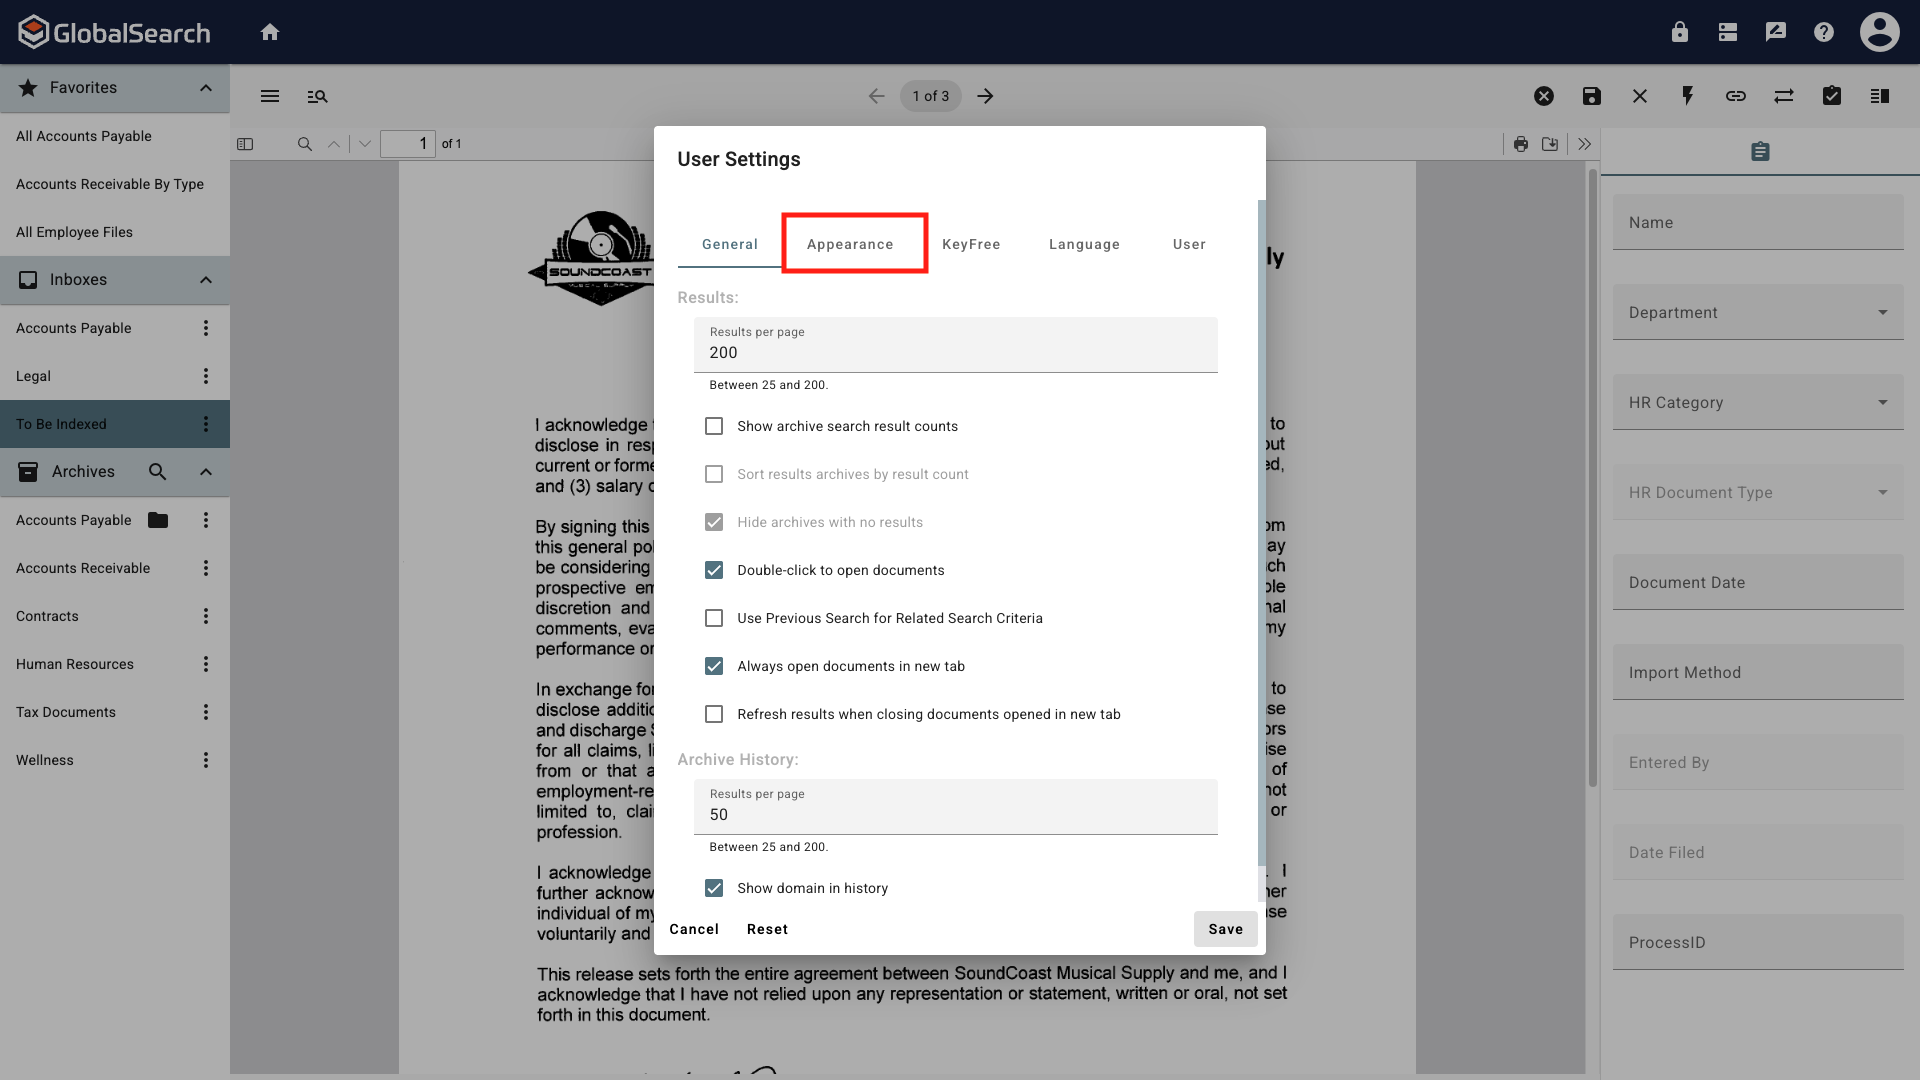
Click the Appearance tab.
-
Under Viewer, enable Persist Archive Import Data.
-
Click Save.
-
Refresh your browser window so the changes will take effect.
-
Index the document, Save the document, and move on to the next document. The data from the previous document appears in the index fields. This data can be used as is or modified.