Updating Your Client Secret
Client Secrets have an expiration that is set when the secret is created. It is best practice to replace the Client Secret before it expires becuase once it expires, the workflow will no longer release documents to SharePoint.
Generating a New Client Secret
-
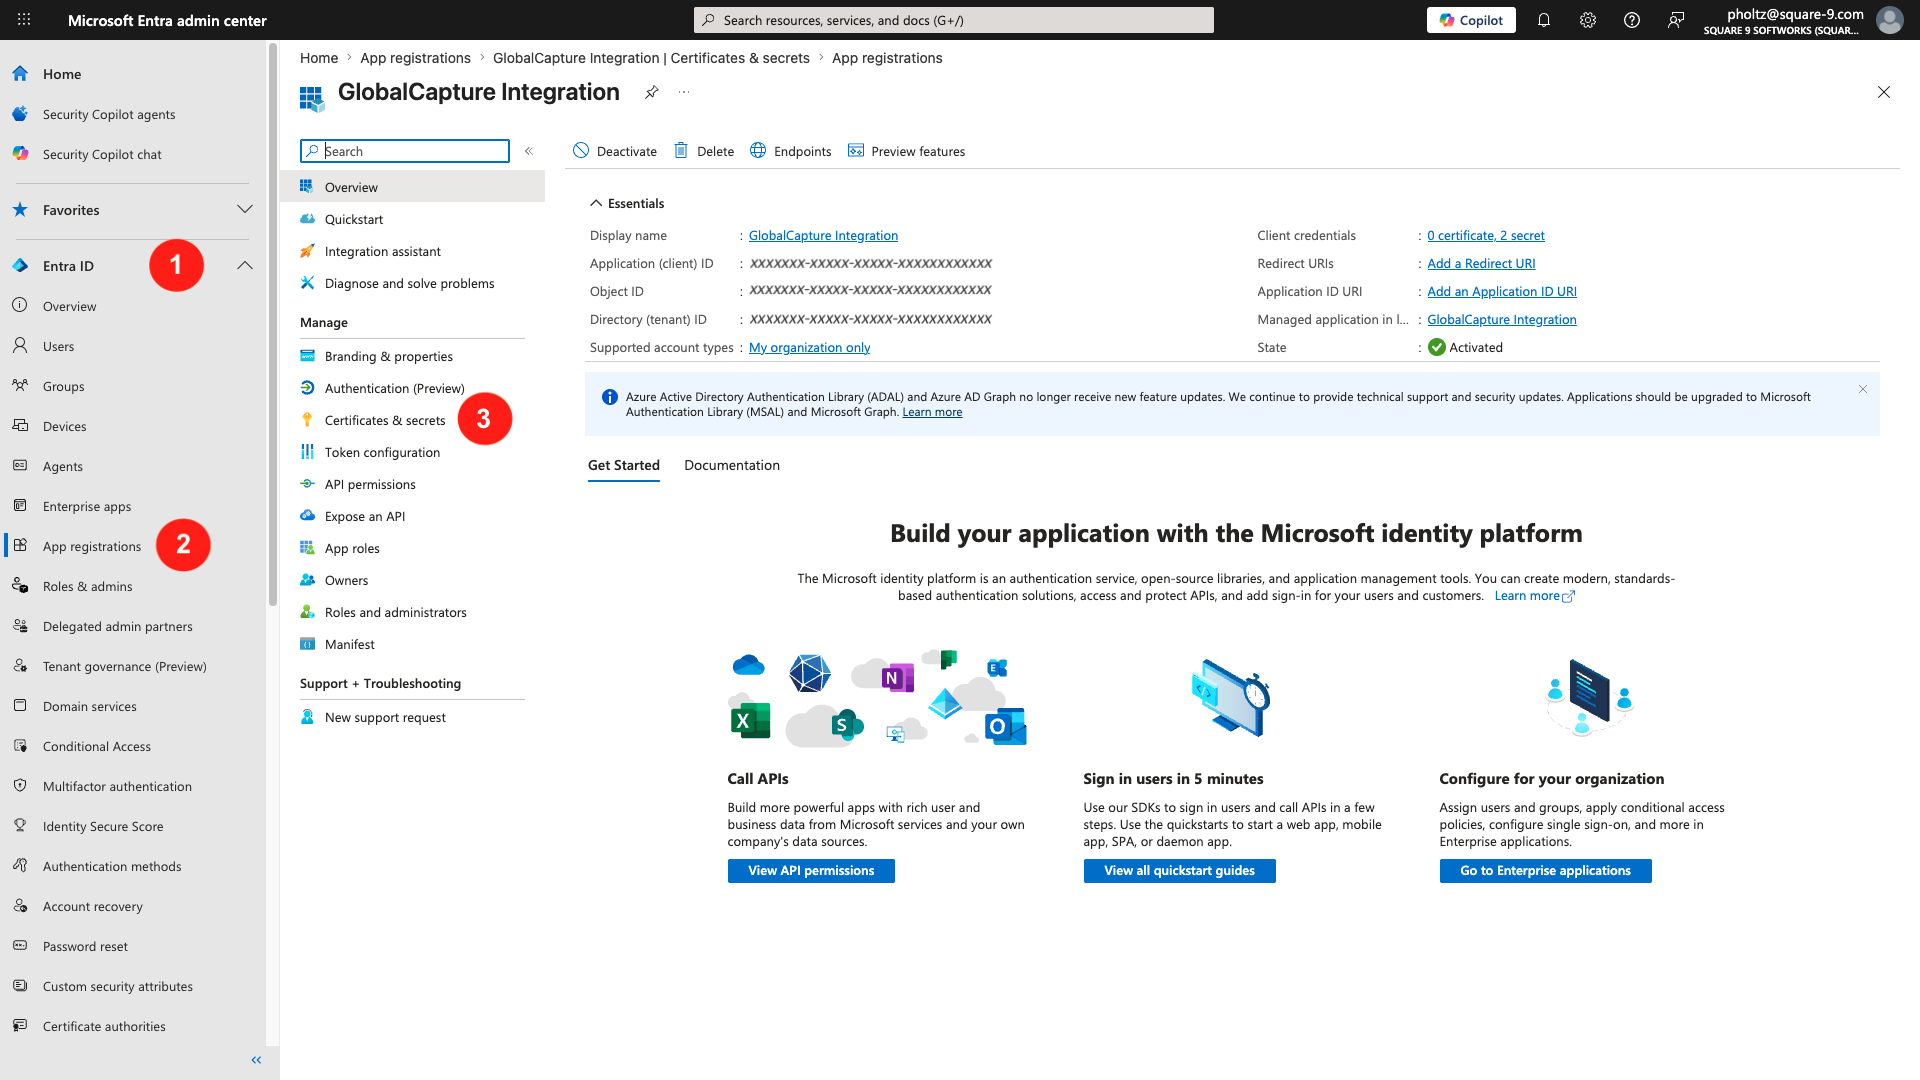
Login to your Microsoft Entra admin center (Azure AD) and create an App registration. Expand Entra ID and select App registrations.
-
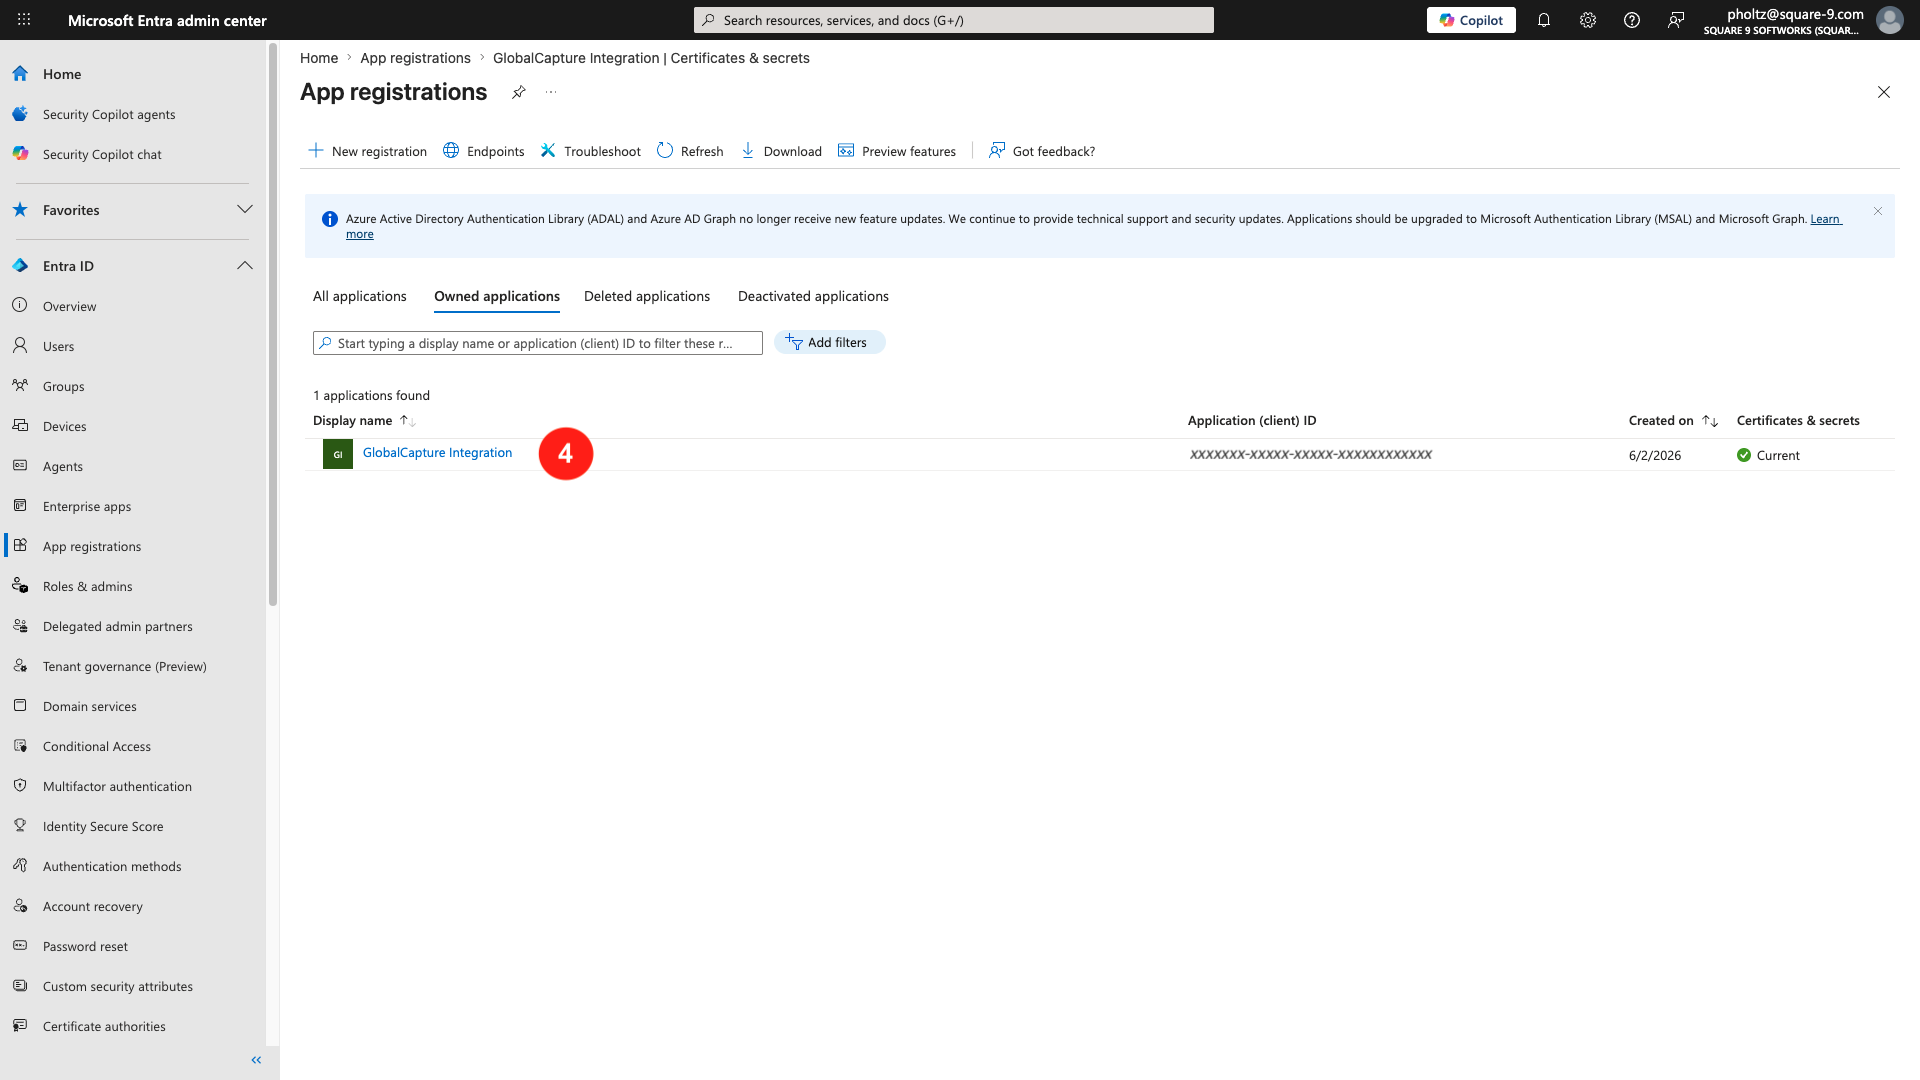
From the list of apps on either the All applications tab or the Owned applications tab, click the App Registration that is being used by GlobalCapture.
-
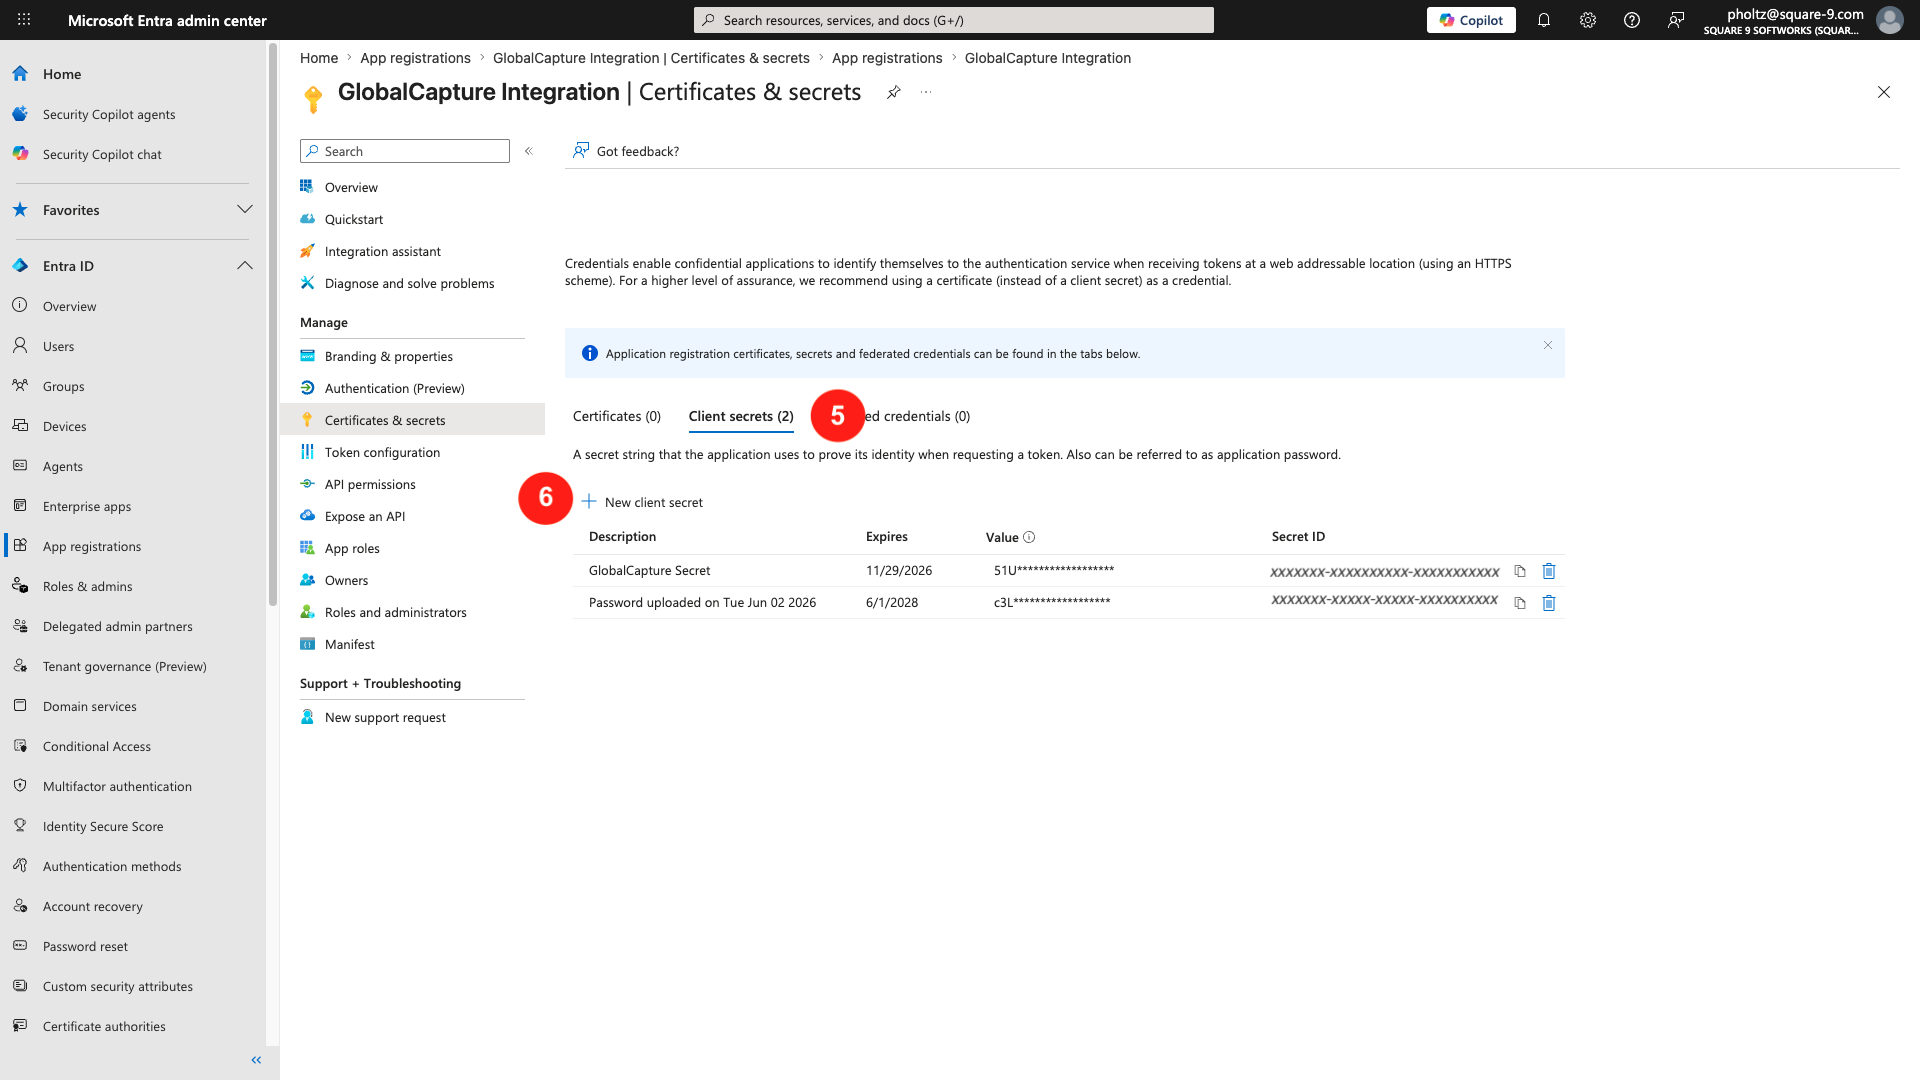
From the Applications left menu, select Certificates & Secrets.
-
On the Client secrets tab, you will see a current list of secrets and their expiration dates. Click + New client secret to generate a new Client Secret.
-
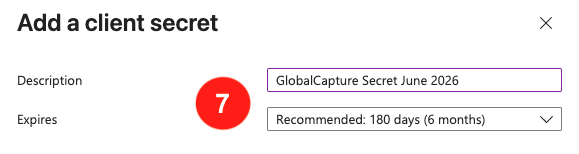
Give your new secret a Description and set an Expires date.
You will need to make sure you refresh the secret prior to it’s expiration for continued fuction.
-
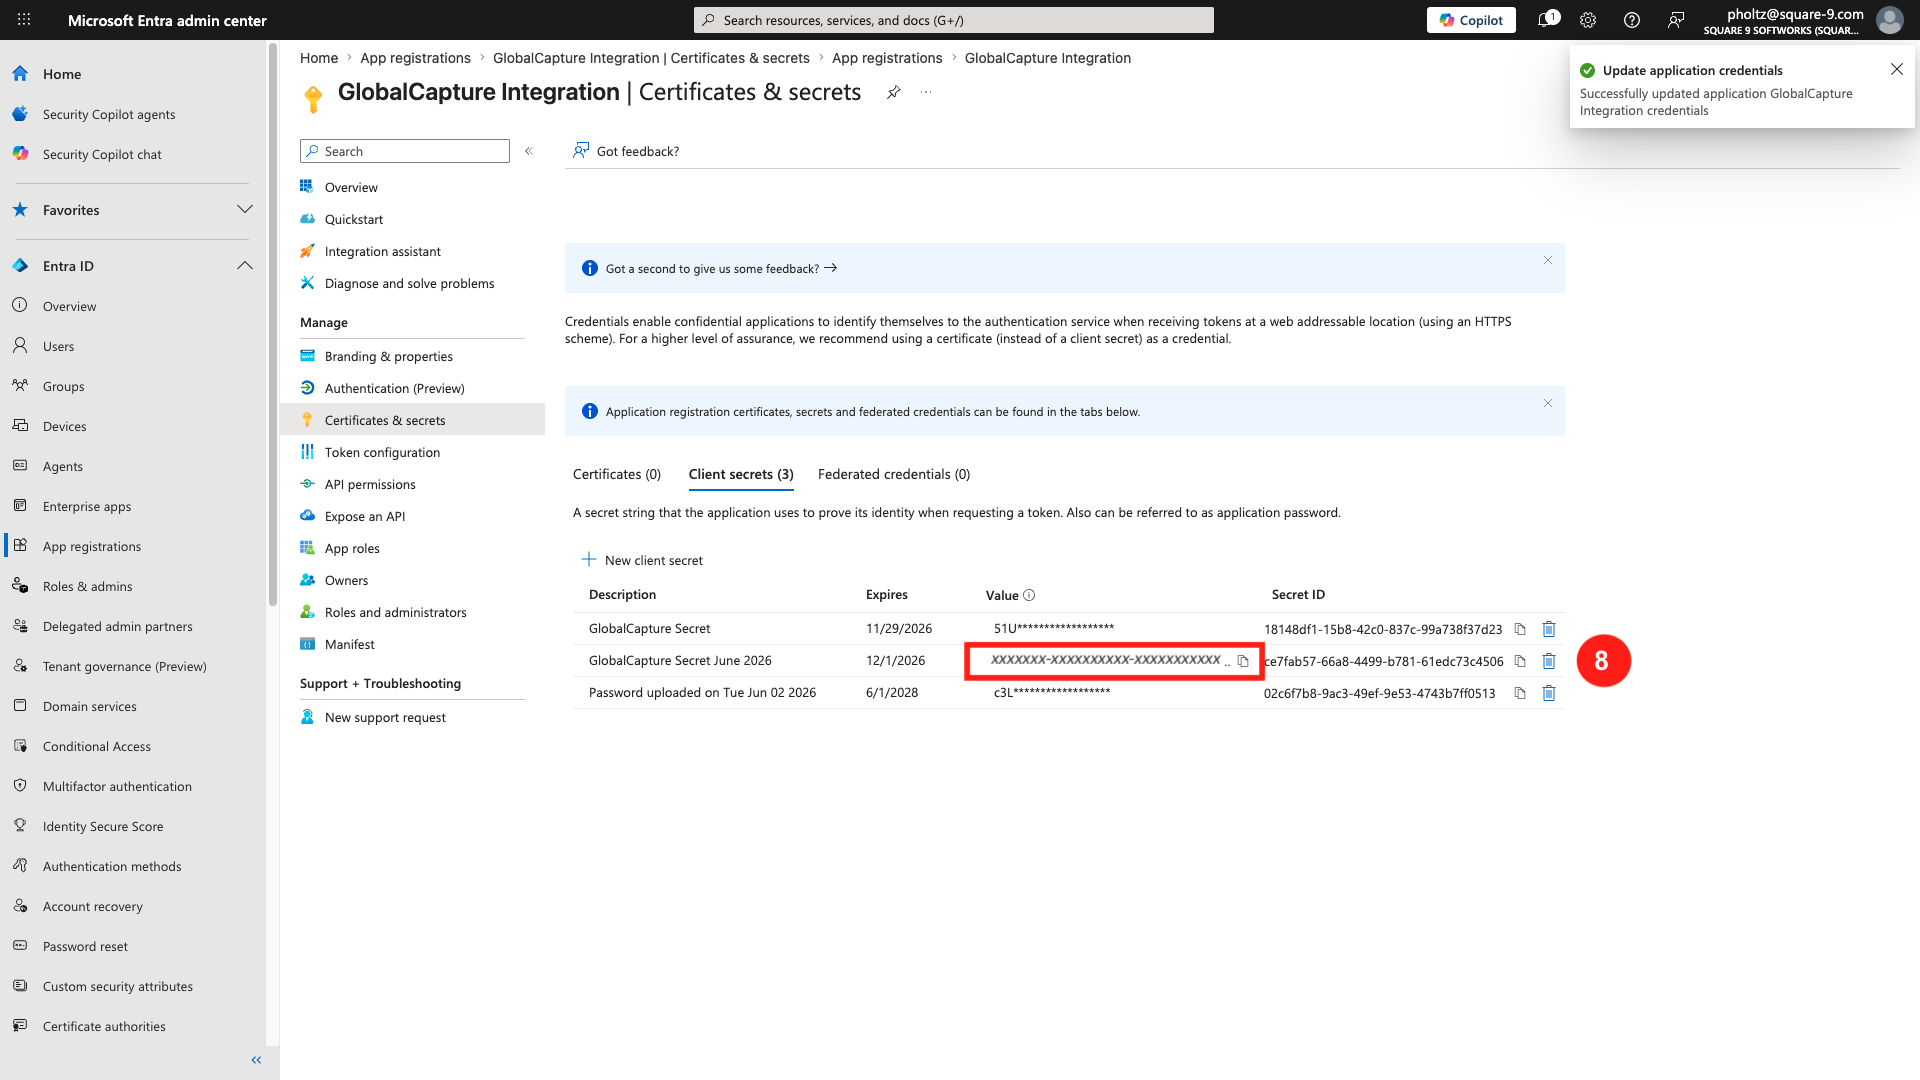
App registration will generate a client secret and add it to the list. Make sure you record the Value of this secret as it will be obscured and can no longer be accessed.
If you lose the secret value or don’t record it, you will need to generate a new secret.
Adding the New Client Secret To Your Workflow
-
Login to GlobalCapture as an Administrator and select the Design (

-
Open your workflow that is releasing to SharePoint.
-
If your workflow is using Process Fields and Square 9 Notation:
-
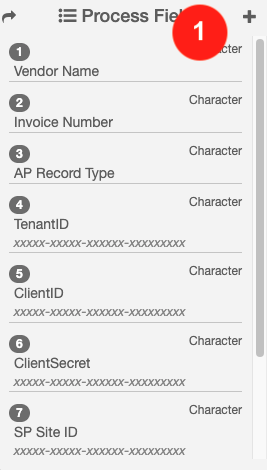
Click the + button in the Process Fields Pane.
Access Process Field Default Values -
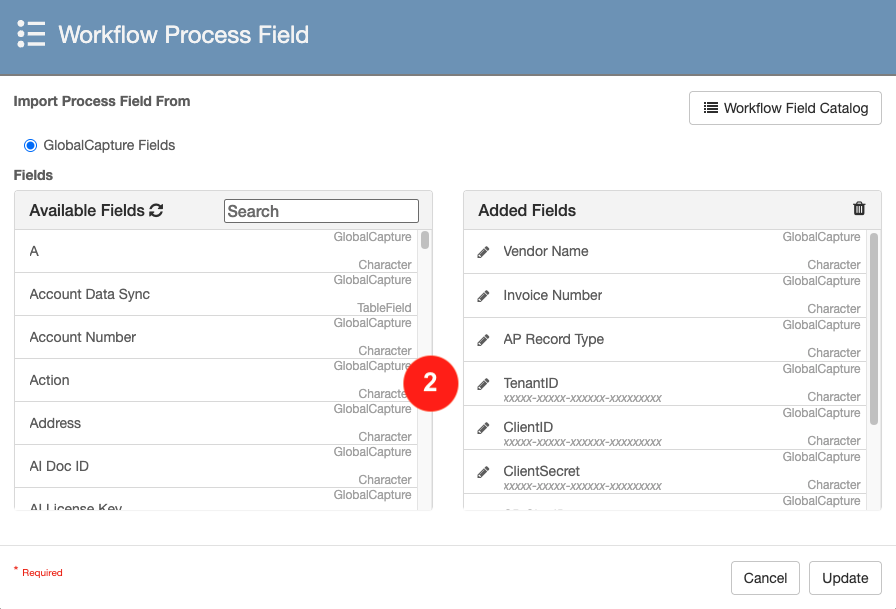
Click the Edit (

Edit Default Value -
In the text box that appears, paste in your new Client Secret.
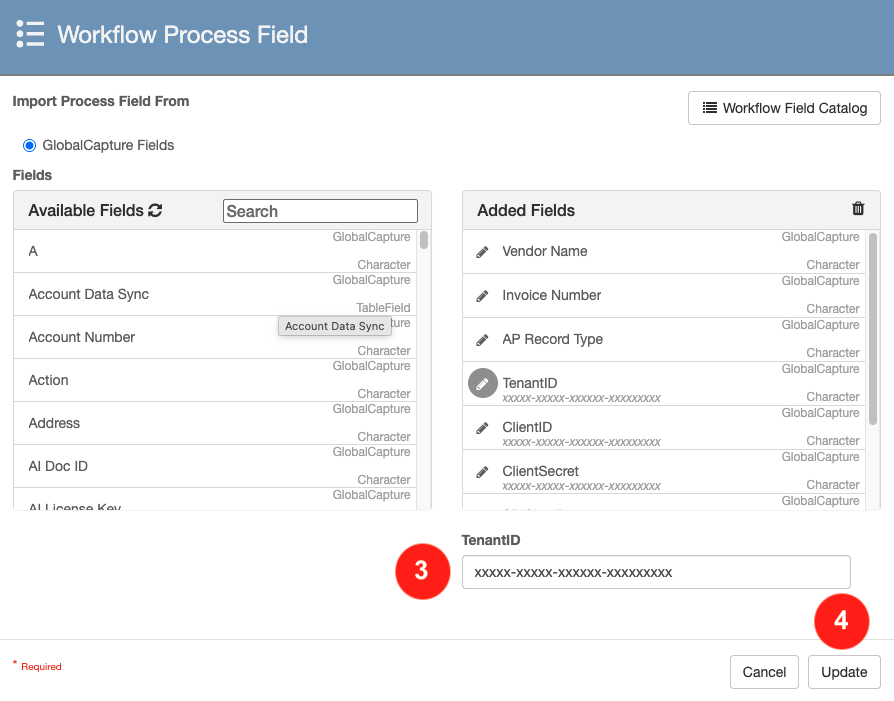
Update Value and Save -
Click Update.
-
Save your workflow.
-
-
If your workflow is NOT using Process Fields and Square 9 Notation.
-
Open the iPaaS node Settings by double clicking on the iPaaS node.
-
Expand Connection Settings.
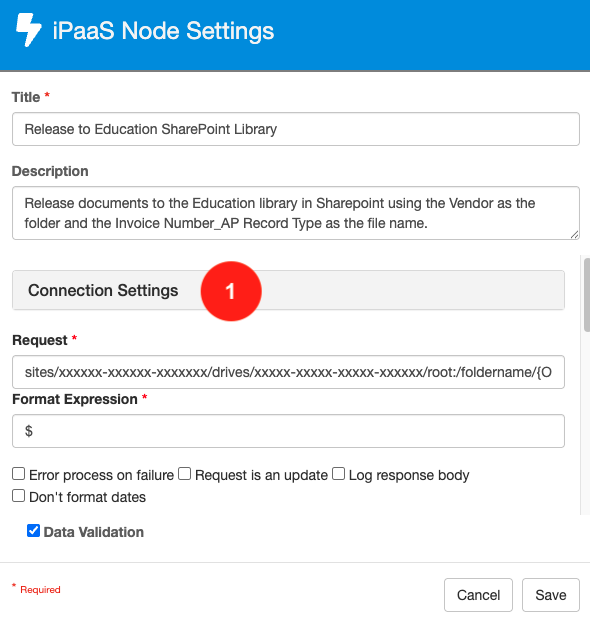
iPaaS Node Settings -
In the Auth Request Body, replace the value for client_secret with the new value.
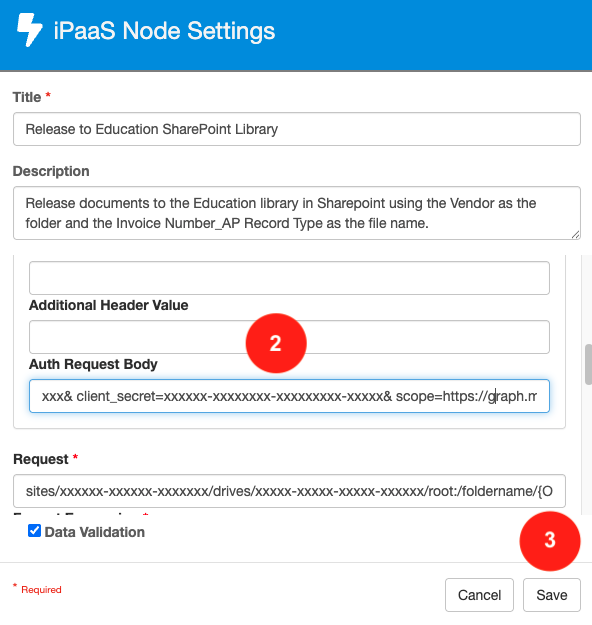
Auth Request Body grant_type=client_credentials& client_id=YourClientID& client_secret=YourNewClientSecret& scope=https://graph.microsoft.com/.default -
Click Save.
-
Save Your workflow.
-
The Auth Request Body needs to be URL encoded. There must be an & at the end of the Client Secret.