
Use the following sequence to setup permissions in Entra for access to Sharepoint object via Graph API. This is the modern approach to integration with Sharepoint, and requires an iPaaS license for Square 9. To configure the iPaaS node you will need the following from the App registration:
-
Tenant ID
-
Applicaiton (client) ID
-
Client Secret
Microsoft will from time to time update interfaces and documentation. It’s always advised to refer to current docs for proper configuration.
https://learn.microsoft.com/en-us/entra/identity-platform/quickstart-register-app
Creating the App Registration
-
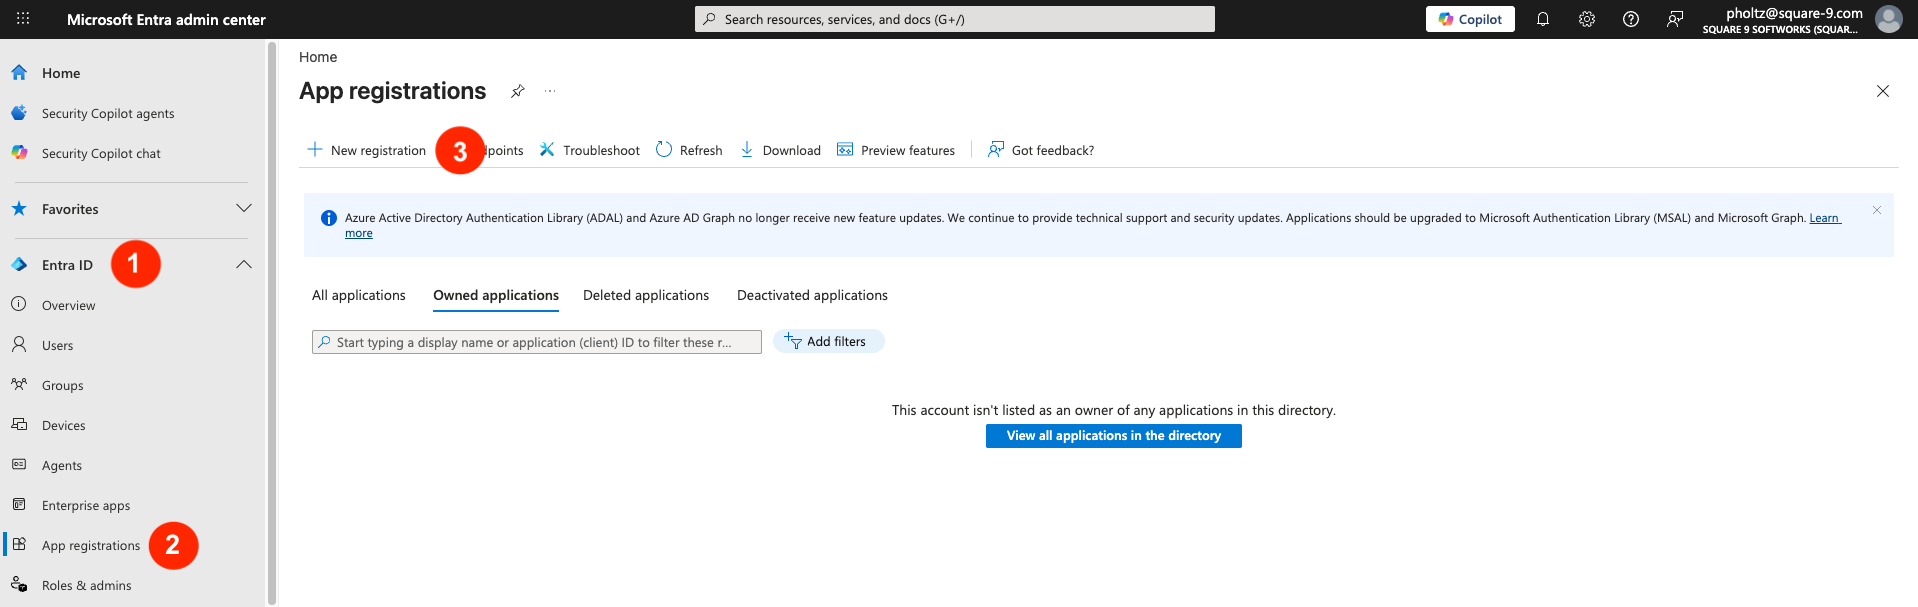
Login to your Microsoft Entra admin center (Azure AD) and create an App registration. Expand Entra ID, select App registrations, then click +New registration.
-
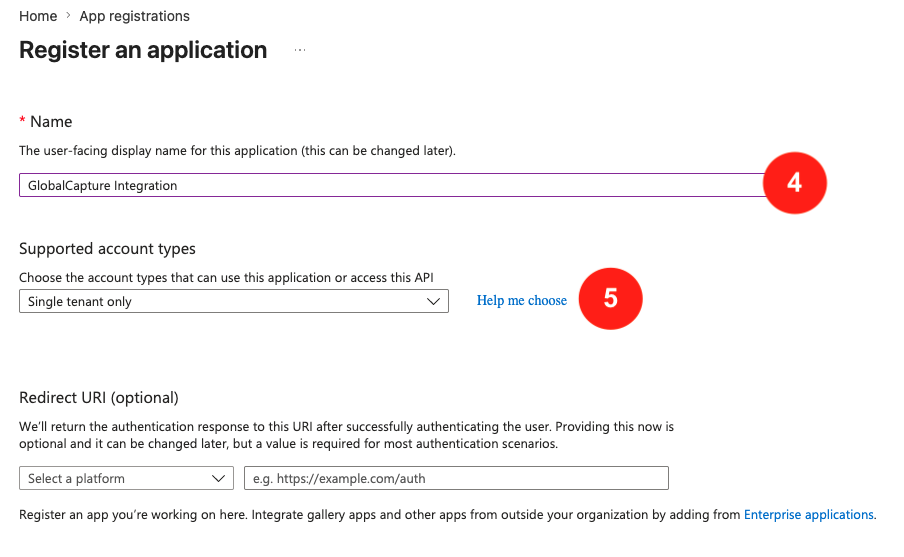
Give your App registration a Name and select the appropriate Supported account types. A Redirect URI is not required for this application.
-
Click Register.
-
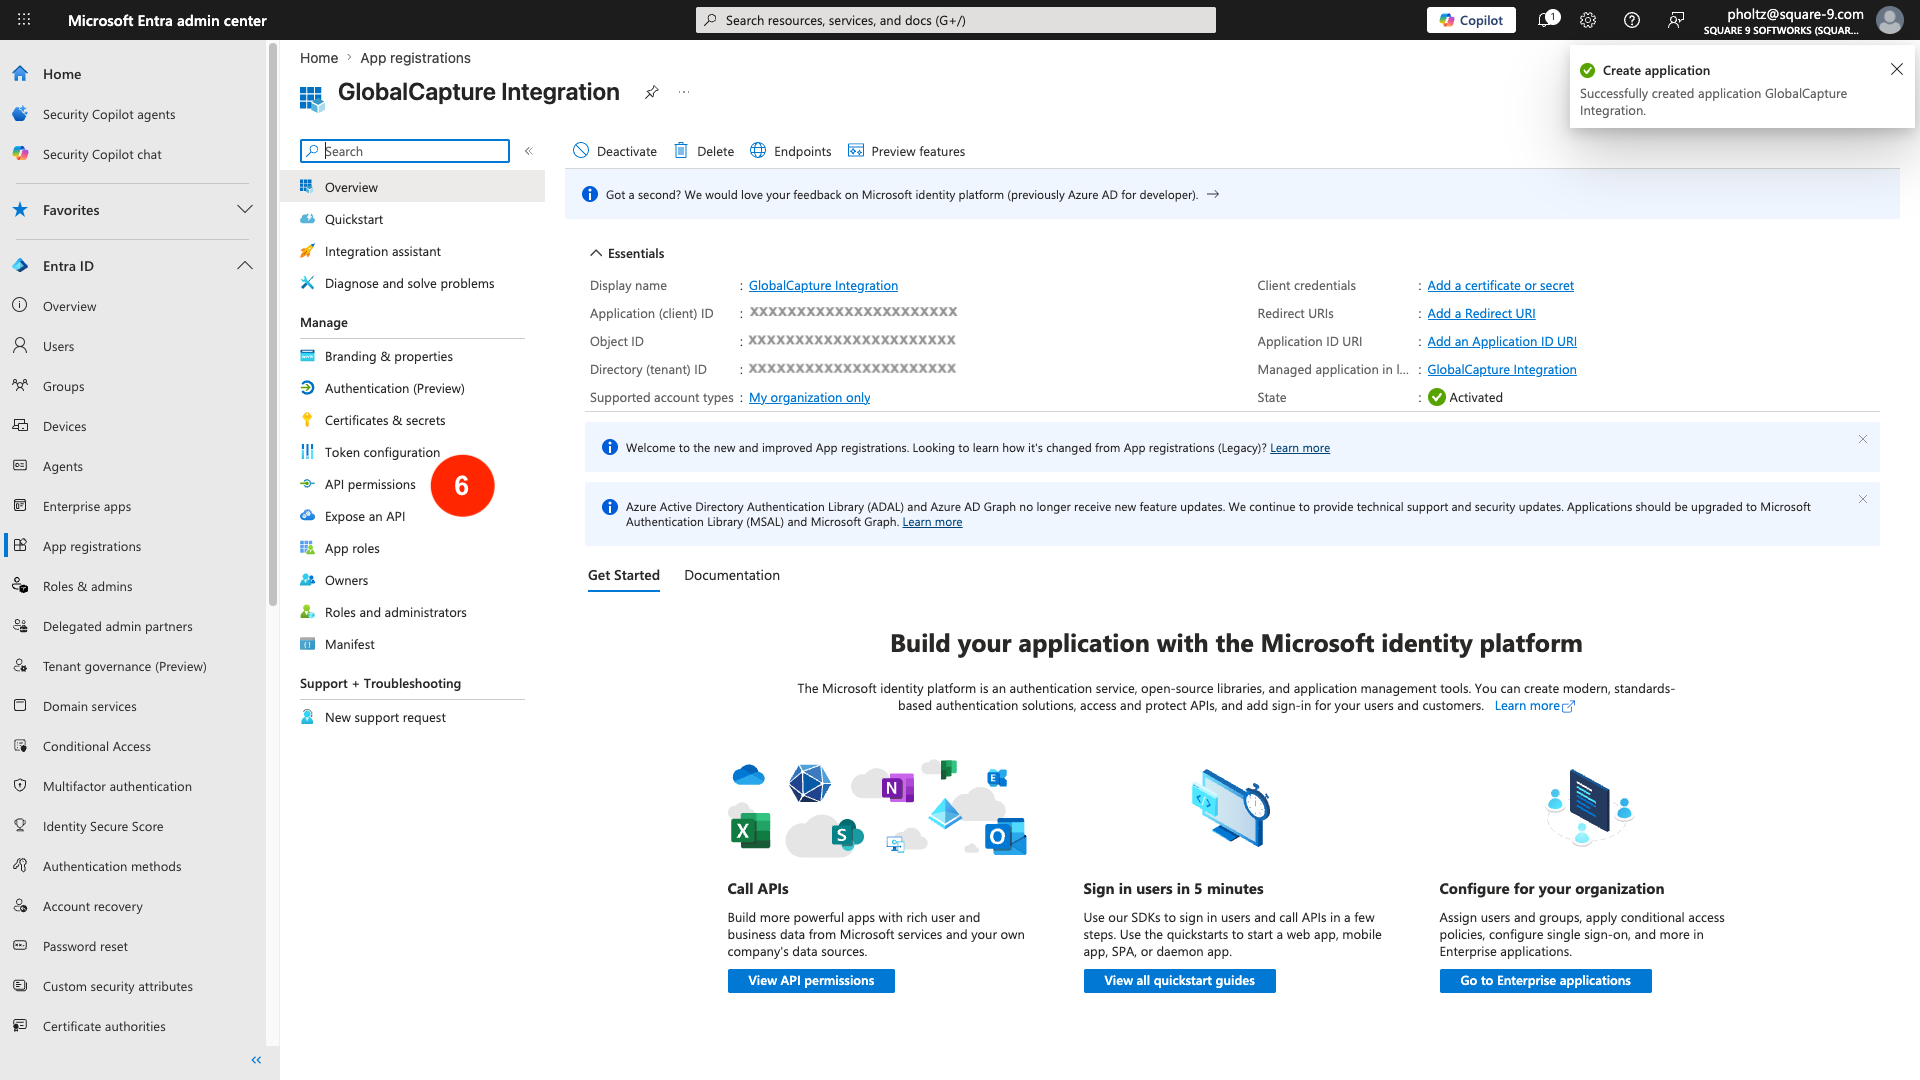
From the Applications left menu, select API Permissions.
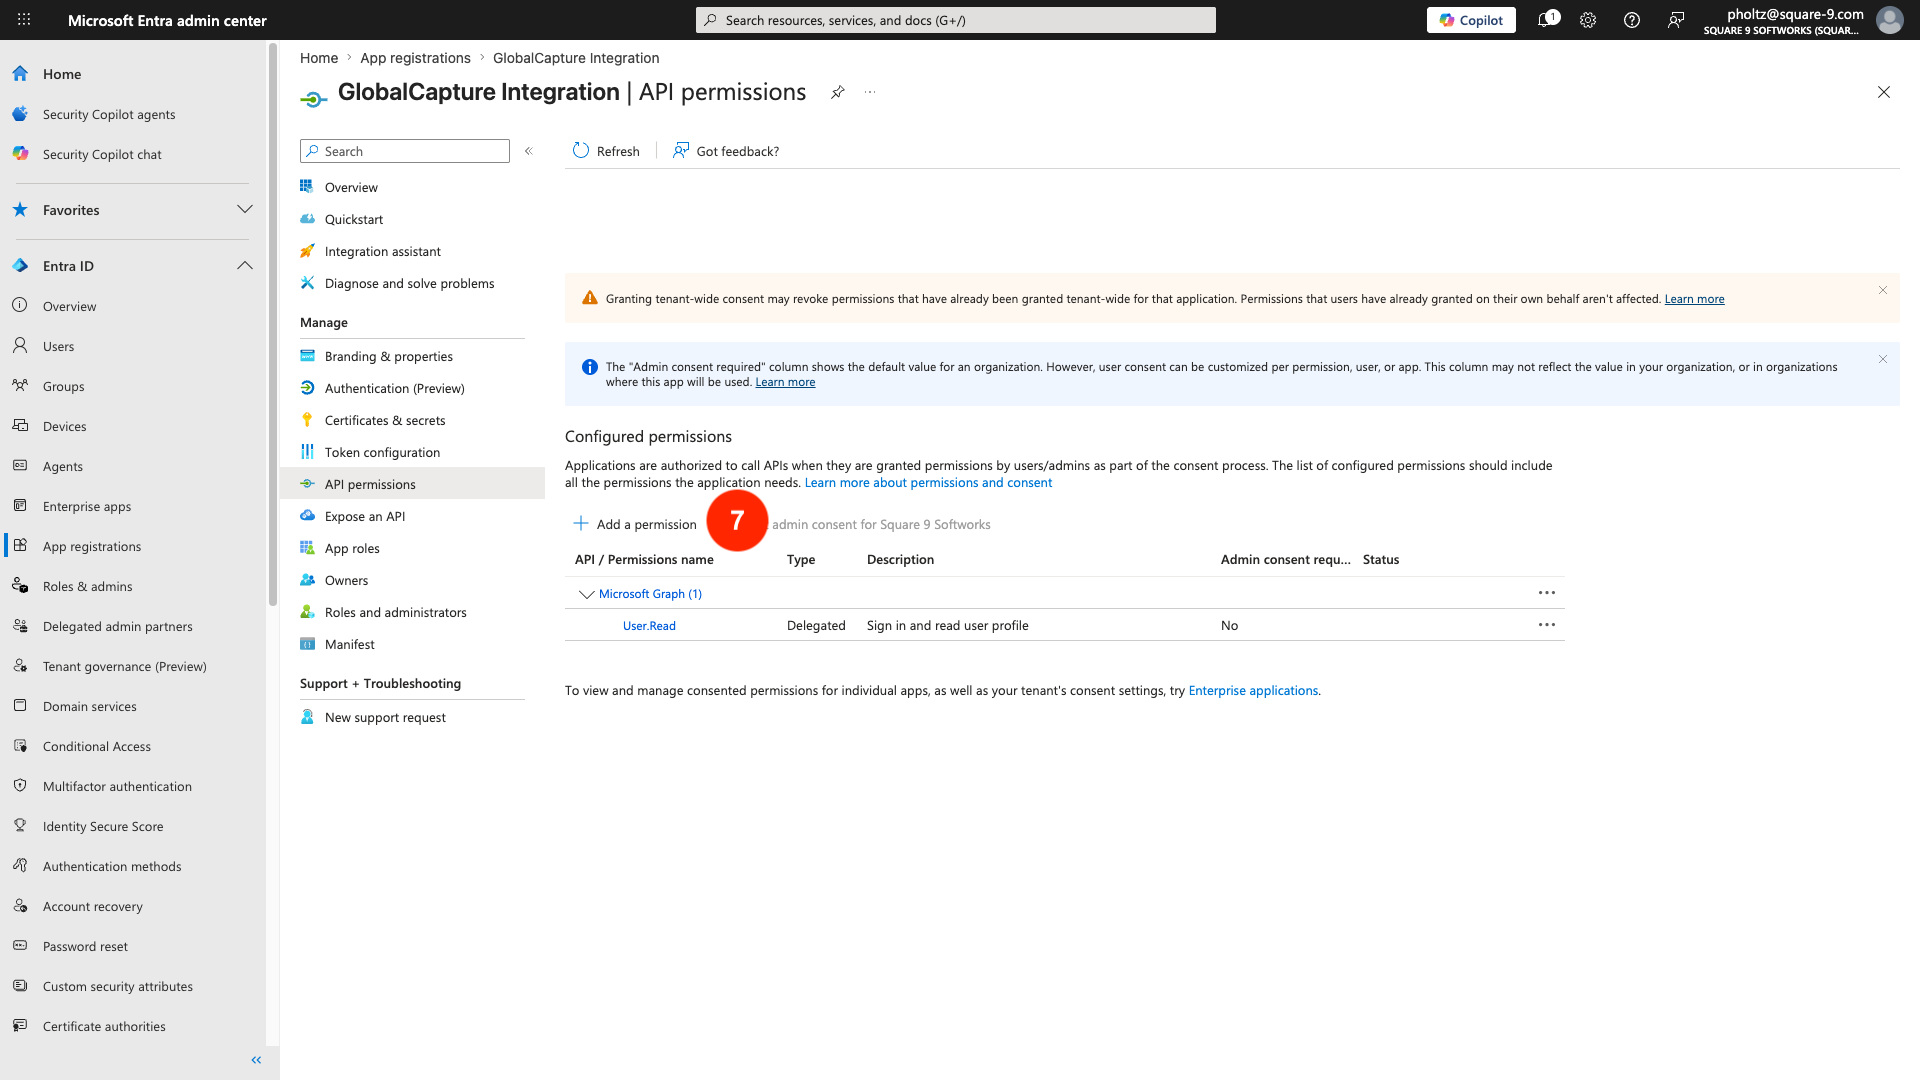
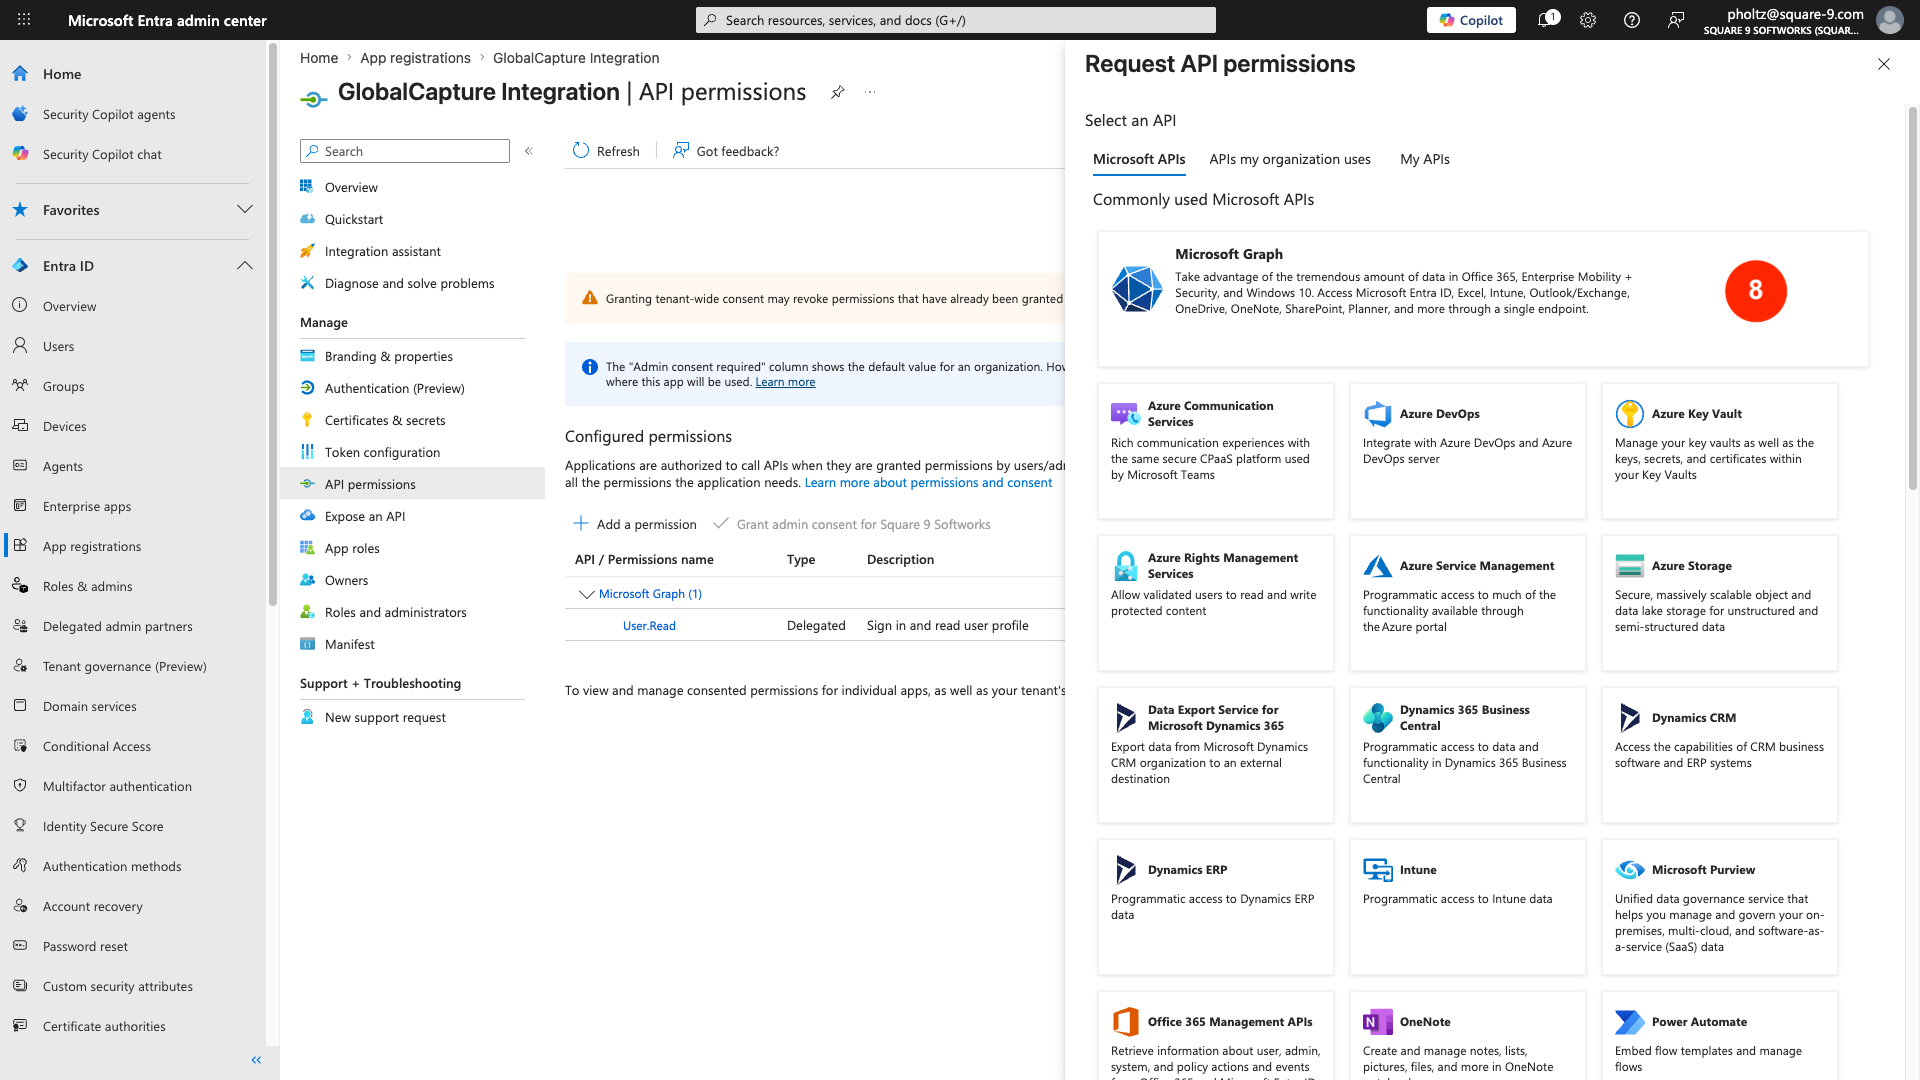
Click + Add a permission.
-
From Request API permissions select Microsoft Graph.
-
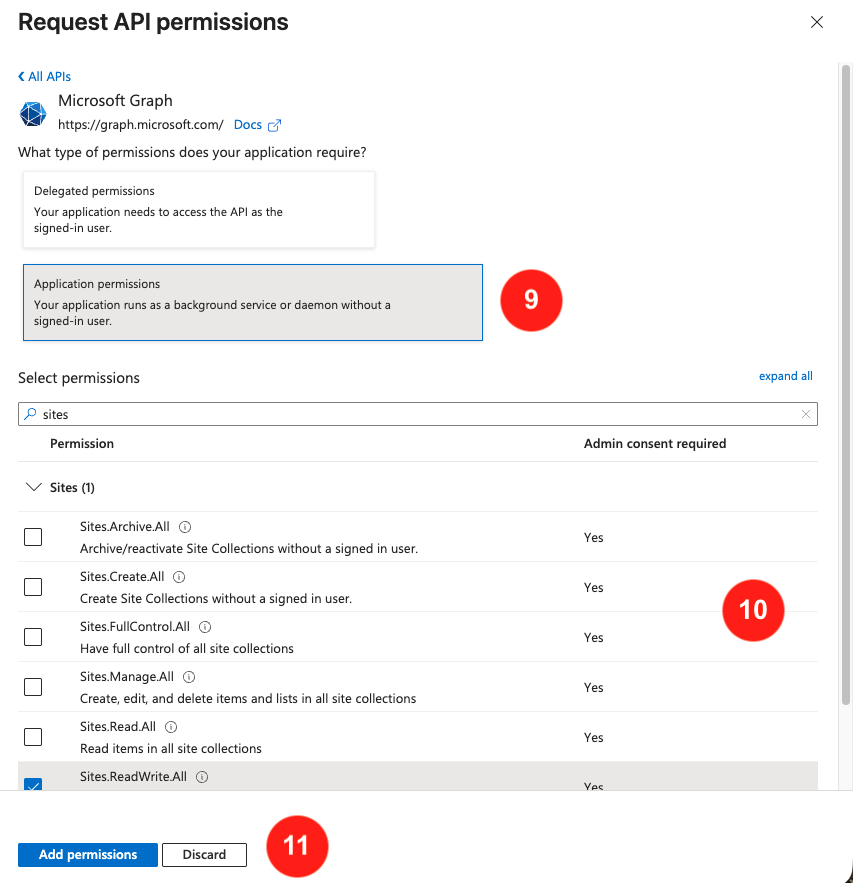
Select Application permissions.
-
Add Graph API permissions. Use Sites.ReadWrite.All for broad access, or Sites.Selected for granular access. Navigate and expand Sites or start typing to filter the available permissions.
Sites.Selected configuration:
-
Use PowerShell (
Grant-PnPAzureADAppSitePermission) or Graph API to grant site-level access. -
You can specify
read,write,fullcontrol, ormanagepermission levels.
-
Click Add permissions.
-
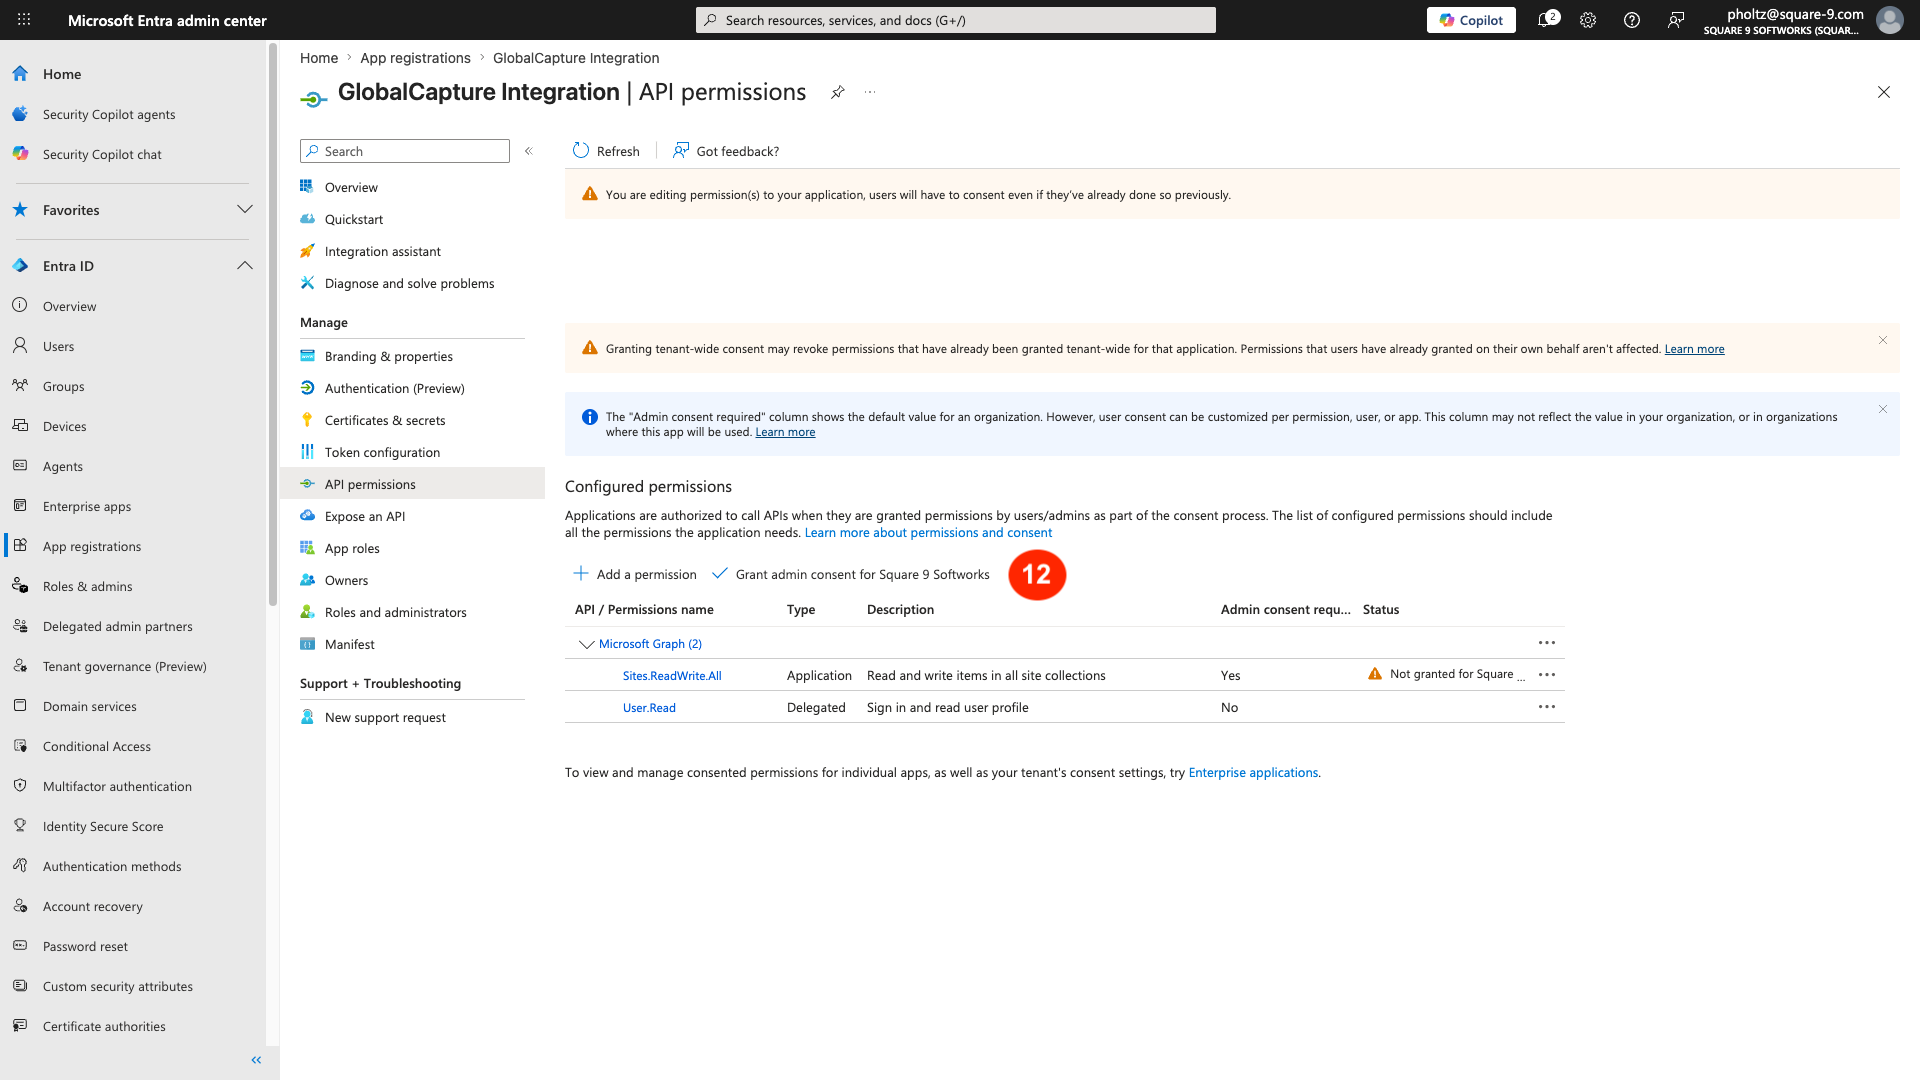
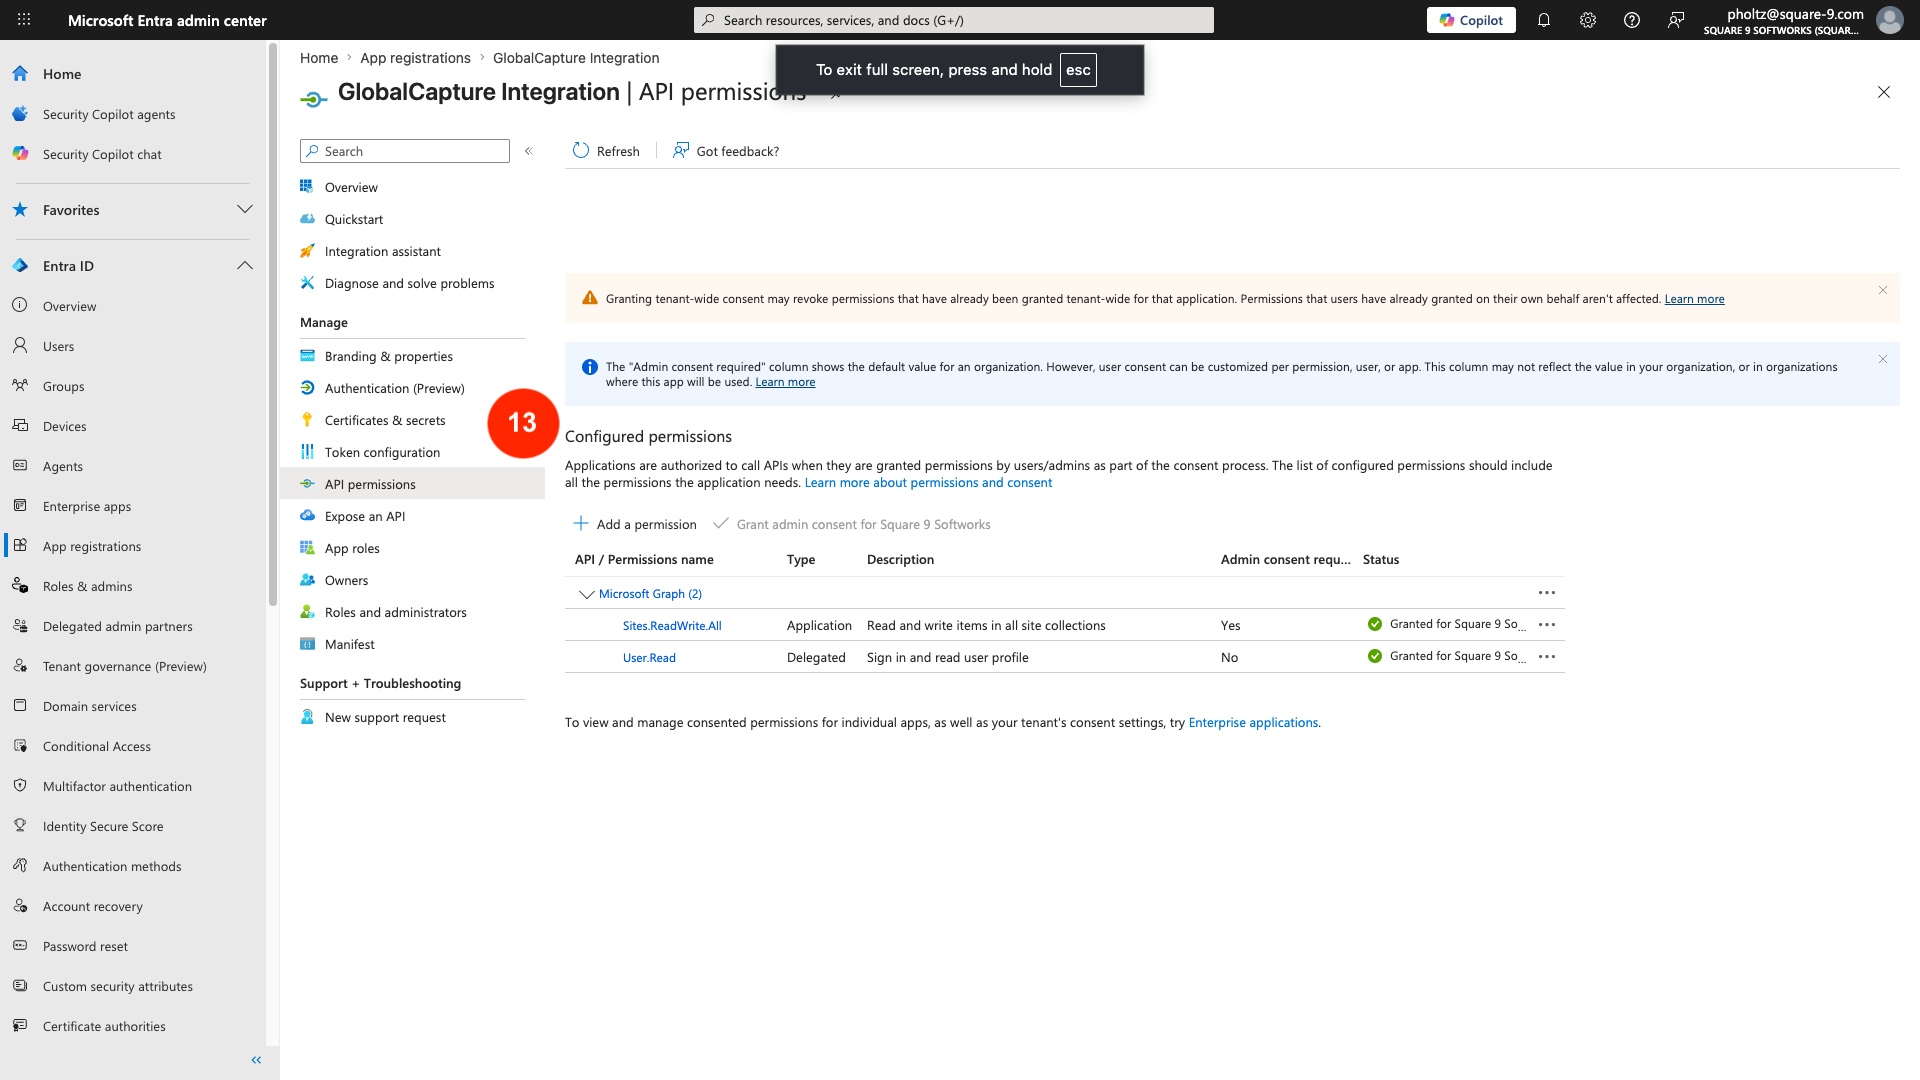
An administrator must grant consent for those permissions. Click Grant admin consent.
-
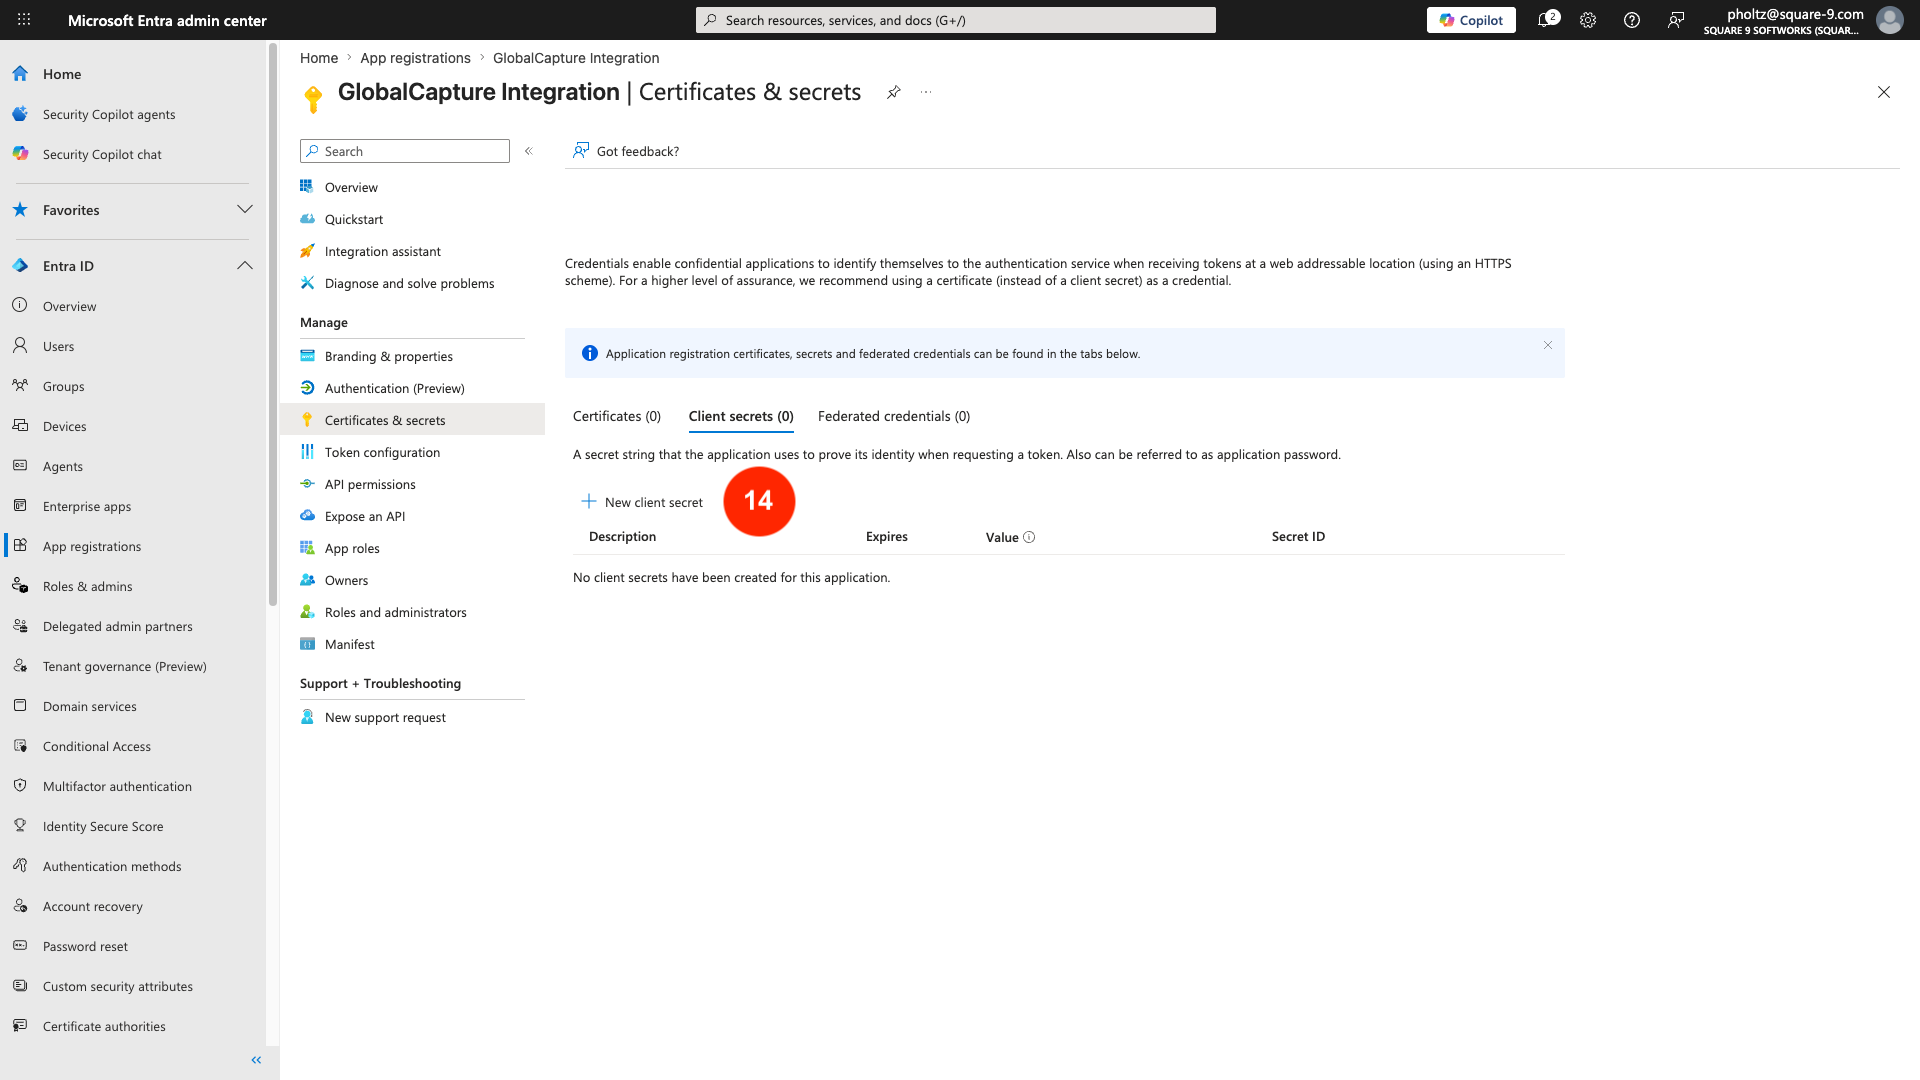
You will need to generate a Client Secret. From the Applications left menu, select Certificates & secrets.
-
On the Client secrets tab, click + New client secret.
-
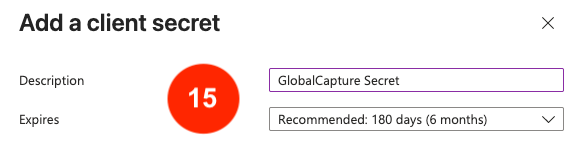
Give your new secret a Description and set an Expires date.
You will need to make sure you refresh the secret prior to it’s expiration for continued fuction.
-
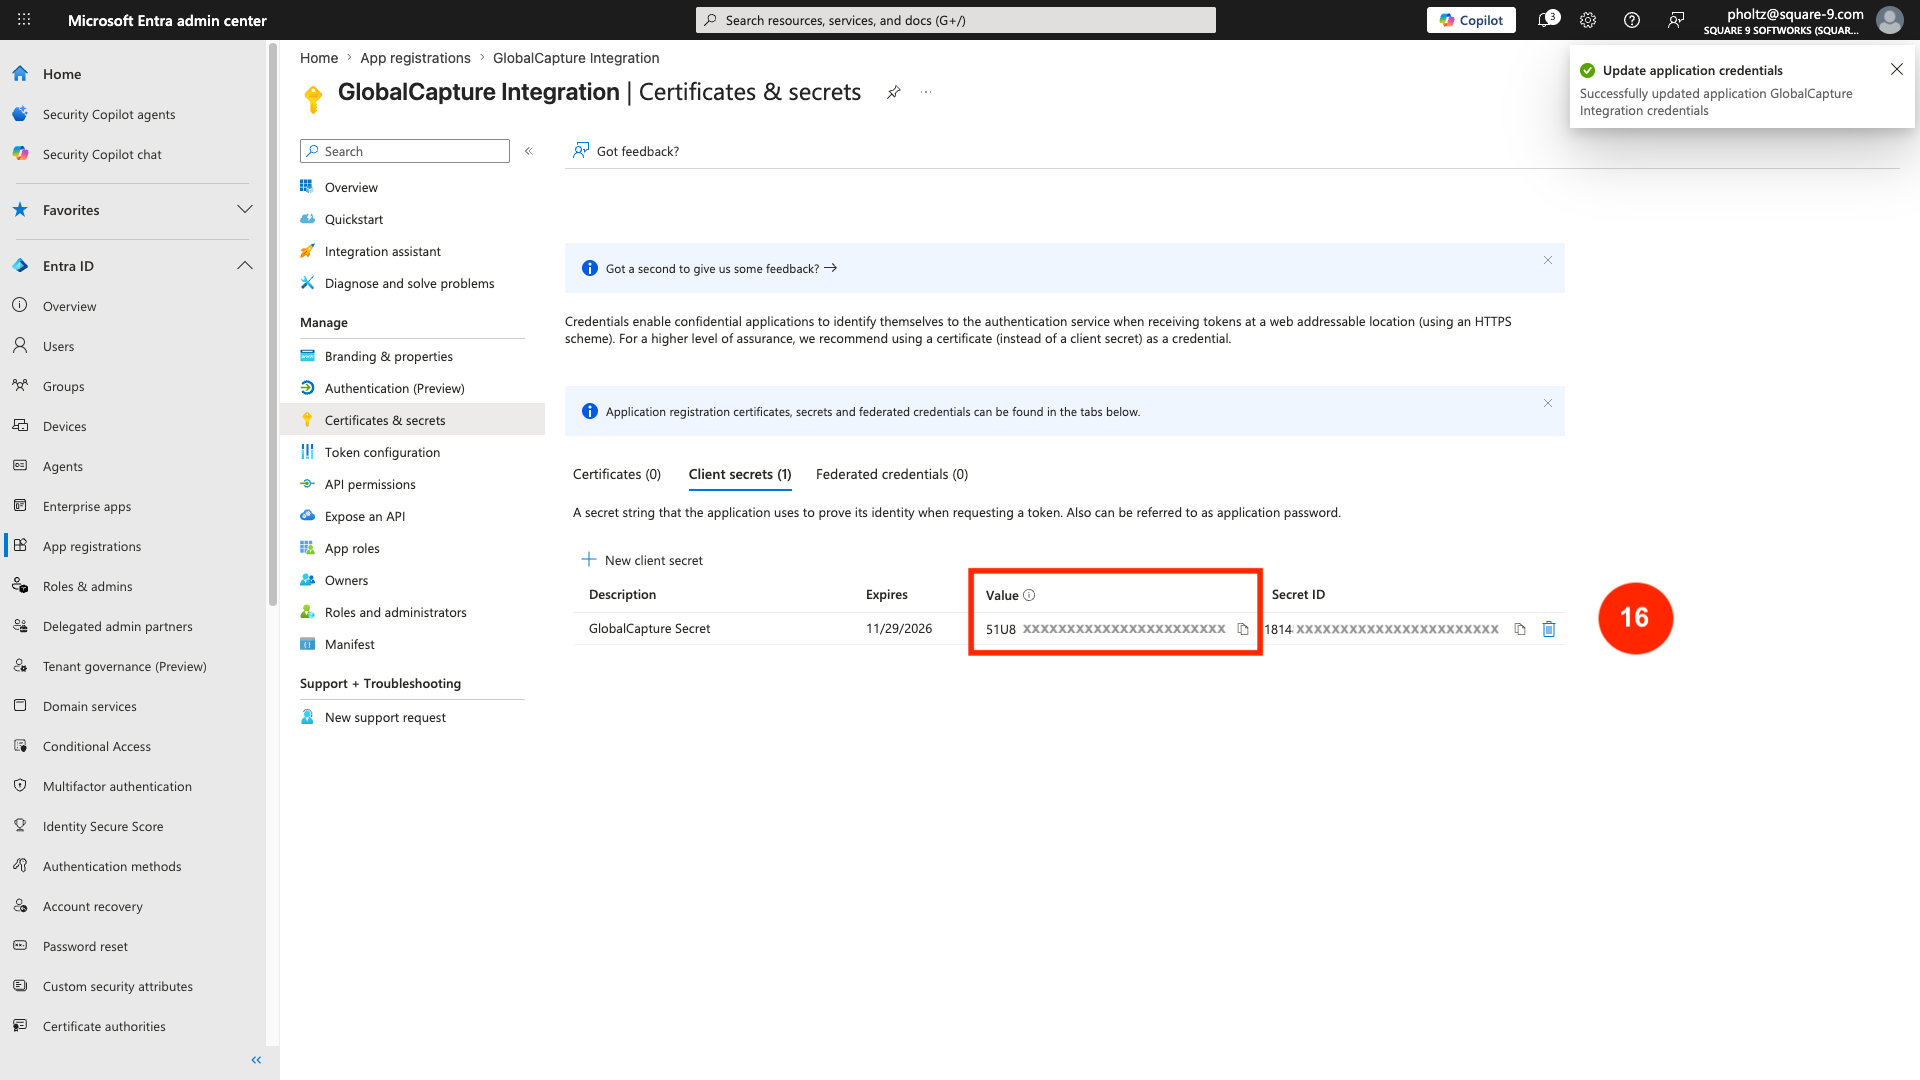
App registration will generate a client secret. Make sure you record the Value of this secret as it will be obscured and can no longer be accessed.
If you lose the secret value or don’t record it, you will need to generate a new secret.
-
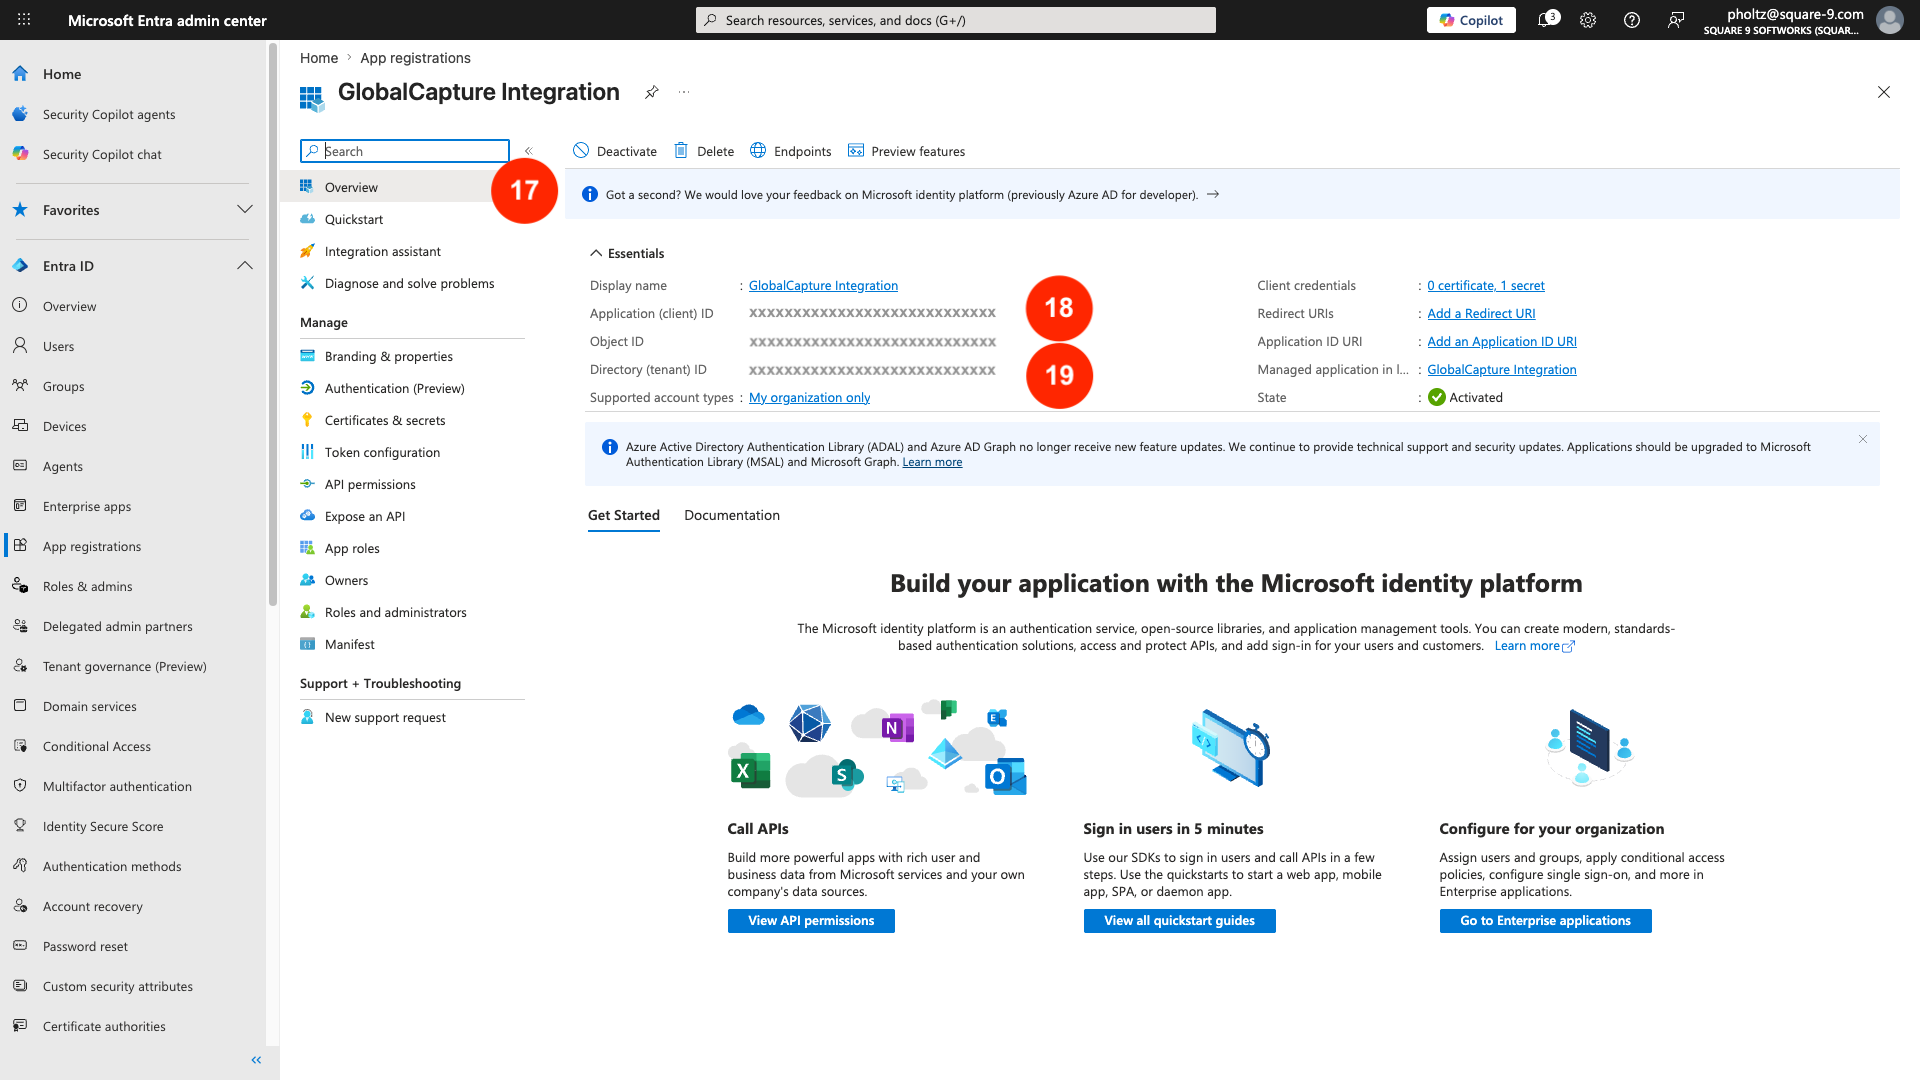
From the Applications left menu, select Overview.
-
In the Essentials area of the overview, you can find the Application (client) ID and Directory (tenant) ID. Record these values.
Please note, Square 9 cannot assist with granular permissions assignments for how to implement them. Contact your Entra support team if you need help specifically with point 4 above.
Getting the siteId and the driveId
When configuring the document release, you will need to obtain the Site ID and the Drive ID for your SharePoint instance.
There are multiple ways in which to obtain this information.
Site ID
-
Copy the URL of your SharePoint server and add it to a new browser tab.
https://yourcompany.sharepoint.com/sites/yoursitename
-
Add /_api/site/id/ to the end of the URL.
https://yourcompany.sharepoint.com/sites/yoursitename/_api/site/id/
-
In the string that appears, the value after Emd.Guid is the Site ID.

Drive ID
-
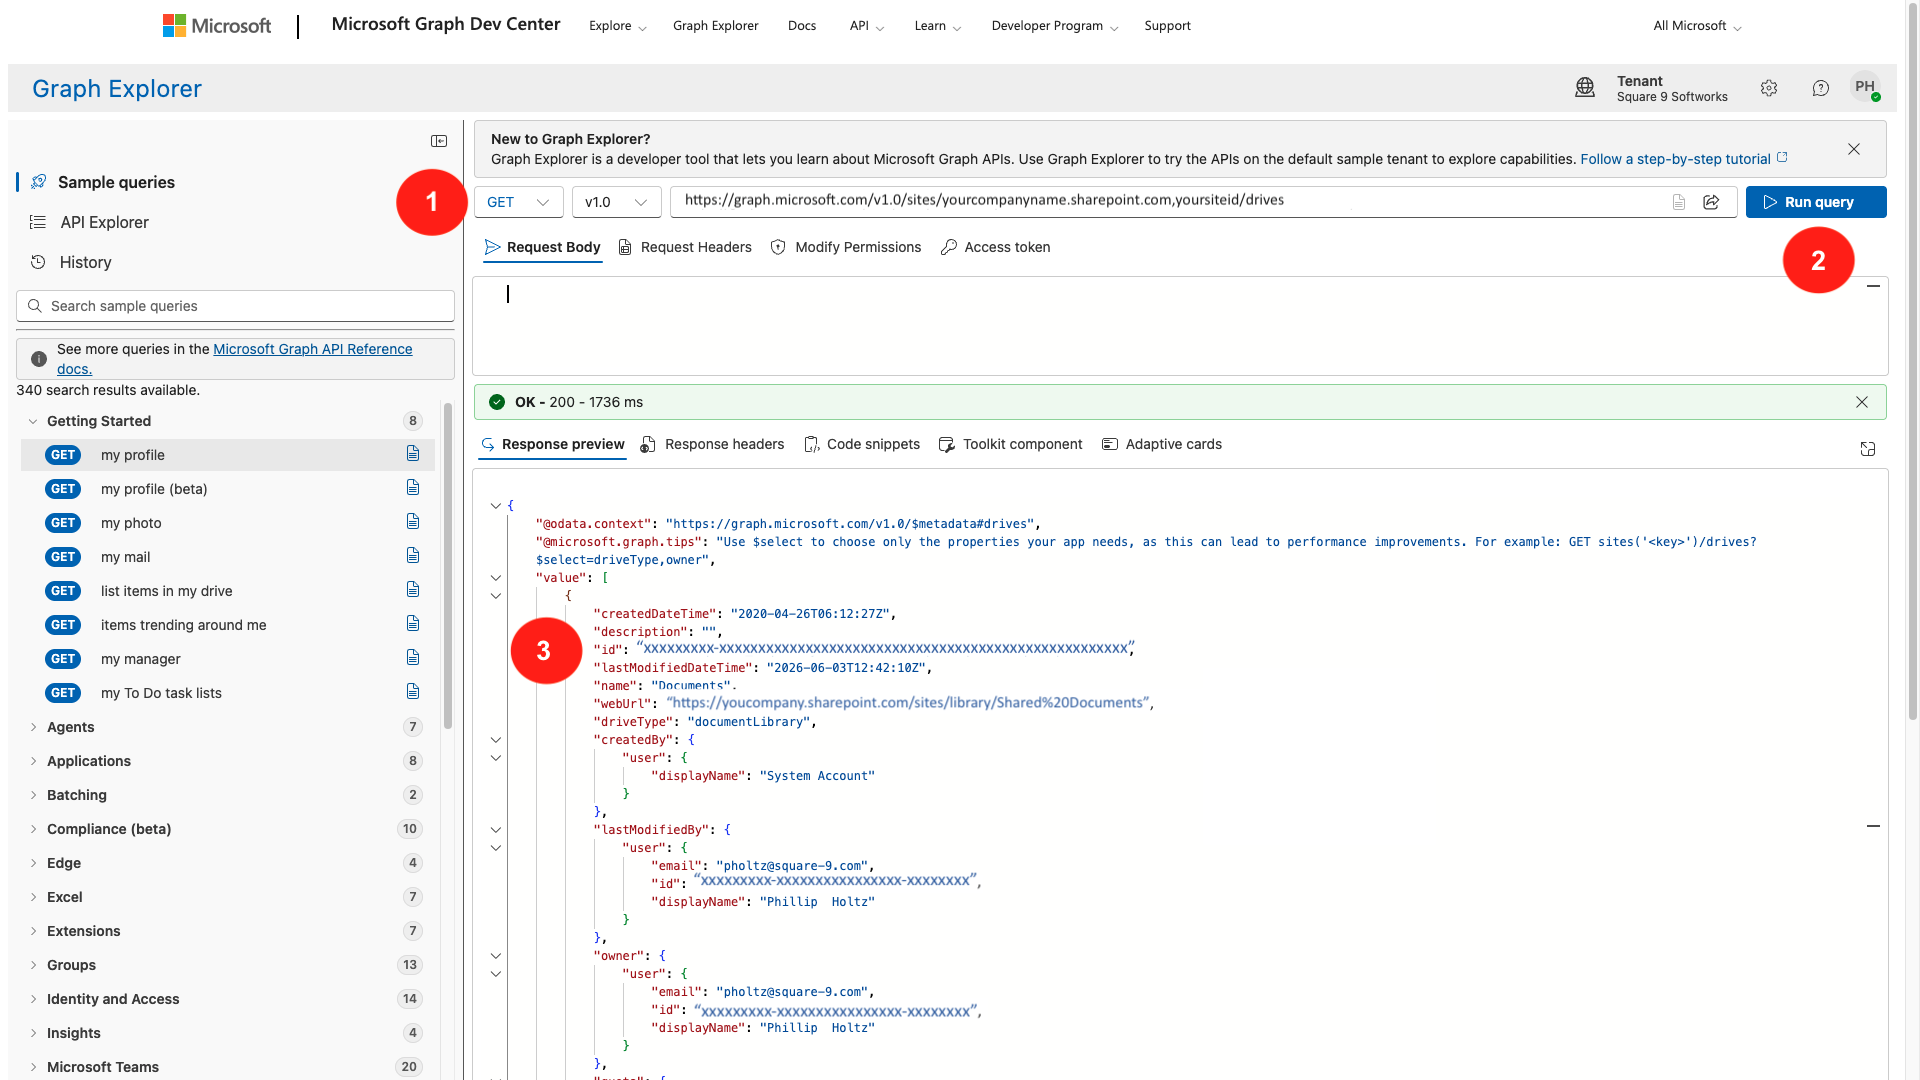
Open Microsoft Graph Explorer and login.
-
Using the Site ID, use the query below to list the drives and document libraries.
https://graph.microsoft.com/v1.0/sites/yourcompany.sharepoint.com,yoursiteID/drives
-
Select Run query.
-
In the Response Preview window, the response will list all the document libraries and their Drive IDs.
-
Identify the library of interest and copy its id.
Using Graph API to Make Requests
Tools like Powershell or Postman will support making Graph API requests. You can also use plugins to VS Code for quick testing and pulling of data. REST Client for VS Code has > 6 million downloads and is easy to use for quick tests.
Graph API testing with SharePoint