
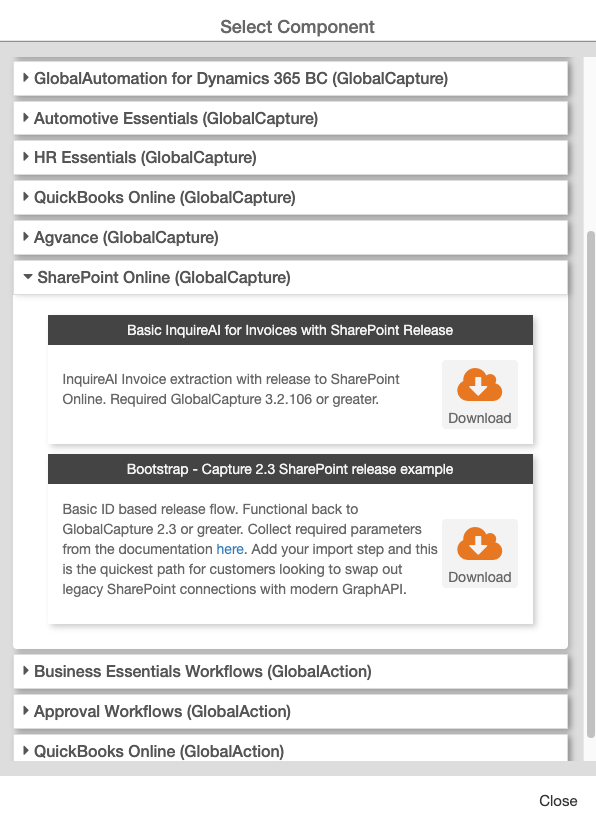
There are 2 workflows available in the Square 9 Solutions Delivery Network under the SharePoint Onlince (GlobalCapture) component that you can use to streamline your SharePoint release workflow creation process. One workflow is a simple release with or without metadata to SharePoint, the other is a …
Regardles of your choice of bootstrap workflow to get started, you will need the following data:
-
Entra Client ID
-
Entra Tenant ID
-
Entra Client Secret
If release metadata to SharePoint, you will also need:
-
Internal SharePoint column name(s) (NOT the display name, they may not be the same)
You will find these articles helpful in obtaining that necessary details if you are unfamiliar with how to do it.
Bootstrap - Capture 2.3 SharePoint Release Example
This is a simple release documents with or without metadata to SharePoint.
In additional to the values above, you will need:
-
SharePoint Drive ID
-
SharePoint Site ID
You will need to:
-
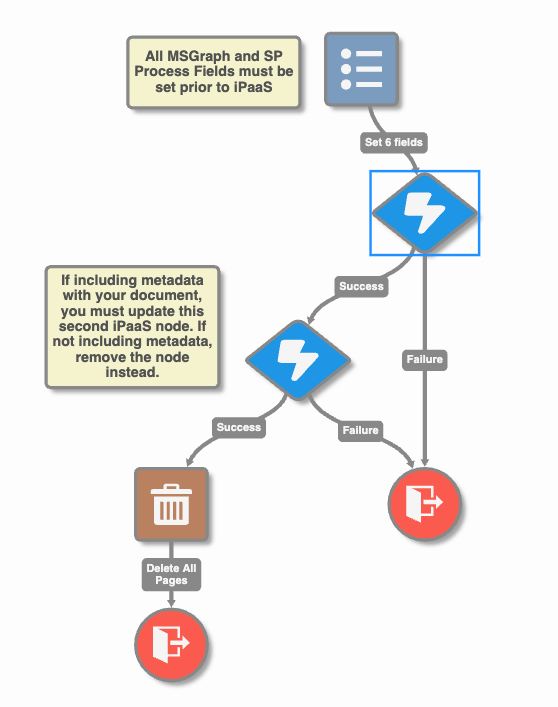
Add an Import node.
-
Add keys to the Process Field Node.
You may need to (depending on your desired outcome):
-
Modify the Upload Document to Sharepoint iPaaS node file release path.
-
Modify the Set Sharepoint Columns iPaaS node with key:value pairs.
-
Download the workflow from the Square 9 SDN.
-
Navigate to the GlobalCapture Designer (

-
Add and Import node. You can use any valid import node to kickoff your process.
-
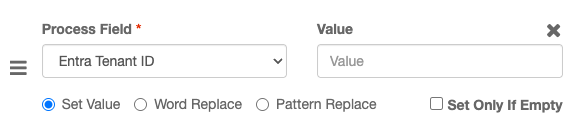
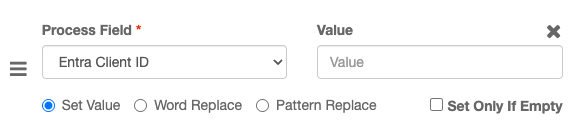
Open the Set Process Field node settings. Here you will need to enter the:
-
Entra Tenant ID
-
Entra Client ID
-
Entra Client Secret ID
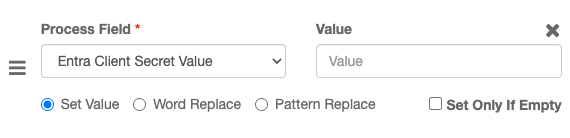
-
SharePoint Site ID
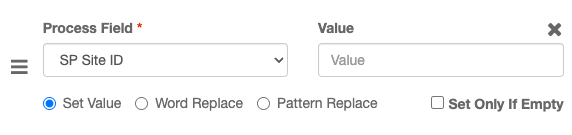
-
SharePoint Drive ID
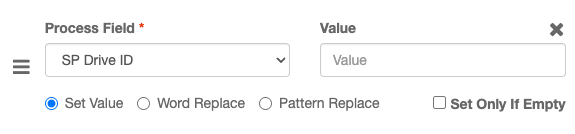
-
-
Click Save to close.
If you are releasing documents to the Root of the SharePoint drive and NOT including metadata, continue to Step 6. Otherwise, skip to Optional Configuraitons: Changing the Release Folder (Step 8).
-
Delete the Set Sharepoint Columns iPaaS node and connect the Upload Document to Sharepoint iPaaS node to the Delete node using the success path.
-
Save, Publish, and Test your workflow.
Optional Configurations
Configure releasing documents to folders that are not the root folder and/or including metadata with your SharePoint release.
Changing the Release Folder
-
Open the Upload Document to Sharepoint iPaaS node settings.
-
In the Request field, update the root:/to reflect the release location.
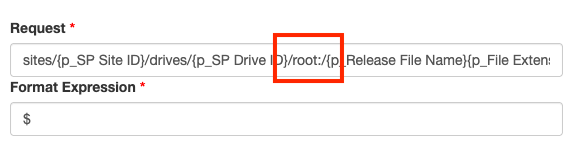
Information in the file release path can be folder names or use Square 9 Notation.
Ex. root:/Human Resources/Onboarding/ would release the document to the Onboarding folder.
Ex. root:/{p_Department}/ would release the document to the folder that shares the same name as the value in the Department process field.
If the folder does not exist, SharePoint will create the folder.
-
Click Save.
If you are NOT including metadata, continue to Step 1. Otherwise, skip to Optional Configuraitons: Include Metadata (Step 13).
-
Delete the Set Sharepoint Columns iPaaS node and connect the Upload Document to Sharepoint iPaaS node to the Delete node using the success path.
-
Save, Publish, and Test your workflow.
Include Metadata
-
Open the Set Sharepoint Columns iPaaS node settings.
-
Scroll to the Request Body. Here is where you will enter your Key:Value pairs in JSON format.
-
The Key must be the internal column name from SharePoint, NOT the display name.
-
The Value can be a static value or you can pass data from GlobalCapture using Square 9 Notation.
-
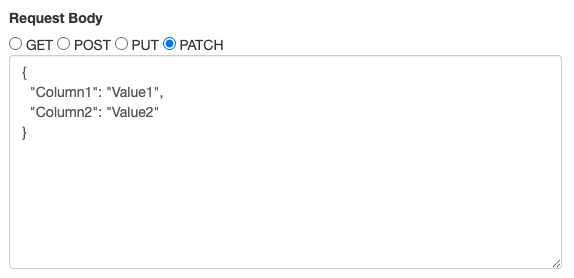
{
"VendorName":"SoundCoast Musical",
"InvoiceNumber":"{p_Invoice Number}",
"PurchaseOrderNumber12345":"{p_PO Number}"
}
-
Click Save.
-
Save, Publish, and Test your workflow.
Basic InquireAI for Invoices with SharePoint Release
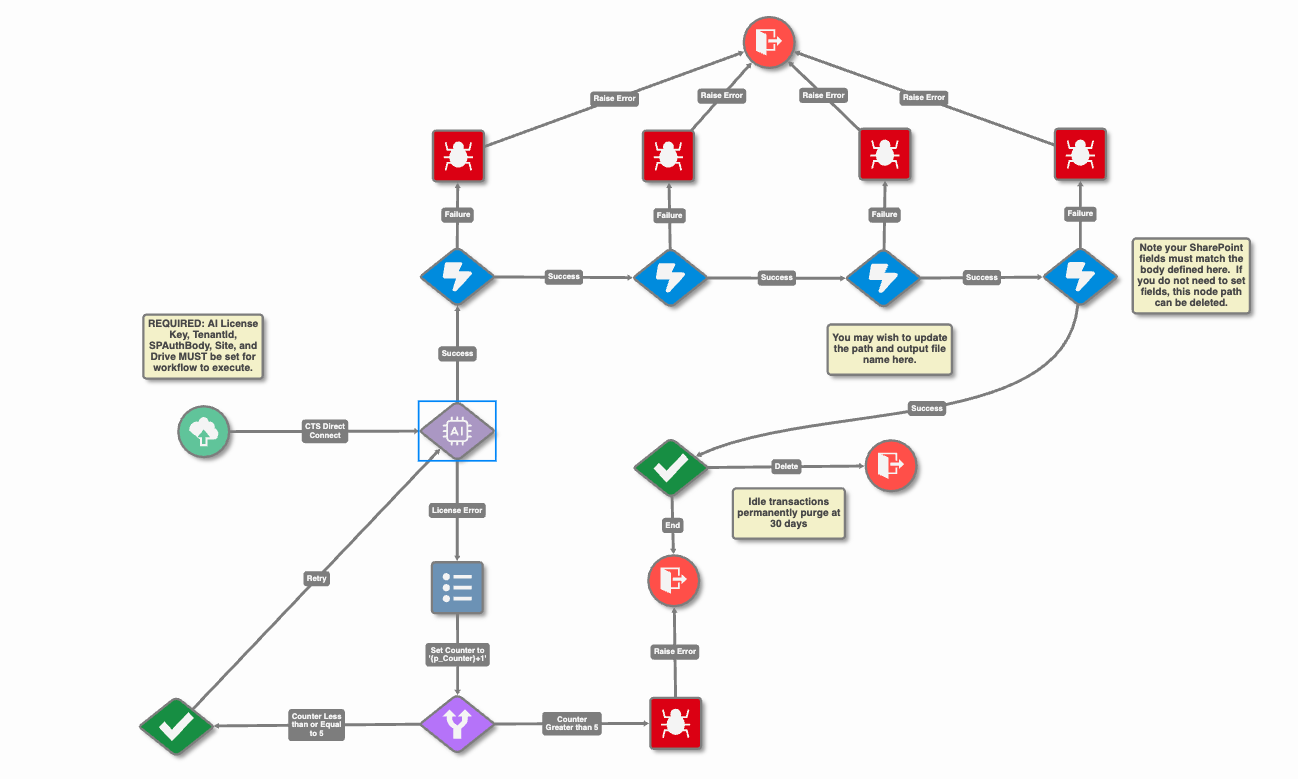
This workflow is configured with InquireAI to extract data AP Invoice data and release the documents and data to Sharepoint.
In additional to the values above (Client ID, Tenant ID, and Client Secret), you will need:
-
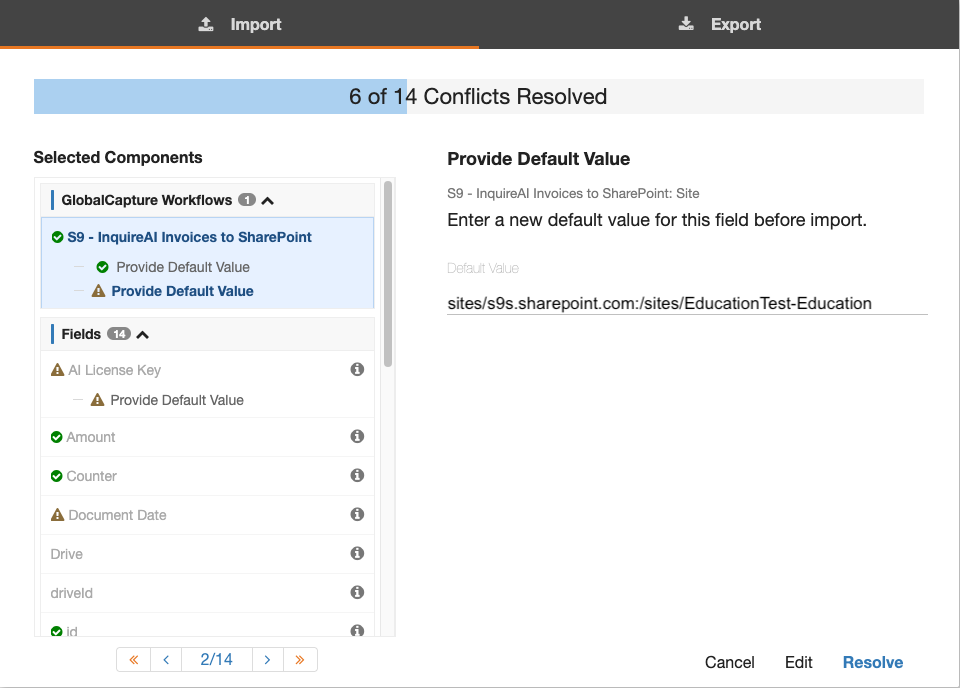
Site - The Site represents you SharePoint domain and site path. You can get this information from the URL. Login to your SharePoint and navigate to your site. From the URL you can obtain the domain and site path.
https://<your tenant domain>.sharepoint.com/sites/<your site path>
Your value for Site should follow the following format.
sites/<your tenant domain>.sharepoint.com:/sites/<your site path>
Example:
My URL is:
https://s9s.sharepoint.com/sites/EducationTest-Education
So my domain is s9s and my site path is EducationTest-Education.
My Site value will then be:
sites/s9s.sharepoint.com:/sites/EducationTest-Education
-
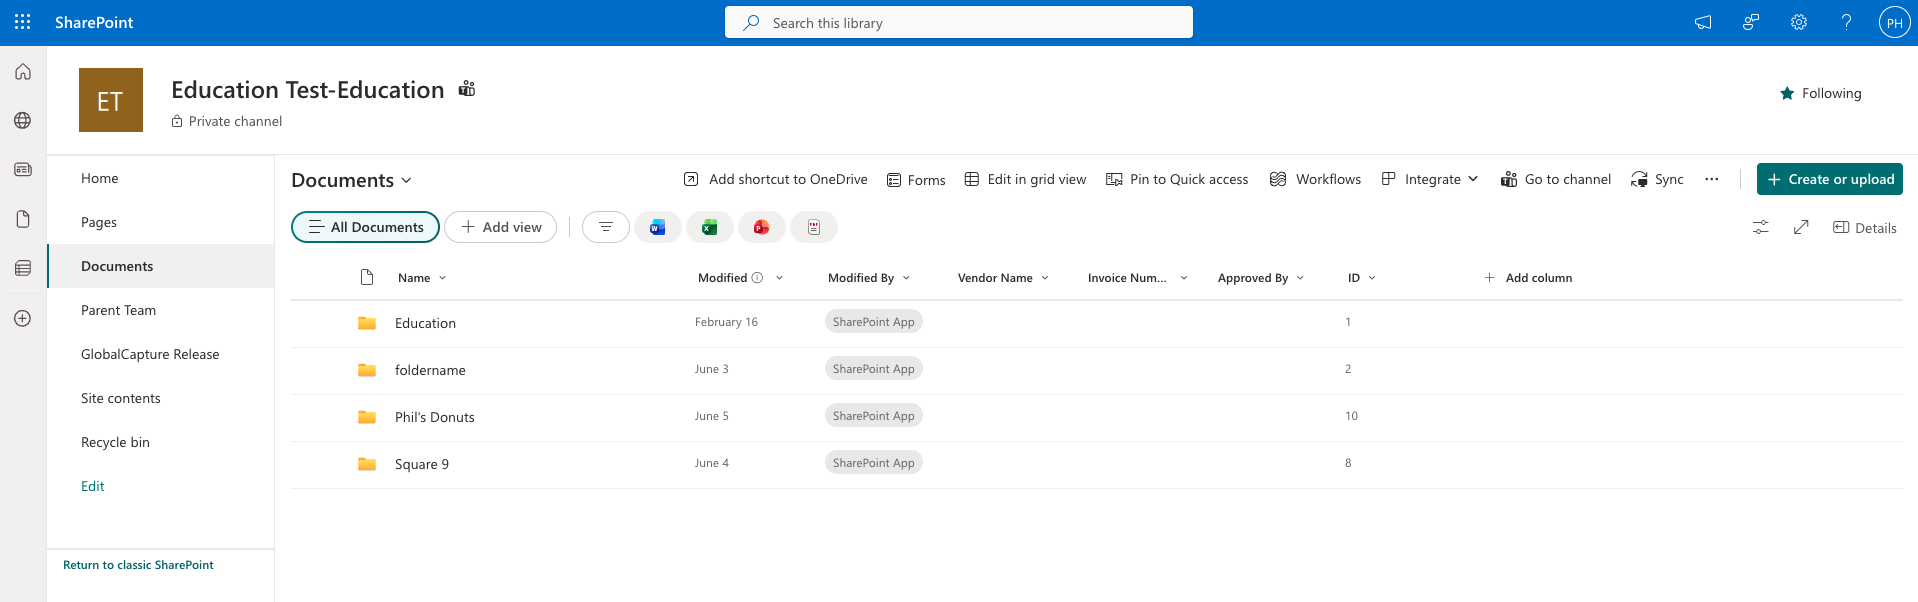
Drive - The Drive is the name of your document library. Often this is just Documents.
-
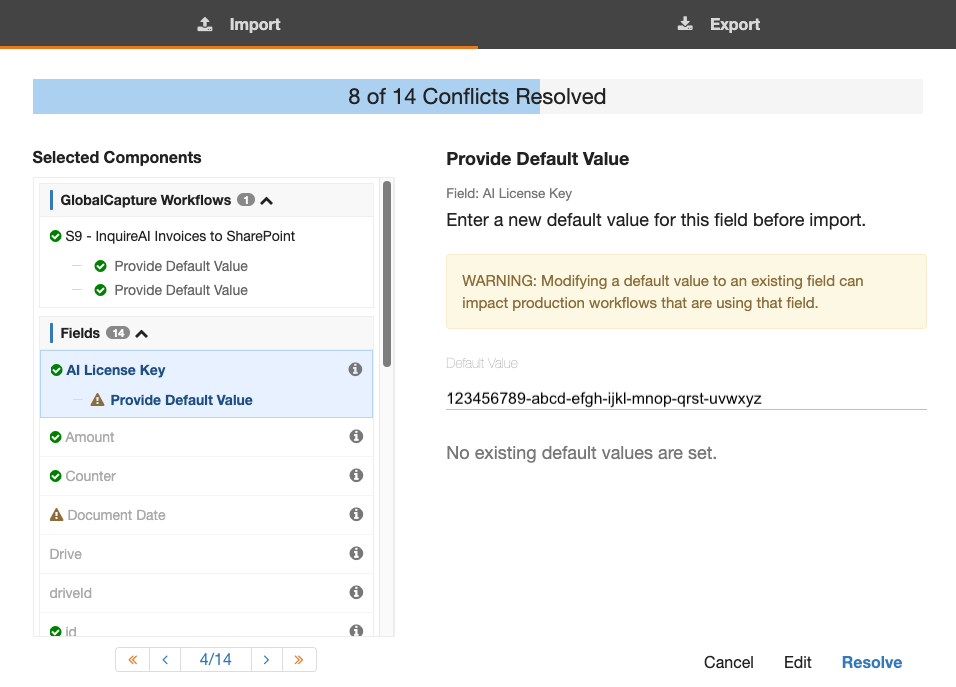
Your AI License Key.
Adding the Workflow to GlobalCapture
-
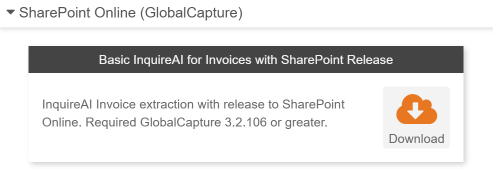
Download the workflow from the Square 9 SDN.
-
Select a Portal and click Import.
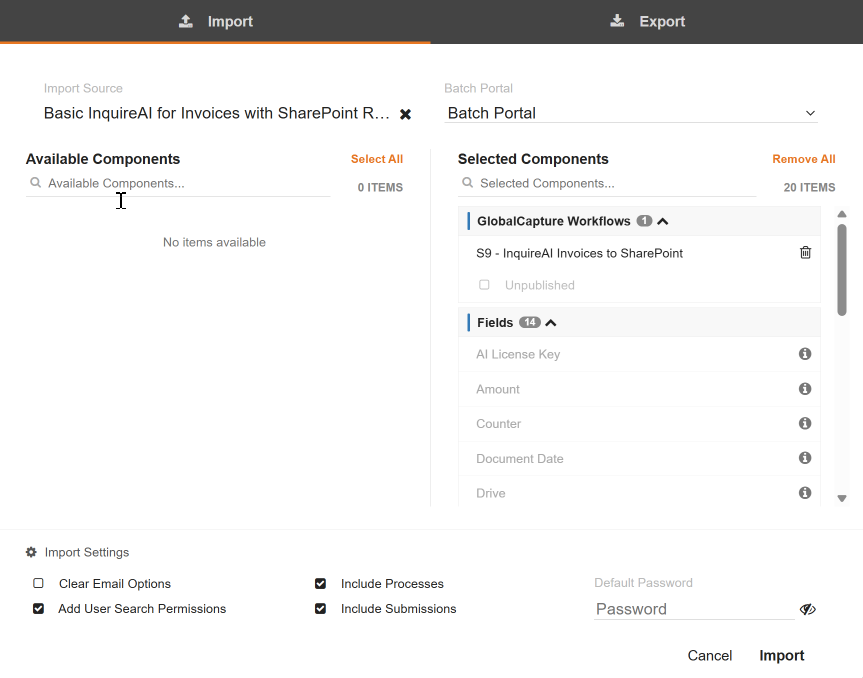
-
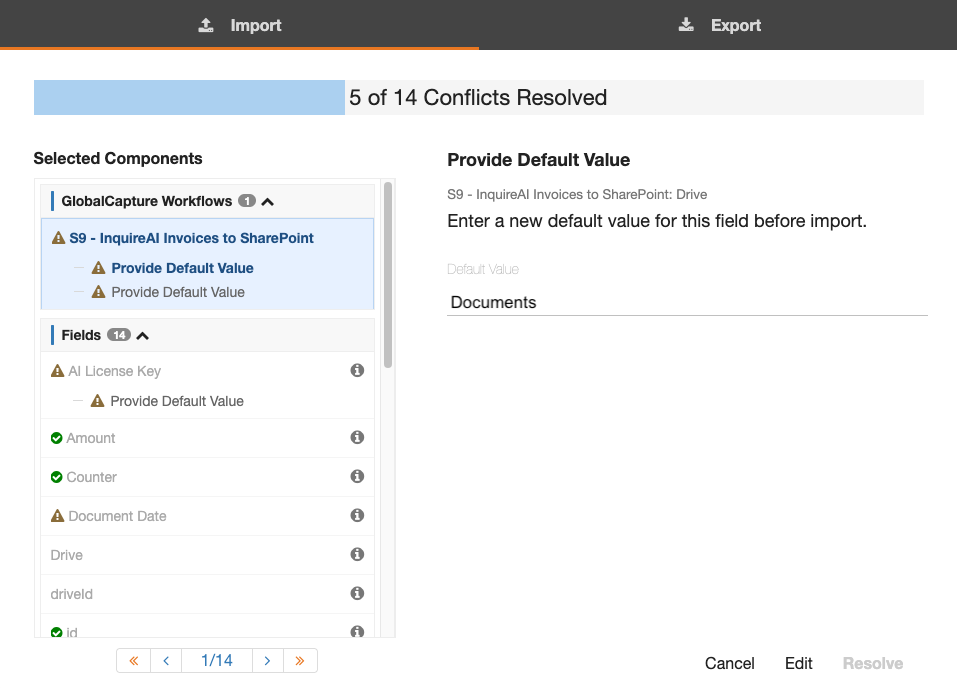
The next set of steps will be a series of conflicts that will need to be resolved. Then number of conflicts to resolve will vary. Some common conflicts that will need to be resolved are duplicated process field, duplicate users, etc. You can resolve these as appropriate for situation. There are 5 conflicts that require attention.
-
Drive - This is the name of the Document Library. Often this is just Documents.
-
Site - The Site represents you SharePoint domain and site path.
-
AI License Key - Enter you InquireAI License Key.
-
SPAuthBody - This authenticates into Sharepoint. You will need to add you Client ID and your Client Secret to the line below.
client_id=<YourClientID>&client_secret=<YourClientSecret>&grant_type=client_credentials&scope=https://graph.microsoft.com/.default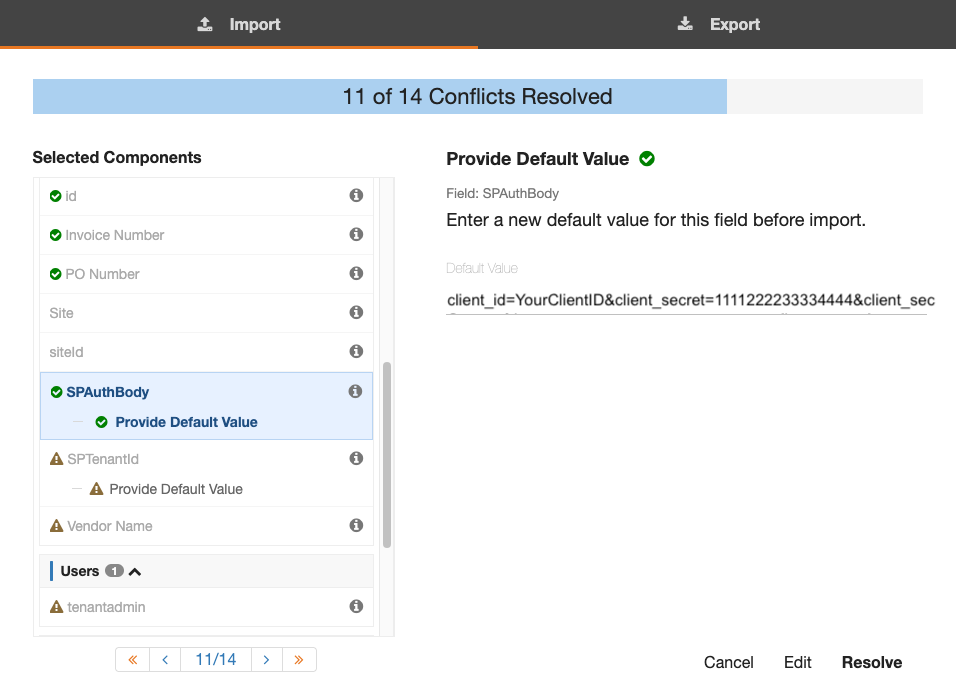
-
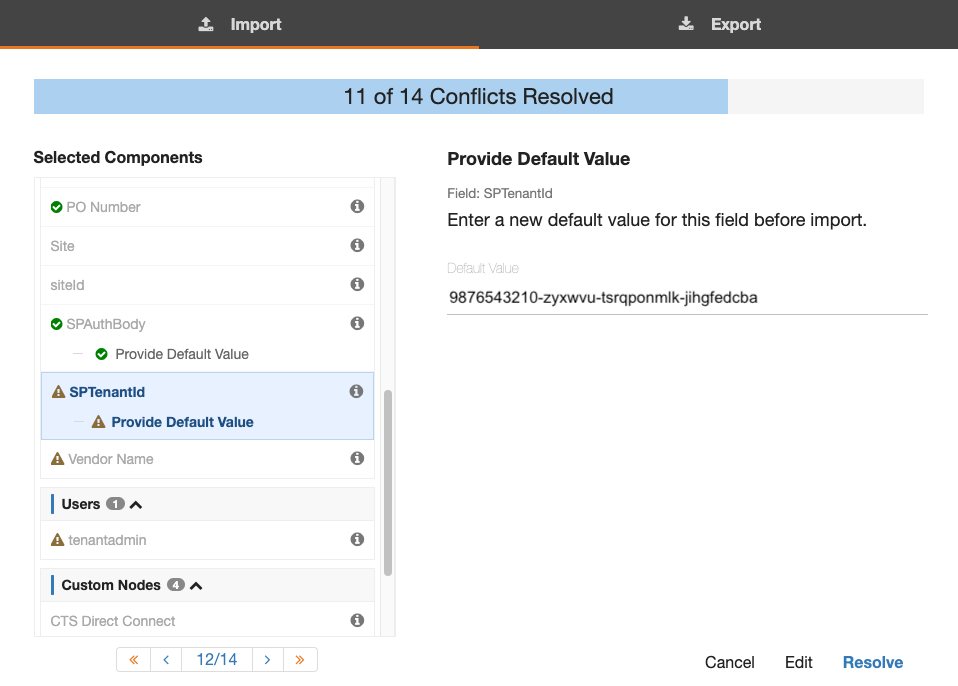
SPTenantID - This is the Tenand ID from your App Registration.
-
-
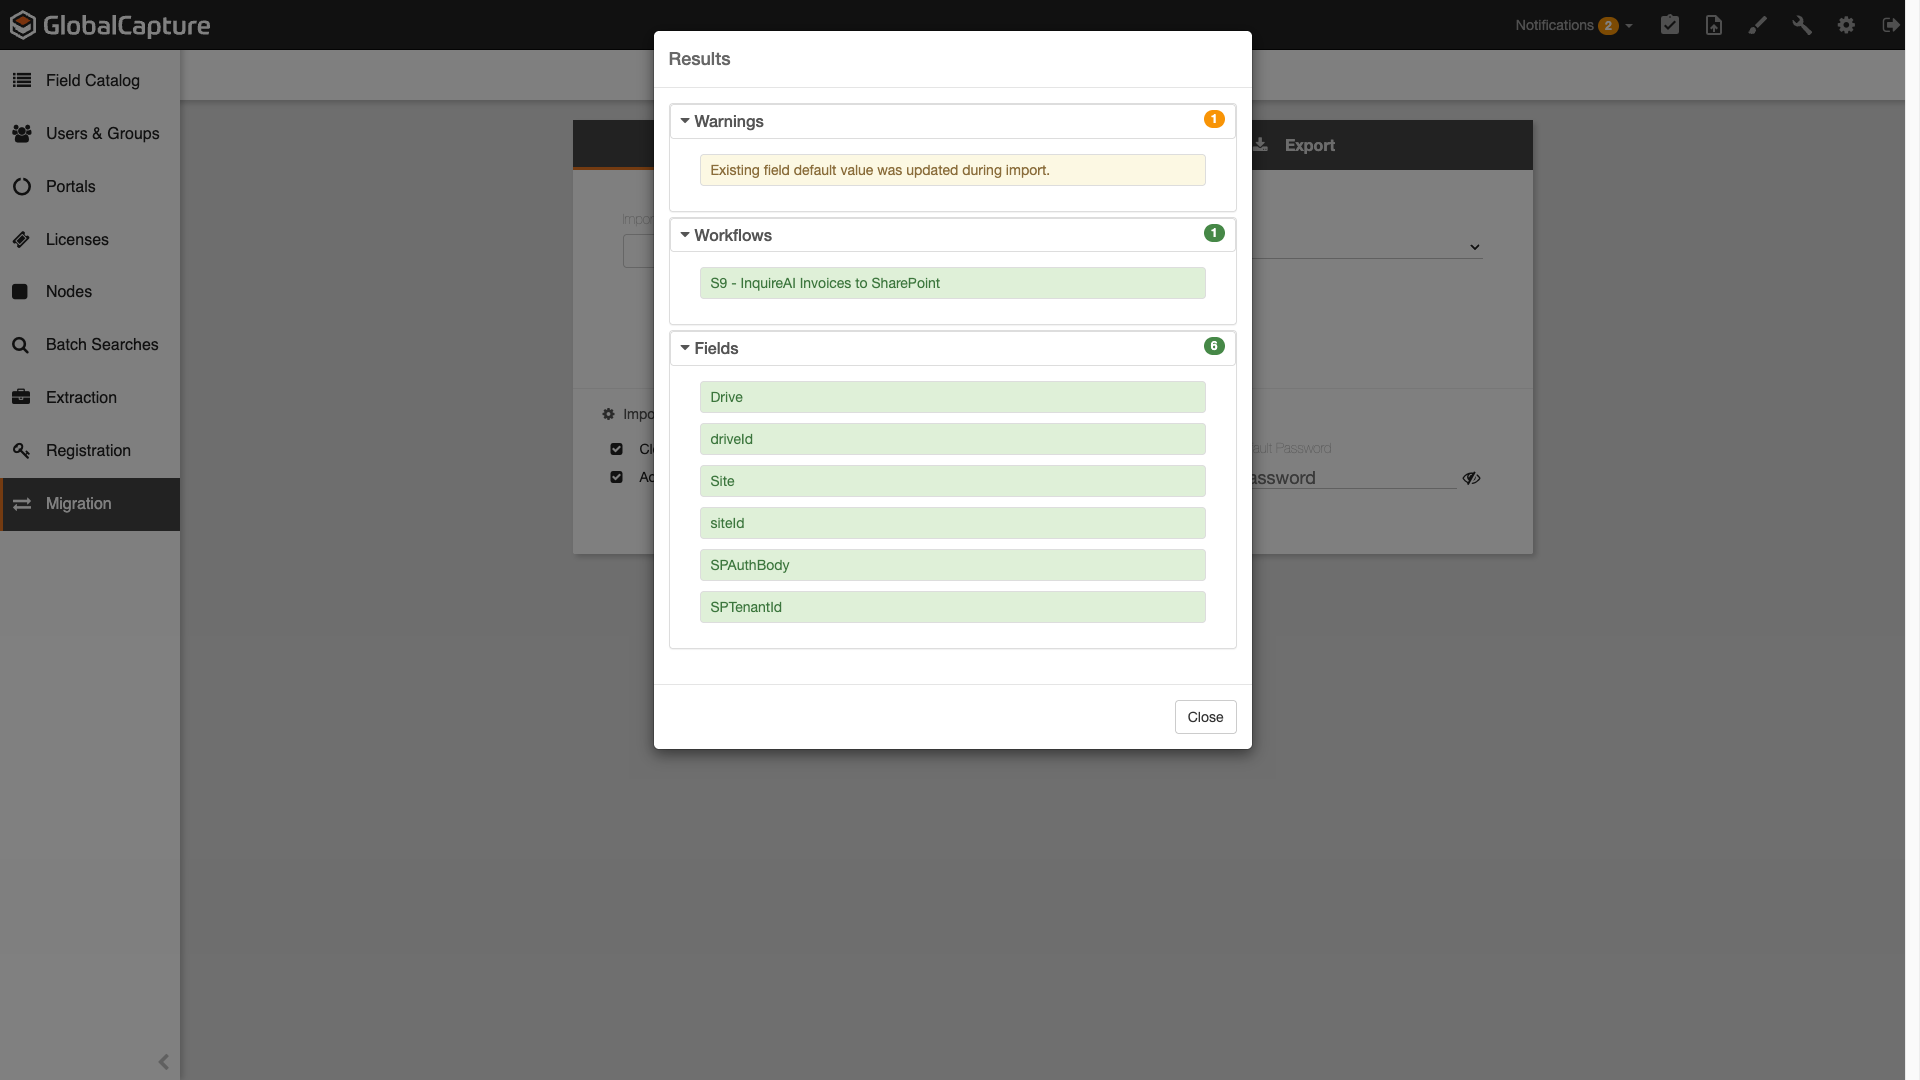
Once these and any other conflicts are resolved, click Import to complete the import process.
Workflow Modifications
While you can modify this workflow any way you see fit to meet your needs, exercise caution when making changes. Any changes to AI License Key, SPAuthBody, SPTenantID, Site, or Drive will cause one or more iPaaS nodes to fail.
The only required modificaiton is to the Put Data to File By ID iPaaS node.
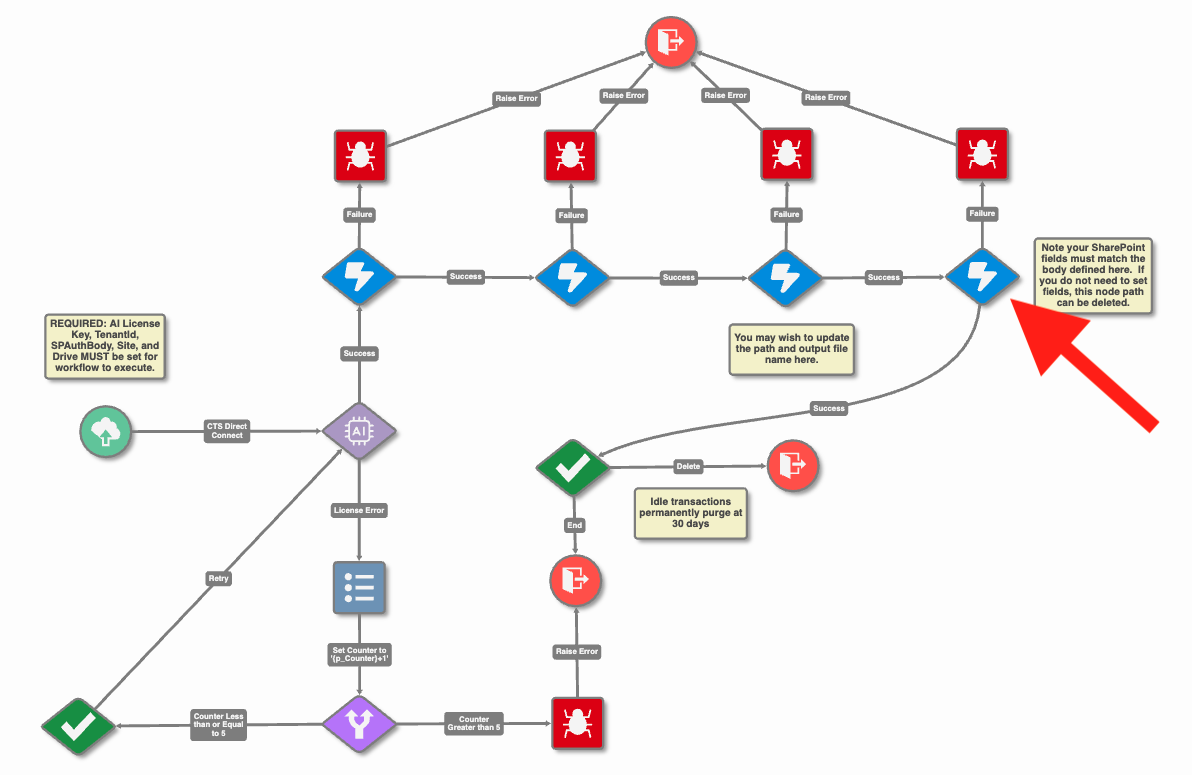
Put Data to File By ID iPaaS node (Required)
This node releases GlobalCapture Process Field data to the corresponding Columns in SharePoint. Failure to modify or remove this node, will cause the process to error on this iPaaS node. You can either update the Request Body to match your GlobalCapture Process Fields and SharePoint Columns or remove this part of the workflow.
Updating the Request Body
If you are releasing GlobalCapture Process Field data extracted by InquireAI to SharePoint Columns, you will need to update the request body to reflect your GlobalCapture Process field and SharePoint Columns.
The request body should follow the following format:
{
"<SharePoint Column Name 1":"{p_GlobalCapture Process Field 1}",
"<SharePoint Column Name 2":"{p_GlobalCapture Process Field 2}",
"<SharePoint Column Name 3":"{p_GlobalCapture Process Field 3}"
}
The SharePoint Columns names may differ from the name displayed in SharePoint.
Ex. In SharePoint, the column may display as Vendor Name, but the Internal Column name may be VendorName or VendorName1234.
You need to use the Internal Column Name in the Request Body.
If you are unsure how to obtain the Internal Column Name refer to our documentation or Microsoft’s SharePoint Documentation.
Remove the Data Release Step
If you are not releasing GlobalCapture Process Field data to SharePoint Columns, you can:
-
Remove the Put Data to File By ID iPaaS node.
-
Remove the Field Data Raise Error Node.
-
Then connect the Success path from the Put File Content iPaaS node to the QC Validate node.
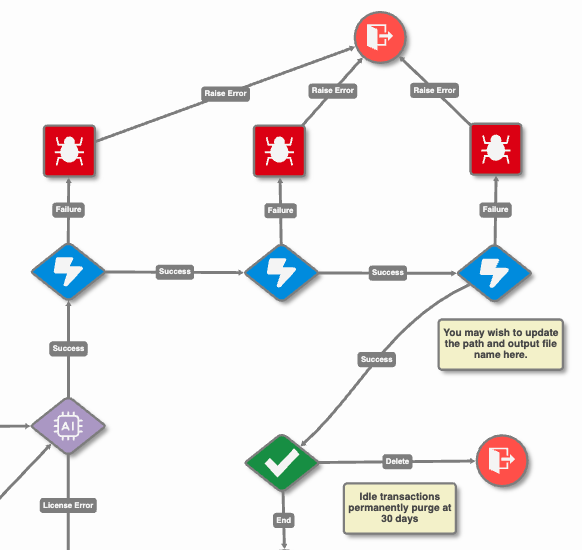
Import Node
By default, the workflow imports from a local folder using the CTS DirectConnect node. If you are using CTS DirectConnect, you will need to configure a pick up location for documents for this workflow.
You can also configure your workflow to import from additional locations like email, SFTP, etc in stead of or in addition to CTS DirectConnect.
Refer to documentation for different types of import nodes.
InquireAI Prompt
The InquireAI prompt is configured to extract the following fields:
-
Vendor Name
-
Amount
-
Document Date
-
Invoice Number
-
PO Number
You can modify the prompt to extract additional fields. Any additional fields added will need associated GlobalCapture Process Fields following the rules for InquireAI. Refer to InquireAI documentation for more details.
Put File Content iPaaS Node
This iPaaS node releases the document to the indicated folder in the Document Library with the name configured in the Drive parameter.
By default it will release to a folder in the root called Square9 with the name: ####_FileUploadTest.pdf where #### is the GlobalCapture Process ID. If no folder exists in the root with this name it will be created.
You can modify where in the Document Library the document is release and the name by modifying the Request for this node.
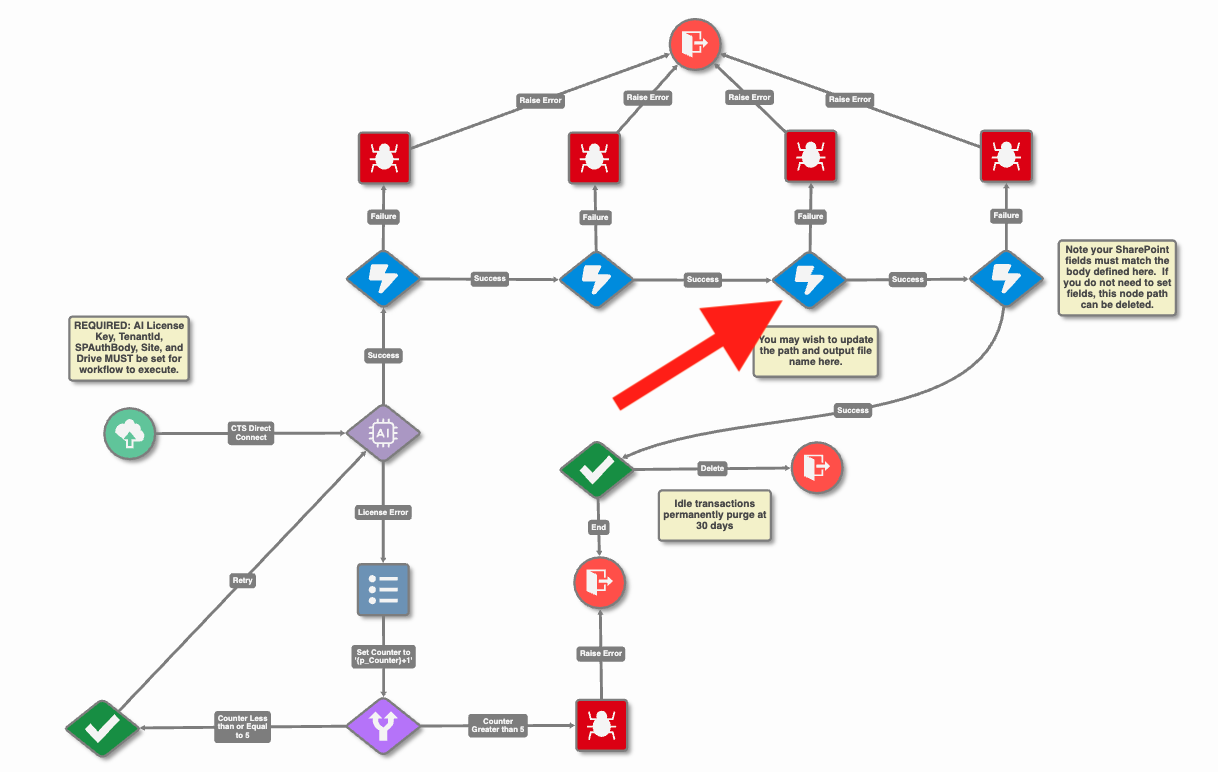
Default Setting:
sites/{p_SiteId}/drives/{p_DriveId}/root:/Square9/{PROCESSID}_FileUploadTest.pdf:/content
To change the folder in the selected Document Library, modify Square9 to represnt the new folder location.
To modify the file name, change the {PROCESSID}_FileUploadTest.pdf.
It is important you don’t many any other changes to this request.
Ex. If I wanted to release to the Accounts Payable/Past Due folder in my SharePoint Document Library and use the name: ProcessID_Vendor Name.pdf, my Request would be:
sites/{p_SiteId}/drives/{p_DriveId}/root:/Accounts Payable/Past Due/{PROCESSID}_{p_Vendor Name}.pdf:/content